January 22, 2019
SMOKED MACKEREL PATÉ
This has to be one of the least inspiring photos I have ever posted in the blog but don’t let it put you off……..
At a couple of events in France last summer bowls of this stuff appeared on the table with the other nibbles. When I said how delicious it was the ladies who produced it told me how easy it was to make. I next encountered it when we went to a restaurant for a pre-Christmas meal with family where it was served as a starter and I thought it was time to have a go myself.
Dead easy it really is and tasty in measures well beyond the level of competence required to make it.
The first time I made it I blitzed it in my food processor and it turned out really smooth. The next time roughed up the fish with a fork then processed it only a little so that it turned out more rustic in appearance. I preferred it this way, although it did leave the odd tiny bone.
You can make it look much fancier by adding herbs or salad. I liked serving mine in my ancient lidded dish made by Pearsons of Chesterfield, the maker of rustic cookware now sadly long gone. I could just pop on the lid and leave it in the fridge where it kept well for several days allowing us to dig in as and when we wanted.
Ingredients
A twin pack of smoked mackerel fillets
1 tblsp crème fraîche
1 tblsp full fat cream cheese
1 tsp French mustard
1 tsp horseradish sauce or creamed horseradish
a few drops of lemon juice
salt and pepper to taste
Method
Remove the skin from the fish and place in a small bowl. Mash it with a fork to break it up then transfer to the bowl of a food processor. Blitz briefly for rustic looking paté or for longer for a smoother paté.
Stir in the other ingredients and mix until well combined.
Serve chilled to spread on toast, bread or crackers, or as a filling for a jacket potato. You can dress it up with herbs or by serving with salad and a lemon wedge on the side.
Serves 6 with an apéro, 4 as a starter, just 1 or 2 as a jacket potato filling.
January 20, 2019
APPLE AND BANANA CAKE
It was delicious! It had a nice, moist, even crumb that cut well without crumbling too much. The flavour was lovely and it kept well in an airtight tin.
In fact it was so good that I have since made several variations of the recipe:
January 15, 2019
APPLE, ORANGE AND CRANBERRY CAKE and home made cake release paste
This cake came about because when I was rummaging in the fridge veg drawer for a carrot or two I spotted the box of fresh cranberries I had bought for Christmas. I had been full of good intentions of making my own cranberry sauce to go with the turkey but then I completely forgot and we had a jar of sauce instead.
Wondering what I could do with them two weeks after the event, I had an idea. There were also some apples and a large orange looking unloved in the fruit bowl so I decided to adapt the Mary Berry recipe for the apple and apricot cake and see how it turned out. You can see that recipe here. I substituted cranberries for the apricots and orange zest for the almond essence. I used a ring tin instead of an ordinary round tin.
It turned out beautifully, in two ways. I have to say that this is probably the nicest cake I have made in a long time. The cranberries gave little bursts of sharpness in every mouthful, in contrast with the sweetness of the apples and the warmth of the orange.
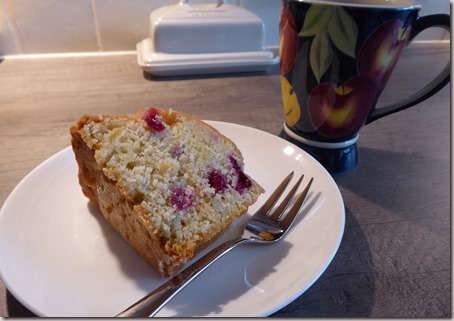
Quite delicious and one to add to my list of cakes that I shall definitely make again.
The other way it turned out really well was in using a home made cake release paste.
I do find preparing Bundt tins a real pain. Getting melted butter into all those nooks and crannies, then dusting with flour, is a messy job and not easy to get right. Turning them out is always stressful and I have had to disguise many a damaged cake with crafty icing in the past. Equally I have had success with bought cake release in spray or liquid form but have been somewhat unsure about some of the ingredients and frankly some of them smell slightly unpleasant.
This stuff is a revelation, easy to make from storecupboard ingredients. I put equal quantities of each component in my mini chopper and blitzed them to a paste.
You can see numerous recipes for it on the internet and most suggest it can be stored in a jar at room temperature. That’s the only bit I’m unsure about. It’s good that it’s completely natural with no added chemicals, but logic tells me I should keep it in the fridge. But then it might be too stiff to use next time I need it. So it resides in my kitchen cupboard for now and if it turns into something green and triffid like I’ll report back!
The cake had a nice, golden and slightly crisp outer crust which I attributed to the cake release. It was not at all unpleasant, in fact it gave the cake a nice finish. It will be interesting to see if the same kind of crust occurs every time I use the paste.
Update - on reading about the cake release in other places I decided to keep it in the fridge after all. I'm pleased to say that it is still easy to brush into the tin straight from the fridge.
Apple, orange and cranberry cake
Ingredients
250g self raising flour
1 tsp baking powder
225g caster sugar
2 eggsfinely grated zest of 1 orange
150g butter, melted and cooled
225g apples, peeled*
120g fresh cranberries (I expect frozen ones would work too)
Method
Preheat the oven to 160 C / 140 Fan / gas mk 3. Grease a Bundt tin or ring tin with home made cake release (see below), or butter and line the base of a 20cm round loose bottomed tin.
Put all the ingredients except for the fruit into a large bowl and mix well together to combine then beat for one minute. Add the cranberries, slice the apples into the bowl and gently mix them in.
Spoon into the tin and level the top. Bake for 1-1½ hours until done. Cool in the tin for ten minutes before turning out by placing a cooling rack on top and flipping it over.
Serve warm or at room temperature.
*The recipe says cooking apples but I used dessert apples and they were fine.
Cuts into 10-12 slices.
Cake release
Measure 50g each of plain flour, vegetable oil and white cooking fat (I used Trex) into the bowl of a food processor or mini chopper. Process until smooth. Store unused paste in a jar in the fridge. Bring out of the fridge for a few minutes before using.
January 11, 2019
LIGHT FRUIT CAKE or a tale of two fruit cakes #1.
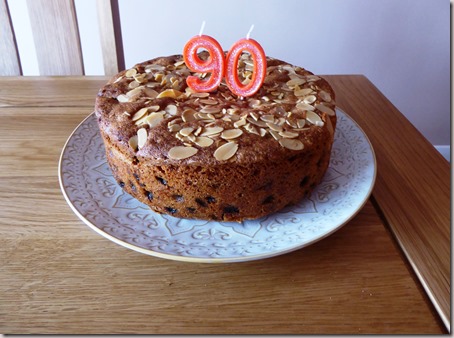
The first fruit cake I made in 2018 was for my dad’s 90th birthday last November. He wanted a small family party and when I asked him what sort of cake he would like he said a fruit cake. This rather took me by surprise.
All the years since Mum died I have been making him chocolate cakes, ginger cakes and many others, but never a fruit cake. Maybe he was hankering after one for ages but was too polite to say!
I rarely make a fruit cake so I looked in my cook books and on the net for recipes and settled on one by Mary Berry called “Easy Fruit Cake”.
It comes from one of her cookery books that I don’t actually own called “Mary Berry’s Cookery Course” and you can see it on the internet here.
It really was delicious. It had a lovely almondy flavour and nice light texture with the fruit evenly distributed. (I have noticed that almond essence appears regularly in Mary’s recipes.) It also kept well in an airtight tin. I decided this would be my go-to fruit cake recipe for whenever I wanted to make another one – then along came fruit cake #2, Sandringham cake, as per a previous post……
Ingredients
225g softened butter or baking spread (I used Flora Buttery)
225g caster sugar
4 eggs
225g self raising flour
100g ground almonds
½ tsp almond essence
450g mixed dried fruit
25g flaked almonds to decorate
Method
Preheat the oven to 160C / 140Fan / gas mk 3. Butter a deep 20cm springform cake tin and line the base and sides.
Cream the butter or spread and sugar with an electric whisk until light and fluffy. Beat in the eggs one at a time.
Fold in the flour, almonds, and extract and mix thoroughly. Add the fruit and mix well.
Spoon the mixture into the prepared tin and level the top. Scatter the flaked almonds evenly over the top.
Bake for 1½ – 2 hours until done. (Mine took 1¾ hours.) Cool in the tin.
Cuts into 12 slices.
January 5, 2019
STICKY PEAR AND GINGER UPSIDE DOWN CAKE
For New Year we decided to stay in and cook something special. Something rich, warming and memorable for the occasion. Never mind the whole week of indulgence that went before – we wanted something that would see the old year out with a bang!
This pudding definitely hit the spot!
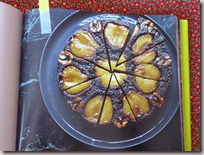
It’s always a comfort when the end result looks like the picture in the book! This is a recipe I have had my eye on for a while, waiting for the right occasion, and comes from the book “Annie Bell’s Baking Bible”. You can also see it on the internet here.
It’s proper name is upside down ginger cake but it was very, very sticky, much like a sticky toffee pudding, with a hefty dose of spices and black treacle.
It was not for the faint hearted, strong on flavour and very sweet. Perfect with a little cream poured over and a glass of dessert wine alongside.
Ingredients
For the topping
100g light soft brown sugar
50g unsalted butter
1 400g tin of pear halves
a few walnut halves
For the cake
125g plain flour
½ tsp bicarb
1 tsp ground cinnamon
1 tsp ground ginger
¼ tsp ground nutmeg
a pinch of ground cloves
¼ tsp salt
1 egg
125g light soft brown sugar
90g black treacle
125ml sour milk* (see method)
a few drops of lemon juice
50g unsalted butter, melted
Method
Set the oven to 180C / 160 fan. Butter and line the base of a 20cm round, 7cm deep tin with a removable base.
To make the topping, gently melt the butter in a small pan, add the brown sugar and stir for 1-2 minutes. Spoon into the bottom of the cake tin and spread out with the back of the spoon. Drain the pear halves and arrange, cut side down, on top of the sugar, adding the walnuts, flat side down, between the pears.
To make the cake, sift the flour and spices into a bowl, stir in the salt.
Measure the milk into a jug and *add the lemon juice to sour it. Put the egg, sugar, treacle and melted butter into a large bowl, add the milk and blend together. Fold in the flour and spice mixture and beat for 1 minute.
Pour the mixture gently over the fruit in the tin and bake for 40-50 minutes or until done.
Remove from the oven, run a knife around the edge and leave to cool in the tin for 10 minutes. Release and remove the collar of the tin, place a cake stand or plate on top of the cake and invert. Remove the base and the baking paper.
Serve warm or at room temperature.
January 3, 2019
SHARON’S HOTPOT
I have mentioned several times that the charity shops local to us are a rich source of cheap cook books. For one or two pounds each I have picked up copies of books I would never have paid full price for and some of them are real gems.
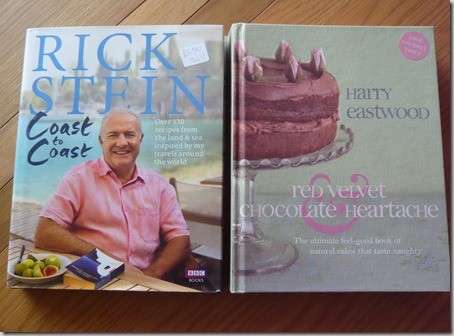
The above Rick Stein book that I acquired last winter was probably brand new at just £1.50. The Harry Eastwood one had a slightly scuffed cover but the inside was pristine.
These two were £1 each and in perfect condition.
The slow cooker book, although appearing to be completely unused, delivered an added bonus – a piece of paper that fell out of it that appeared to be a list of ingredients for something called “Sharon’s hotpot”. I had absolutely no idea who Sharon was but, intrigued, I felt compelled to try it!
As the list was not really a recipe and with no quantities I had to guess how to proceed. The ingredients were very similar to the everyday beef stew I normally make in my slow cooker although with slight differences - I hadn’t owned a jar of garlic salt for years. I found myself wondering how Sharon had come to give the list to someone who then gave it away in a cook book that she seems to have never used. Indeed, who was Sharon?……
Anyway, we had ours with a jacket potato and it was delicious! Congratulations to Sharon, who ever she is!
This was the first time that a secondhand book delivered a bonus recipe. You can read about the second time here.
Ingredients
oil for frying
500g stewing beef, cubed
1 onion, peeled and sliced
500ml beef stock (made with an Oxo cube)
1 large tsp English mustard
a sprinkle of garlic salt
a dash of Worcester sauce
2 sprigs rosemary
3 carrots, peeled and thickly sliced
a glass of red wine
4 heaped tsp plain flour
Method
Heat the oil in a large frying pan and brown the beef. Remove to the slow cooker. Add the onion to the pan and brown slightly. Remove and add to the slow cooker.
Add all the remaining ingredients to the slow cooker, sprinkling the flour over the top last of all. Give it all a good stir so that all the ingredients are well mixed.
Cook on high power for 6-8 hours, or until done, according to how your particular slow cooker works.
Serves 4.
January 2, 2019
PARSNIP AND GINGER SOUP
For at least the first forty years of my life I never made soup, not a single bowl of it. I always thought that it was somehow complicated and mysterious and you would need lots of special pans and equipment. It was only when I first read the recipe for vegetable soup in Nigella Lawson’s book “How to Eat” that I realised that in fact it was outrageously simple and I had been missing out all that time.
The only special equipment you need is a large saucepan or stockpot and a stick blender. A food processor is also handy for chopping large quantities of vegetables but in reality a knife and board will get them chopped or sliced well enough as they cook down just as quickly. Most recipes suggest transferring the cooked soup to a jug style of blender or food processor but I never do and always use my trusty old stick blender straight in the pan.
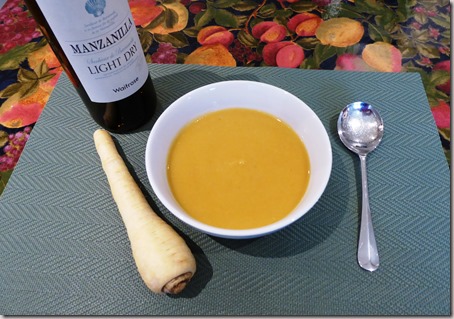
I was checking the contents of my veg drawer and realised that I had been over enthusiastic when buying parsnips for Christmas and I still had some that were more than ready for using up. A quick browse of my cook books and five minutes later I was slicing them for parsnip and ginger soup. Thirty minutes after that we were tucking in. The recipe required fresh ginger which I did have but it was in the freezer. That’s when I discovered that you can peel and slice it straight from the freezer. I also added a few small pieces of butternut squash that were hanging around, hence the slightly deeper colour than if I had only used parsnips.
One of the things I learned from Nigella’s recipe is that many soups benefit from a good splash of dry sherry before serving. Consequently I usually add it to all my soups, referring to it as “the mystery ingredient”!
This soup was easy and quick to make, absolutely delicious and wonderfully warming for a cold winter’s day.
For more ideas on making soup, see Dom’s post here.
Ingredients
25g or a large knob of butter
30g of fresh or frozen ginger, peeled and sliced
1 small red onion, peeled and chopped
500g parsnips, peeled and sliced
1 litre of vegetable stock (I made mine using Marigold powder)
A good splash (or a small glass) of dry sherry.
Method
Melt the butter in a large saucepan or stock pot. Add the ginger and cook for a couple of minutes, stirring.
Add the onion and parsnips to the pan, season with salt and pepper and cook for another couple of minutes.
Add the stock and bring to the boil. Simmer for about 15 minutes by which time the vegetables should be soft and tender.
Remove from the heat and process with a stick blender until as smooth or lumpy as you like. Stir in a good splash of dry sherry before serving. Add a dollop of crème fraîche or swirl of cream to each serving if you like.
Serves 4.