This is what I posted about in 2022.
CAKES AND BAKES: 12
SOUPS: 9
SAVOURY DISHES: 5
DESSERTS: 2
MISCELLANEOUS: 1
A VERY HEALTHY AND HAPPY NEW YEAR TO YOU ALL !!
This is what I posted about in 2022.
CAKES AND BAKES: 12
SOUPS: 9
SAVOURY DISHES: 5
DESSERTS: 2
MISCELLANEOUS: 1
A VERY HEALTHY AND HAPPY NEW YEAR TO YOU ALL !!

I have mentioned before that there might be no cake posts for a while as I am on a mission to lose some weight. The soup maker has really come into its own in this quest and this recipe is adapted from a cook book of recipes for slimmers. The diet is going well, I have lost 15lb (7kg) so far and I can honestly say I haven’t felt hungry once. I have however hankered after a decent sausage, mash and onion gravy, more than once, not to mention a nice thick wedge of cake, but not so much that I would be prepared to jeopardise the progress so far! And I’m really enjoying trying new recipes.
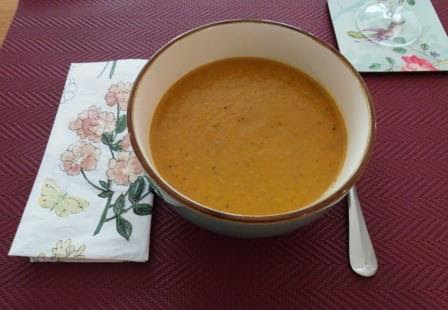
This one uses a jar of roasted red peppers and it's important to buy the ones preserved in water, not oil, for the purpose of a diet. The difference is significant but only if you're on a low calorie diet.
The recipe said to use red peppers but I used a jar of mixed ones, as that's what I had in stock. It was absolutely delicious and a recipe I will make over and over again.
Ingredients
2x 400g cans butter beans, drained and rinsed
1 460g jar roasted red peppers in brine, drained
2 celery sticks, roughly chopped
2 cloves of garlic, thinly sliced
1 tblsp sweet smoked paprika
1 garlic and thyme stockpot (or use home made stock - see here - and some fresh thyme)
A few extra thyme leaves, or chopped parsley, and some yoghurt or crème fraîche for serving
Method
Place all the ingredients into the machine, adding enough cold water to fill to the top line. Cook on the smooth setting. Add a swirl of yoghurt or crème fraîche and the remaining thyme leaves or parsley before serving.
Makes four generous servings.


This recipe is adapted from one of those recipe cards I picked up at Waitrose some time ago. The original uses chicken legs but we had some skinless chicken breasts in the fridge already so I used them instead.
Waitrose recipes tend not to disappear or be hijacked so to see it on their website click here.
I cooked it in a favourite cast iron casserole dish that was given to me by my Aunty Vera donkeys years ago. Probably in the 1980's when cast iron cookware was all the rage - if the cookery magazines were anything to go by in those days. I suspect that my aunt bought one but was not enamoured with it, preferring her Pyrex instead! I like it because it's actually quite small and ideal for making something for just the two of us.
Of course if you don't have a cast iron dish you can do the first part of the recipe in a frying pan on the hob and finish it off in an ovenproof dish in the oven.

The recipe was easy to make and with the grapes and wine had a slightly "weekend" appeal, yet was quick enough for a midweek meal. The chicken was moist and delicious. We had ours with the usual selection of weekday veg and mash.
Ingredients
2 chicken breasts
a splash of oil
1 large or 2 small leeks, washed and sliced, not too thickly, not too thinly
a large handful of green grapes, washed and halved
2 small sprigs fresh rosemary
1 small glass of white wine (or use chicken stock)
a squeeze of lemon juice
Method
Preheat the oven to 200°C / 180° fan / gas mk 6.
Using a cast iron casserole dish* on the hob, heat the oil then fry the chicken breasts, skin side down for 10 minutes until golden brown. Turn the chicken and cook on the other side for 2-3 minutes. Remove from the dish and set aside.
Add the leeks to the dish with a pinch of salt and fry for 3-4 minutes until beginning to soften.
Stir in the grapes, rosemary, wine and lemon juice.
Remove from the hob, place the chicken breasts on top and roast, uncovered, in the oven for about 25 minutes until the chicken is cooked through.
Serve with mashed or baked potatoes and veg.
Serves 2.
*If you don't have a cast iron casserole or one that can be used on the hob, do the frying in a frying pan then transfer the leek mixture to an ovenproof dish of some kind, maybe ceramic or enamel. Place the chicken on top as above and roast as above.

Curiously, exactly the same thing happened to our kettle in France last month; the lid broke on that one too. How bizarre to have both give up the ghost at the same time, for the same reason! As it happens both kettles were at least ten years old so didn’t owe us anything.
In France we got a new decent one from a small selection at our nearest supermarket. In the UK the choice in our local Tesco, usually quite extensive, was poor. In fact since their recent refurb they have changed the way they display their small electricals and it’s not good. Previously they had a top shelf with each item on display so you could pick it up and look at it, with sealed boxes of them stashed on shelves underneath for you to buy your selection. Now, nothing is on display. There are simply boxes of things piled on the shelves and none that you can look at, only the picture on the box to go on. Hence there are damaged boxes of the things where people have ripped them open so they can see what they actually look like. We looked at a couple that had already been opened and gave up, eventually ordering one from Amazon.

However, I suggested that it might be worth looking at the sale shelf, where they dump items for clearance. They had no kettles but they did have a wok, reduced to less than £10. I have never owned a wok in my life and have never tried making stir fries at home but my OH reckons he has. He mentioned it in the same wistful way that he refers to all his awful 1970’s clothes that filled his wardrobe when we met and that were expunged when we got together and combined our two households in the 90’s. The implication being that I took it to the charity shop along with his flares and skinny rib jumpers. I can honestly say I don’t remember doing that.
Anyway, I am on a mission to lose a bit of weight* and thought a wok might help, stir fries being generally lower in calories than say sausages and chips for a midweek dinner, so we bought one. We picked up a bag of stir fry veg, some noodles and chicken fillets, and that evening Nick made a delicious chicken stir fry, making a sauce with garlic, fresh ginger and soy sauce.
There was a good portion leftover and about a third of the pack of veg so I turned it into soup. It was also delicious!

The soup maker makes four good portions and as there are only two of us I store the remaining half in the fridge. Having experimented with various ways of storing it I have finally settled on using the ancient Tupperware jug that belonged to my mum. It was found at the back of the cupboard when we cleared Dad's flat after he died and I'm pretty sure neither of them ever used it. It was no doubt a rogue purchase from one of the Tupperware parties that Aunty Vera used to drag Mum to in the 1970's!
*There will be no cake posts for a while, sadly. If I make it I will eat it and we have even decided not to make a Christmas cake this year, which is the first time ever in my whole life that there will not be a home made Christmas cake in the house.

Ingredients
one portion of leftover chicken stir fry, including the noodles
the remaining unused stir fry veg in the pack
three small potatoes
1 carrot
1 leek
1 stick of celery
Method
Add the stir fried chicken and veg to the machine and prepare enough veg to fill to the bottom line.
Add enough water to fill to the top line and cook on smooth setting.
Makes four generous portions.


Our new velux windows are fitted here in France and we're now on with decorating the master bedroom. It's a big job because it’s a big room. However the timing is right as the very day after the last window was finished off it started raining, so being confined to indoors seems like less of a sacrifice. On top of that we both have colds. As per usual Nick's has been mild but mine is what my mum would have called "a stinker". Neither of us has had a cold for three years so we're not going out and I had quite forgotten how much of a hinderance they can be.
On top of that we have another fuel crisis on this side of the Channel. The tanker drivers have "downed tools" (do tanker drivers have tools?) and supplies are patchy. I knew nothing about it until my Nick's sister mentioned it after seeing it on the BBC news. Filling stations are all a good distance apart in rural France and it's risky to head off in one direction only to find no petrol to be had. With our petrol tank already very low we managed to fill up but are conserving our supply for essential use. Going to buy more paint might be the next trip.
Consequently we haven’t done any food shopping for a while and are eating what we have in. The carrots looked a bit tired and there was one leek but plenty of potatoes and a huge bowlful of apples. A very tasty soup they made!
THE UGLY BAG - home made stock (broth in the USA)

For the stock I used home made. Never in a million years did I think I would turn into the kind of person that made her own stock but then I read somewhere about something called an "ugly bag". (At the risk of going against my own most recent rule I'll give the link for it here.) The idea is simple in that every time you prepare a meal you put all the carrot tops, onion trimmings, celery leaves, chicken bones, tomato ends etc into a large bag in the freezer.
When the bag is full you tip the contents into a large pan, cover with water, add any fresh herbs you have, bring to the boil and simmer for an hour, no longer. Strain through a colander into another large container and discard the veg. Fill sturdy freezer bags with quantities suitable for your needs and pop in the freezer. I even reuse the same ugly bag! Clever or what!

Ingredients
5 medium carrots
1 large leek
4 smallish potatoes
1 eating apple
350 ml home made stock (or use a stock pot/cube) - save your trimmings for your ugly bag!
nutmeg
dry sherry
salt and pepper
Method
Prepare enough veg to fill the soup maker to the lower line. Add the stock and enough water to the top line.
Cook on smooth.
When it's done, add a little grated nutmeg, fresh if possible but otherwise from a jar. Add a good splash of sherry, season to taste and stir. Serve with a swirl of cream if you have any.
Makes 4 generous portions.


In accordance with my recent lightbulb moment regarding the conundrum of giving away cakes made to an untried recipe I made a couple of muffins with a spoonful of the mixture. They tasted good, a nice flavour of lime with a hint of coconut, just as I would expect, moist and with a nice even crumb, which confirmed my conclusion that the recipe on the internet must be wrong and the sugar had been omitted. The lime flavoured icing was delicious.
It wasn't until I looked at the recipe again for writing up the blog post that I realised my mistake........I should have used condensed milk, not evaporated milk, condensed milk being an already sweetened product. No wonder the recipe contained no actual sugar! I can't believe I did that but brain fog has been a feature of my life so far this year!
In the words of René Artois from "Allo, allo": "you stoopid wooman!!"
The cake sold well, every slice devoured, so I leave it up to you whether you make it with evaporated milk or condensed milk. I will add this cake to my tweaking list and try the condensed product myself next time!
(You can buy tinned condensed milk everywhere in France and I think also evaporated milk, sold as an addition for coffee, although I haven't tried it. I brought mine from the UK in the pre-Brexit days when that was allowed.)
A word here about zesters.

Ingredients
For the cake
175g softened butter or baking spread
3 large eggs, beaten
55g desiccated coconut
zest of 2 limes
175g self raising flour
1 tsp baking powder
250g evaporated milk*
100g caster sugar*
For the icing and decoration
100g icing sugar, sifted
juice of 2 limes
as sprinkling of desiccated coconut
strands of lime zest (optional)**
Method
Preheat the oven to 170°C / 150° fan / gas mk 3. Butter a 900g / 2lb loaf tin and line the base with a strip of baking paper, or use a paper liner.
Put all the cake ingredients into a large bowl and using a hand held electric whisk beat together until pale and creamy.
Transfer the mixture to the prepared tin, level the top and bake for 50-60 minutes. If the top is looking brown before the middle is cooked, cover with a piece of baking paper or foil.
Cool in the tin for 10 minutes then remove to a wire rack to cool completely.
To make the icing, mix the icing sugar with enough of the lime juice to make a thick pouring consistency and drizzle imaginatively over the cake.
Sprinkle coconut over the cake for decoration. If using an extra lime, scatter strips of lime zest over the cake.
Cuts into 10-12 slices.
*instead of evaporated milk and sugar use 250g condensed milk
**if using the extra lime to create the topping it occurred to me that you could drizzle the juice from it over the cake before icing it.

There has been more baking than you would expect going on chez nous lately. We are up to our eyes in dust and scaffolding here in France, with major work on the house going on. Roof repairs and five new velux windows; four replacements and one brand new one (in the bathroom - how we put up with no window in the bathroom for eight years is now baffling). Followed by decorating in the master bedroom and a new carpet.

The whole house is affected. The carpet extends into the walk in wardrobe so that has had to be emptied. The stuff from in there has more or less filled the living room. The furniture from the bedroom has filled everywhere else. Oh the joys of home improvements!
Before the work started I volunteered to make a couple of cakes for the Tea Garden at a local event. The French love British cakes, it seems. French patisserie is a thing of wonder but British home baking always sells well around here.

All of my cookbooks are safely under dust sheets so I resorted to the internet for ideas. I was going to make Phil's apple cake recipe (see here) as I've been hankering after making it ever since he posted it. But then I spotted one by Miranda Gore Browne, a former GBBO contestant from a few years ago, called caramel apple cake, and remembered my golden rule of bake sales. That the cakes slathered in the most icing sell the best. Sad but true (in my experience - see here). I'll risk giving the link for the recipe here as the recipes on the Sainsbury's Magazine website do tend to not disappear or turn into something completely different.
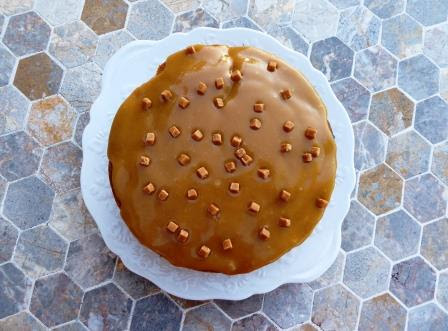
It took longer to clean down the kitchen sufficiently than to make the cake. I didn't make the apple crisps to decorate the cake as per Miranda's original recipe because a) for me they were possibly a step too far and b) the timing was wrong. I was making the cake the night before the event and it occurred to me that the crisps might not be quite so crisp by the time the cake was on sale. I scattered a few fudge squares over the cake instead.
However, they looked so pretty in the picture that the next time I make this cake I will definitely give them a try.
I also had a lightbulb moment regarding the conundrum of making cakes to recipes I had not tried before that were destined to be given away. I used a spoonful of the mixture to make a separate muffin. That way I could taste the cake myself and make sure I was not presenting something inedible. Why did I never think of that before?
Consequently I can confirm that the cake is delightful and the icing is fabulous - very, very sweet but delicious, so I shall definitely be making this recipe again. Like many apple cakes that contain chunks or slices of apple, the cake was quite fragile. Even when completely cold the top layer developed a crack when I lifted it on top of the bottom layer, as you can see in the picture. Luckily the icing disguised it pretty well! Apple cakes that contain grated apple tend to hold together much better - or maybe it's due to the variety of apple. The recipe stated Bramley apples but I have never found them for sale in France so I used Reinette apples instead.

At 10.00 when I delivered my cakes the Tea Garden was a sea of cake and the first few customers were trickling in. When I returned at 5.00pm to collect my plates it was still in full swing but the only cakes left were a few slices of fruit cake. Amazing. I was dead chuffed when my friend who was helping on the counter said that the first slices of cake sold were of my caramel apple cake!
~~~~~~~~~~~~~~~~~~


I made this cake again the next year. This time, instead of making the caramel glaze for the top I made 1½ times the quantity of buttercream filling and topped it with that instead. It still looked fabulous and I didn't get to taste a slice! By the time I arrived at 2pm to do an afternoon shift on the cake stall it had long since sold out.
(Having made the cake a few more times I have come to the conclusion that just one quantity of the buttercream is really sufficient to fill and ice the cake.)
(The photos give it a darker appearance because at 8.00 in the morning the light was so dull when I finished the cake and delivered it in gloomy mist to the event!)
Ingredients
For the cake
500g cooking apples
zest and juice of 1 lemon
225g unsalted butter, softened, or spreadable butter
225g caster sugar
3 large eggs, beaten
200g self raising flour
2 tsp baking powder
50g ground almonds
1 tsp mixed spice
For the buttercream filling
100g unsalted butter, softened, or spreadable butter
200g icing sugar, sifted
2 tblsp caramel, either from a tin of Carnation caramel or a jar of Bon Maman confiture de lait
1 tblsp semi skimmed milk
For the caramel icing
75g unsalted butter
75g icing sugar, sifted
1 tblsp caramel (see above)
For decoration
a handful of fudge pieces (optional)
Method
Preheat the oven to 180°C / 160° fan / gas mk 4. Butter two 20cm sandwich tins and line the bases with baking paper.
Peel the apples and chop into 2cm dice. Toss the pieces in the lemon juice to prevent browning and set aside.
In a large bowl, beat together the butter, sugar and lemon zest, either by hand or using a hand held mixer. Beat in the eggs one at a time. Fold in the flour, baking powder, ground almonds and spice. Tip in the diced apples, draining off any excess lemon juice first and mix well to evenly distribute through the mixture.
Divide the mixture equally between the tins and bake for 25-30 minutes. Leave to cool in the tins for 10 minutes then transfer to a wire rack to cool completely. Be careful as they are quite fragile.
While the cakes are in the oven make the caramel buttercream by beating all the ingredients together until smooth and well combined.
When the cakes are out of the oven make the caramel icing by putting all the ingredients into a medium saucepan. Heat gently until melted together and smooth. Set aside to cool for 10 minutes.
When the cakes are cold, place one onto a serving plate or cake stand and spread the top liberally with the buttercream.
Place the second cake on top and pour the still warm caramel icing over, allowing it to dribble down the sides. Decorate with the fudge pieces (or any other decoration of your choice).
Cuts into 10-12 slices.
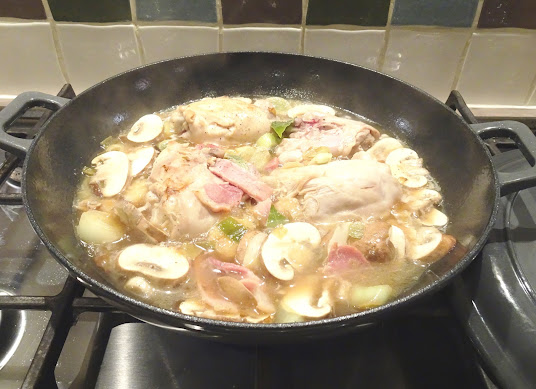
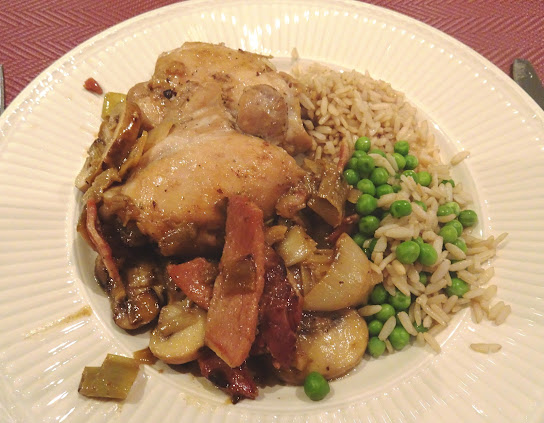
This white wine version is loosely based on a Nigella Lawson recipe which you will find in her book Nigella Express. You can also find it here.
Ingredients
1 pack of lardons, about 150g
1 leek, finely sliced
4 small skinless chicken thighs (or a pack of chicken mini fillets, about 350g)
a handful (half a punnet) of mushrooms, thinly sliced
2 bay leaves
1 tblsp garlic oil for frying
half a bottle of riesling wine
a tblsp cream or crème fraîche
a tsp cornflour (optional)
Method
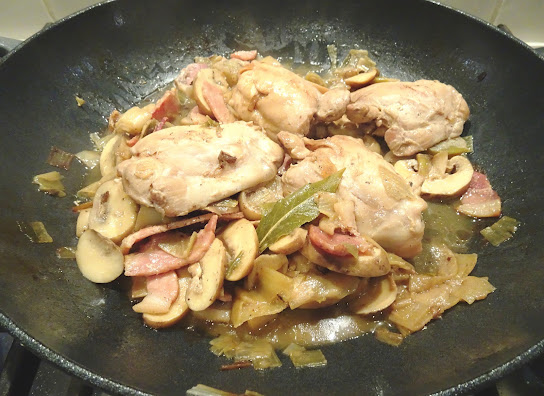
Heat the oil in a sauté or frying pan that has a lid. Fry the lardons then add the leeks and cook until softened.
Add the chicken pieces, bay leaves, mushrooms and wine, season with salt and pepper. Bring to the boil, reduce to a simmer and cook with the lid on for 30-40 minutes or until the chicken is cooked through. Stir in the cream and heat for another minute or two.
Thicken the sauce with a little cornflour mixed with water if you prefer it less watery. Cook for 2 minutes more.
Remove the bay leaves before serving with pasta, rice or potatoes. Sprinkle with chopped fresh parsley or dill if you like. Enjoy the rest of the bottle of riesling with the meal!
Serves 2-4, depending on the amount of chicken.
This has to be one of the best soups I have ever made using leftovers in the soup maker.

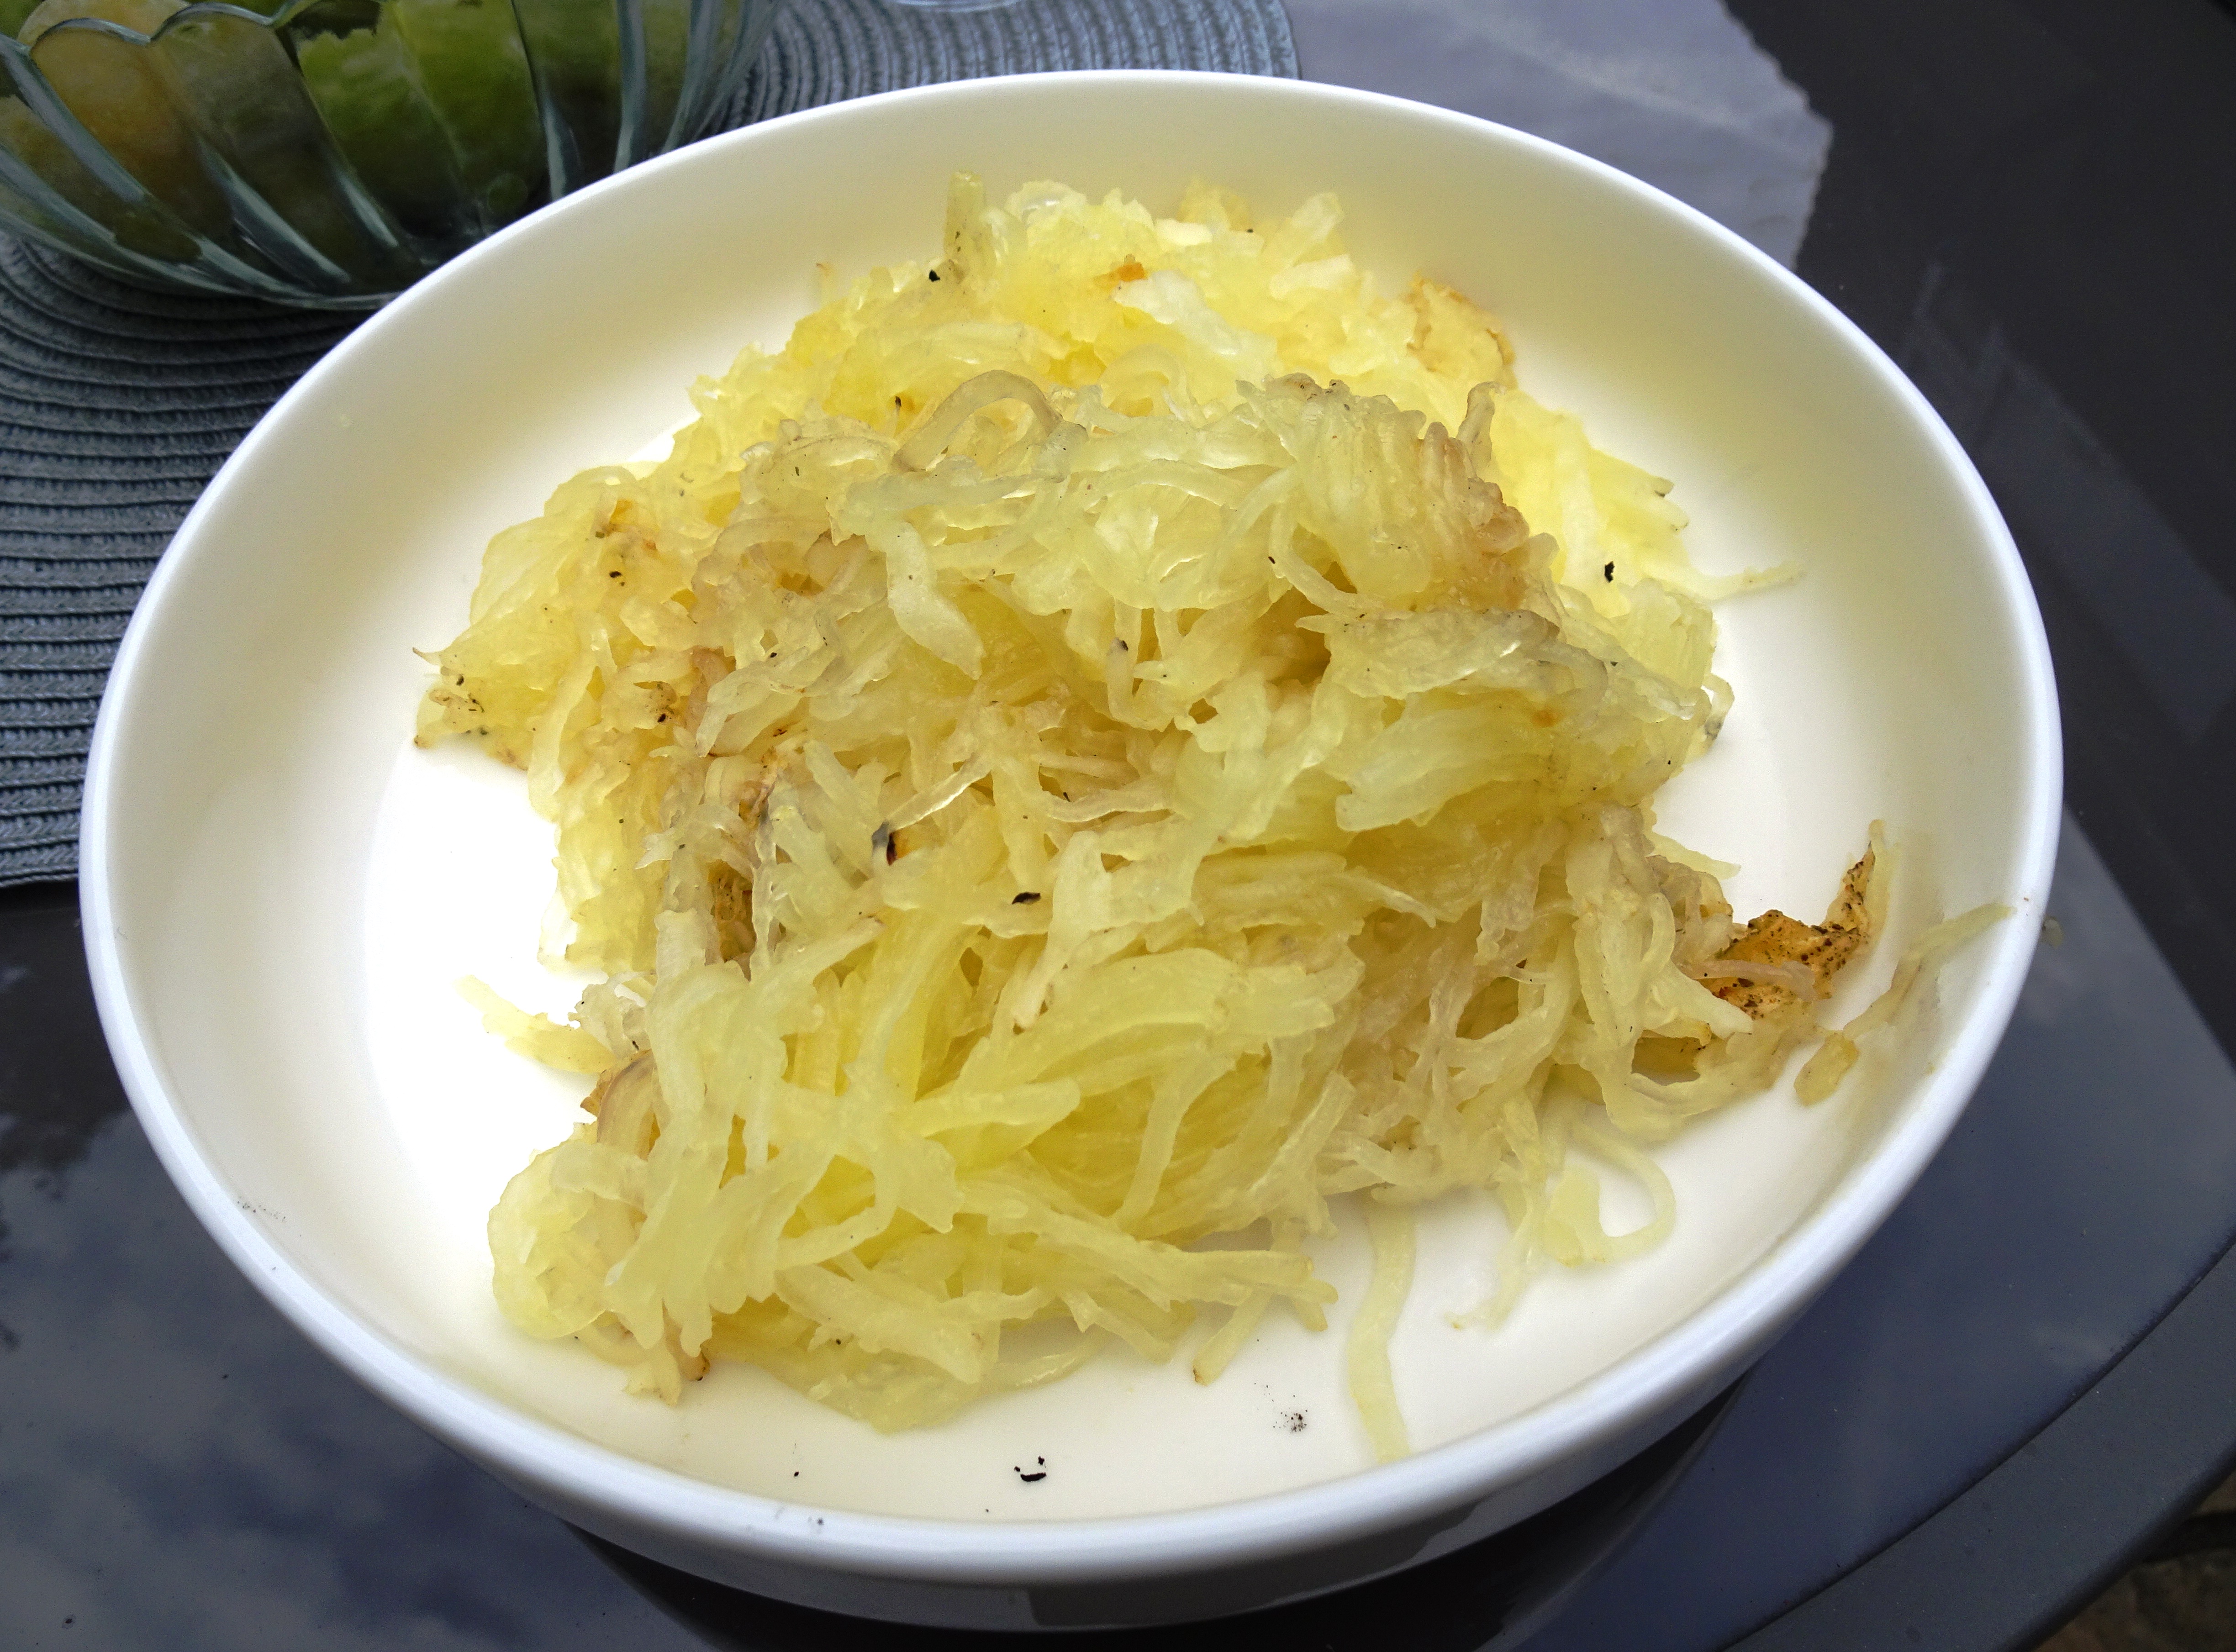
After our bbq we had half a roasted spaghetti squash left. You can read how I cooked it here.


Delicious!
Ingredients
About a pint of leftover ratatouille
Half a roasted spaghetti squash, flesh scraped into the machine (skin discarded)
2 small leftover bbq'd potatoes
3 medium carrots, peeled and thickly sliced
1 veg stock pot
Enough veg to fill to the bottom line
Enough water to fill to the top line
Cook on "smooth" setting.
Makes 4 generous portions.


I looked through my collection of cookbooks and on t'internet for some ideas on what to do with them.
I settled on a recipe for "blackberry and apple torte" by Jo Wheatley (one of the early "bake off" winners) which I thought would adapt nicely. It’s a recipe in her blog which is an adaptation of one from her book called "A passion for baking" where it was originally a recipe for a raspberry torte. I do have the recipe book but it's back in the UK so I couldn’t do what I would normally do which is to go and look it up! The raspberry version of the recipe can be found, if you Google it, on the Daily Mail website. I hope you're keeping up!

My own adaptation was to use the small figs instead of the blackberries. However, with both recipes open on my iPad I spotted a discrepancy; in one it suggested an oven temperature of 170° fan and in the other 160° fan. Hmmmm……

I decided to split the difference and go with 165° and it was done in 40 minutes. Next time I would check after thirty because it was if anything a tiny tad over baked.
A puzzle sprang to mind as I was looking at these recipes and that is - what makes a cake a torte rather than a cake? I Googled it and there were so many different explanations that I decided it's probably entirely down to the whim of the recipe writer. For myself I thought a torte would be more of a dessert cake than an afternoon tea kind of cake so that’s what I've stuck with here! Any other suggestions on a postcard, please!

It was a very nice cake. Torte. Whatever. I like recipes that can be adapted to use whatever fruit you have in and this one is good for that.
Ingredients
150g each of:
self raising flour,
softened butter or baking spread,
caster sugar,
ground almonds
1 tsp ground cinnamon
2 eggs, beaten
1 eating apple, peeled and cubed, made up to 150g fruit with small figs, quartered.
2 tblsp apricot jam to glaze
Method
Preheat the oven to 165° fan. Butter and line the base of a 23cm round springform tin.
In a large bowl, beat together the flour, sugar, butter, eggs and cinnamon until smooth. Stir the cubes of apple through the mixture.
Spoon the mixture into the tin, level the top and tap on the worktop a few times to dispel any trapped air. Arrange the quartered figs on top and push slightly into the mixture.
Bake for 30-40 minutes until done. Cool in the tin for five minutes before turning out onto a wire rack to finish cooling.
Put the apricot jam into a small saucepan and heat gently to melt it. Brush over the finished cake. (Alternatively, just dust with icing sugar.)
Serve with cream, ice cream or crème anglais. Also delicious just as it is.
Cuts into 8-10 slices.
~~~~~~~~~~~~~~~~~~~~~~~~~~
*When I say "I'm back in France" it’s because Nick is still in the UK. Before my dad died I spent several weeks in the UK while Nick was in France with the cat and the dog. Hence we are significantly out of step with each other in terms of the number of days we have left out of our 180 days. (Our six month visas expired a couple of weeks ago but we can still go up to 180 days within the Schengen rules.) Consequently he's spending another ten days in the UK so that he can catch up a bit and we can both stay here until the end of October. It’s all so complicated since Brexit.
Our plan was that my brother would be spending the ten days here with me so he could have a bit of a holiday. Looking after the care of an elderly person month after month is exhausting, draining and all consuming and we are all in need of some rest and relaxation.
Sadly, not many weeks after the funeral my brother ended up in hospital himself. He had a pulmonary embolism with complications and has now been there for five weeks, the last four of them in intensive care. He's very poorly indeed. It never rains but what it pours. This has not been the best year for us.


Last month a friend in France gave us a spaghetti squash from her new garden where they have grown really well. I had never seen one before.