Showing posts with label tomatoes. Show all posts

May 3, 2026

FRIDGE BOTTOM FRITTATA

As time goes by we have become more adept at using up what we have in stock rather than shop for more food.  There are several reasons for this.  

The first is probably because we have more time to cook.

The second is that in France we live a good distance from any shops.  There is a village shop which sells a limited range of basics about 3km away but a supermarket selling everything is at least a twenty minute drive away.  We therefore shop less frequently and make sure we use everything up.

The third is that out here in rural France fresh produce does not seem to keep as long as stuff that we used to get from say Tesco or Sainsbury's.  I don't know why that is but we find ways to use up leftovers and veg before they become too tired.

The fourth is thrift.  Now that we are retired we have to be a bit more careful.  We enjoy eating out and balance the cost of that with sensible shopping.

The fifth is to avoid waste, for all the reasons above.


There are several ways to use up random leftovers of cooked or raw food.  You can make them into soup, into a quiche, in a salad, a gratin, or one of our favourites, a frittata.

This one had in it leeks, broccoli (stalks and florets) cherry tomatoes, courgettes and cooked brussels sprouts plus leftover bbq bits and pieces including smoked sausage and baby potatoes. You could add any herbs or spices, fresh or dried, or chilli flakes.

As a friend of mine used to say, if you have eggs, you have dinner!


Ingredients

1 leek, trimmed and sliced thinly

a few cherry tomatoes, halved

a handful of broccoli florets and the stalk, trimmed and sliced

a piece of cooked sausage

1 courgette, washed and sliced

a few cooked leftover sprouts, halved

4 eggs beaten

1 tblsp crème fraîche or cream

Herbs, fresh or dried

Method

Preheat the oven to 200C / 180 fan.

Cook the broccoli in boiling water for a few minutes until tender.

Heat a little oil in a frying pan with an ovenproof handle.  Cook the leeks and courgette until tender. 

Add the tomatoes, potatoes, sprouts, broccoli and sausage and stir into the pan.

Beat the eggs with the crème fraîche.  Season with salt and pepper and add a few chopped herbs, fresh or dried if you like.

Pour the egg mixture over the veg mixture and heat gently until the bottom is cooked but the top still liquid.  

Transfer the pan to the oven and cook for 20-25 minutes or until the eggs are set.  If you don't have a frying pan with a metal/ovenproof handle, you can cook the whole thing in the oven, just tip the veg etc into a baking dish or tray, pour the egg mixture over and cook in the oven for a little longer.

Serve hot with salad or other veg.  Also good cold.

Serves 2-3, depending on what you serve with it.

January 14, 2026

BEAN SOUP (soup maker recipe)


This was a very tasty soup.


At this time of year I have a clear out of our food cupboards.  At the back of a cupboard I found this bag of dried white haricot beans.  They were just past their sell by so it was time to use them up!  The next day I looked in my recipe books for things to do with beans and came up with bean soup, perfect for the freezing cold weather we were having last week.

What I hadn't bargained for was that the dried beans had to be soaked overnight before they could be cooked.  I should have realised this as it's exactly what we now do with our mushy peas so I wrote it on the pack of beans to remind me!  (I have never seen mushy peas for sale in France and instead of bringing tins of them from the UK I bring packs of dried marrowfat peas which I then cook and freeze in portions.)

A rummage at the back of the pantry shelves turned up a tin of pre cooked beans so we could still have the soup. 


Another thing I found in the cupboard was a pack of half baked demi baguettes that were just at their sell by date.  These are very handy to have in stock for when you want nice crusty bread and the boulangerie is shut or the baguette machine in the village has sold out.  I always make sure we have some in stock.  They’re not quite as delicious as a fresh baguette but better than none at all!


The soup was cooked in the soup maker on the "chunky" function which means it's all boiled up but not blended.  Consequently I chopped the veg smaller than usual as that's the size the chunks were going to be in the finished soup.  As the blender function is not used you could simply cook the soup in a saucepan!

It was delicious, definitely a keeper and Nick declared it one of the best soups I had ever made.  It was just the job for a chilly day when we didn’t want to head to the shops on slippery roads.

Ingredients

1 400g tin chopped tomatoes

1 400g tin haricots blancs or cannellini beans, drained and well rinsed

1 large onion, peeled and finely chopped

2 medium carrots, peeled and chopped into small dice

2 sticks celery, washed and thinly sliced

2 cloves garlic, peeled and finely chopped

1 vegetable stock pot

1 tsp mixed herbs

Method 

Put all the ingredients into the soup maker with enough water to fill to the top line.  Give it all a good stir.  (Or put it all into a large saucepan with a litre of water and bring to the boil gently, cover and cook for 15-20 minutes, stirring occasionally, or until the carrots are tender.)

Cook on the chunky setting.

If the carrots are still slightly firm, stir the soup and give it another few minutes on "chunky".

Serve with warm, crusty baguette.

Makes 4 generous servings.

January 10, 2026

PIGS IN BLANKETS CASSOULET

This was one of the recipes in Mary Berry's Christmas programme last year.  It looked so good that we bought extra pigs in blankets in order to make it.  You can see the recipe here.

We actually adapted it to a quick version that just serves two people.

In browning the PIBs the blankets (bacon) came off - the sausages became unwrapped but that was not a bad thing!  In fact it gave me the idea that the cassoulet would be just as good another time made with chipolatas and lardons! 

It was utterly delicious, perfect for a Friday night supper (or any night of the week!).  Because it contains a whole tin of beans we just had ours with extra veg; carrots and broccoli.  I used my lovely small old Cousances cast iron casserole dish, a present from my Aunty Vera in the 80’s.  She had bought it during the early trend for cast iron pots and pans but couldn’t get on with it, preferring her 1970’s Pyrex dish instead - the white one with the orange flower pattern.  I'm sure many of us remember those and I dare say some of you will still be using one!


We obviously used ready made uncooked PIBs but it would be perfect for cooked leftovers, just putting them in last thing with the beans once the sauce got going.  The advantage there is that they would probably stay in one piece!

Ingredients 

1 tblsp sunflower oil 

10 pigs in blankets (or the whole pack of 12!)*

2 small shallots, peeled and chopped

1 stick of celery, washed and sliced

2 small cloves of garlic, peeled and crushed or grated

1 400g can of chopped tomatoes 

1 400g can of haricots verts or other white beans eg butter beans, cannellini beans, chick peas, drained and rinsed

a splash of white wine (or water) used to rinse the empty tomato tin

1 tsp dried parsley or sage

1 tsp Dijon mustard (or just a spot of English mustard)

1 vegetable Oxo cube or any stock cube or stock pot

1 tsp chicken gravy granules if needed

1/2 tsp sugar if needed

Method 

Heat the oil in a heat proof (cast iron) casserole dish or sauté pan.  Add the shallots, garlic and PIBs and fry gently, stirring, to colour them.  Don’t worry if the bacon unwraps itself from the sausages!

Stir in the tomatoes, beans, and herbs, crumble in the stock cube and bring to the boil.  Add the wine and simmer gently uncovered for about 10 minutes until the sausages are cooked through. *this is the stage where you could add cooked leftover PIBs.

Season and taste the cassoulet.  Add the sugar if the tomatoes seem a bit sharp.  Add the mustard and stir in the gravy granules to thicken the sauce if it’s a bit thin.

Serve with any extra veg you like.

Serves 2.

You might also like these other sausage dishes:

Italian sausage and bean stew

Sausage and lentil stew

Sausage traybake

Sausage and potato quiche which could also be adapted to use leftover PIBs.

September 1, 2025

TOMATO SAUCE

Our tomato harvest has been less than normal this year, as we only planted four plants, but we are still not keeping up with the supply.  So as per previous years I have been hunting for ways to use them and this time, I decided to make tomato sauce.

I found a recipe for a simple tomato sauce on the internet and adapted it, as always, to what I had in stock.  I used most of our home grown tomatoes, reserving a small dishful for use in salads and sandwiches.  The original recipe was for 500g of tomatoes but I had three times that when I weighed the ones that were ready for using so I scaled it up.  You can see the recipe here.

1½ kilos of tomatoes made a full litre of the most delicious garlicky sauce, perfect for pasta or for adding to pies, stews and soups.  After using some straight away I divided the rest into 300g portions using ziplock bags for the freezer.  If you flatten the sealed bags before freezing they take up less space in the freezer.

Ingredients 

500g / 1500g ripe home grown tomatoes 

2tblsp / 6tblsp extra virgin olive oil

4 / 12 cloves garlic, peeled and finely chopped 

a good handful of fresh basil or 3 tsp dried basil

Salt to taste

Method

Roughly chop the tomatoes, removing any scarred or damaged bits.  No need to peel.

Heat half of the olive oil in a large saucepan on medium heat.  Add half of the tomatoes, turn the heat down to low and add the garlic.

Add the remaining tomatoes and cook gently until they begin to break down, stirring regularly.

Add the remaining olive oil and salt to taste and cook on a low heat for 20-30 minutes, stirring regularly.

5 minutes before the end of cooking add the torn basil leaves and/or dried basil.

When cool transfer to a food processor and process until as smooth as you want it, or use a stick blender in the pan (be aware it may splatter and tomato stains can be very stubborn).

Makes 33cl / 1 litre of sauce which will keep for a week in the fridge.  Freezes well.

You might be interested in other ways I have used tomatoes:

airport potatoes

preserved roast tomatoes

ratatouille

roast salmon with courgettes and tomatoes

gazpacho soup

smoked salmon and halloumi stuffed courgettes

roasted cod with potatoes and tomatoes

stuffed chicken fillets

tomato, ham and goat's cheese tart

noggle end tomato tarts

roasted tomato soup

courgette and tomato gratin

easy tomato and cheese tart

green tomato chutney

July 27, 2025

NOGGLE END TOMATO TARTS

Our tomatoes have started to ripen but although they taste delicious they would not win any beauty contest!  They are a bit "noggly" - lumpy and bumpy with the odd split.  With a pack of puff pastry in the freezer I decided to use some of them for little tarts.

There was also a selection of bits of cheese in the fridge - we call those "noggle ends" - bits you would put under the grill on toast or in a quiche.  I used Camembert and something called Tome aux Fleurs, a hard cheese with a crust of flower petals, which you can read about here.  Grated cheddar would have worked well.

Also lurking in the fridge was a small pack of cocktail frankfurters, purchased for some long forgotten event and never used but fortunately well within date. 

I used my free Yorkshire pudding tin (see here) to make four tarts but this time used a slightly bigger template to cut the pastry allowing me to crimp the edges more neatly.  (It's actually something I spotted in Ikea, is meant to be the base for one of those stainless steel kitchen tool holders and I had a hunch it would be just the right size.)

My pastry made four tarts and eight cocktail sausage rolls (recipe here) from the trimmings.  All fun to make and very tasty - a nice way to entertain children on a wet afternoon in the school holidays I think - they are very adaptable and bake in just the right amount of time to clear up then heat up a tin of baked beans!😋

Ingredients 

1 pack of ready made, ready rolled, oblong puff pastry

2 tsp French mustard (or brown sauce, onion chutney or ketchup if you prefer)

6 thick slices of tomato

Thin slices of any cheese you have (or grated cheddar if you prefer)

1 egg, beaten (optional but worth using if you are also making the sausage rolls)

Fresh or dried thyme

8 cocktail frankfurters (or one large frankfurter cut into bits or the filling from a sausage)

Method 

Preheat the oven to 200°C / 180° fan / gas mk6.  Grease the four holes of a Yorkshire pudding tin or four small tart tins (or use four ovenproof saucers placed on a baking sheet).

Allow the pastry to thaw and come up to room temperature.  Unroll and cut four circles about 2cm bigger than the holes using anything you have that’s the right size as a template.  Lay the pastry into the holes and crimp the edges.

Using the back of a teaspoon spread 1/2 tsp mustard over the base of each tart.  Add the slices of tomato, cutting to fill the pastry.  Arrange thin slices of cheese on top but leaving gaps as the cheese will melt and spread.

Brush the pastry edges with beaten egg (optional).  Sprinkle with fresh or dried thyme and bake for 20 minutes until the pastry is crisp and golden brown and the cheese has melted and bubbled.

Use the pastry trimmings to make little sausage rolls which can go into the oven at the same time.

Makes 4 tarts and 8 cocktail sausage rolls

June 28, 2025

GAZPACHO SOUP and how to peel tomatoes


With Nick away for a week I was looking forward to catching up with spring cleaning and other jobs.  Unfortunately the weather had other ideas.   We are having a prolonged heatwave here in the middle of France.  It's debilitatingly hot so I got much less done but I did get several invitations to eat out. 😄 Some of the invites clashed but I accepted as many as were physically possible and on one day had lunch with a couple of friends and dinner with a large group of others celebrating a move of house.  (The term for this is apparently a "house cooling", which is ironic considering the extremely warm weather!)

At both of these the meal began with Gazpacho, something I have eaten often but never made and is perfect for the hot weather.  It’s delicious and refreshing.  With another invite on the cards and all the stars aligned I decided it was time to have a go at making it myself and offered to bring the starter.

There are dozens of recipes out there in the ether, and on my bookshelves, and I consulted several, including one by Mary Berry from "Mary Makes it Easy" and one by David Herbert from "The Really Useful Cookbook".  I also took on board my friend's adaptations for the soup she served at lunch.  

Of the two gazpachos I had in one day, one of them clearly had bread in it and the other not.  I thought my soup turned out a bit too thick so next time I would probably halve the amount of bread and see how it goes.  I might even leave it out altogether (but still add the water) and see which version I like the best.

Most of the recipes said that the tomatoes should be peeled.  I have never peeled a tomato in my life before and whilst it's not difficult, it's rather tedious and a bit fiddly.  Hence I've given the recipe two stars in how faffy it is!

This is how I made mine.

Ingredients

1kg tomatoes, the riper the better, or about 6 large tomatoes

½ a large cucumber (unpeeled)

1 red pepper, de-seeded

55g white bread, no crusts (see notes above and maybe try 30g or just a chunk)

250ml water

2 cloves of garlic, peeled (3 cloves if you like your soup very garlicky)

½ a red onion, peeled

2 tblsp good quality olive oil

2 tblsp balsamic vinegar

1 tblsp tomato purée

1 tsp sugar

salt and pepper

extra olive oil and chopped cucumber for serving

Method

Put the chunks of bread into a bowl with the water and set aside to soak while you deal with the veg.

To peel the tomatoes

Cut a cross in the bottom of each one (i.e. the opposite end to the stalk) and put into a large Pyrex or similar bowl.  Cover with boiling water and leave for 45 seconds.  Transfer to a similar bowl containing cold water (tap water temperature is fine).  Using a small pointed knife such as a paring knife pick up the point of one section of the peel where you cut the cross in a tomato and drag the peel downwards away from the tomato to remove it.  

Prepare all the veg by washing or wiping, peeling where appropriate and chop medium small.

Put all the ingredients into a large bowl, including the soaked bread, and stir well.  Transfer in batches to a food processor or blender and blend until it's as smooth as you would like it.  (You could of course use a stick blender in a suitable container.)  Mine had tiny chunks of veg in it.  Other recipes say to keep going until the soup is smooth.  To quote James Martin "it's entirely up to you"!

Transfer the blended soup to a large jug or container and chill in the fridge for several hours.  I added a few ice cubes before serving to chill further.

The soup looks very nice served in a large glass jug at the table, pouring out into small soup bowls or glass bowls.  Add a drizzle of olive oil to each one and a few bits of veg, chopped small for garnish.  I added chopped cucumber but you could use green pepper, avocado, tomato or, as some recipes suggest, chopped hard boiled egg (this sounded a bit odd to me!).

Serves 8-10 small portions, 6-8 slightly larger.

(I brought the leftovers home with me and the soup was still good two days later, which suggests that it could easily be made and left chilling in the fridge the day before you need it.)

May 4, 2024

SMOKED HADDOCK GRATINS

In France there is a chain of frozen food shops called Picard.  Their range of foods goes from basic stuff, like peas and green beans, through to luxury items.  Our favourite purchases include their croissants, which cook from frozen in eighteen minutes, their salmon fillets, which are not cheap but occasionally on special offer, and twin packs of scallops in chardonnay sauce which are a bit pricey but utterly divine as a starter.  These little gratins also come in reusable ceramic dishes, always a bonus in my book.  We have frequently seen little piles of them for sale at village brocantes - the French rarely throw anything away that they might get a few euros for! I have hung on to mine and by now have collected enough of the little blue dishes to feed quite a crowd!

After treating ourselves to another scallop gratin starter I thought I really ought to look for a recipe for something similar that would make a tasty starter without the hefty price tag.

I spotted a recipe for a smoked haddock gratin on a lovely blog which you can see here and which gave me the idea for my starter.  I used frozen spinach which comes chopped and mixed with a little crème fraîche - a combination that I’m not sure if it’s available in the UK but any fresh or frozen spinach would do the job.  I left the quantity I wanted in the fridge to thaw overnight which made it easy to drain off excess liquid.  

The rest of the recipe is really just an assembly job.

They were perfect little starters, quite rich with all the cream and cheese but very tasty and not too filling! Definitely good for a dinner party.  Next time, instead of smoked haddock, I might try a mixture of prawns and smoked salmon - the little packs of diced smoked salmon or trimmings that you can buy would be ideal.

You can find more recipes for the smoked haddock that I used, and other smoked fish, on the manufacturer’s website here. There are English and French versions.  

UPDATE: I made the gratins using smoked salmon trimmings and prawns, which were delicious.  I also made a couple using chicken and chorizo for someone who was allergic to most fish and they were pronounced delicious too.

Ingredients

5 blocks of frozen spinach in crème fraîche, thawed, or equivalent, or a 200g bag of fresh spinach

1 x 140g smoked haddock fillet, skin removed

6 small knobs of butter

6 dessert spoons half fat crème fraîche

3-4 tblsp grated gruyère cheese

3-4 tblsp grated parmesan

6 slices of a large tomato

2 tblsp fresh breadcrumbs made from 1 slice of white bread

Method

Preheat the oven to 220°C / 200° fan / gas mk 7.  Put six small gratin dishes or ramekins on a baking sheet.

First make the breadcrumbs.  Tear a slice of white bread into pieces and drop into a food processor.  Process until you have fine crumbs.

If using fresh spinach wash and cook it for a few minutes until just cooked then chop it.  If using frozen spinach make sure it's completely thawed.  Press out any excess liquid and share between the gratin dishes or ramekins.

Cut the fish into small pieces and sit them on top of the spinach.

Dot the fish with a small knob of butter and spoon some crème fraîche on top.  Sprinkle with the two grated cheeses and place a slice of tomato on top.

Sprinkle with breadcrumbs and bake for 15-20 minutes until golden and bubbling.  Serve immediately.

(As the dishes are straight from the oven you may want to serve them sitting on a heatproof plate or dish so as not to damage your table, placemats or tablecloth.  I served mine on a small glass plate protected from the heat by a pad of folded paper serviette.)

Serves 6.

November 16, 2023

GREEN TOMATO CHUTNEY

We harvested the last of the tomatoes the other day, dug up the plants and dispatched them to the compost heap.  All but one of the tomatoes were hard and green.

I had made green tomato chutney in the past and was not too thrilled with it but this time we had so many good tomatoes that it seemed a shame not to do something with them.  

With the rain pouring down outside and the wind howling it seemed like the perfect day to do some cooking on the wood burning stove so I searched online for a different recipe.  It was a Sunday and the shops were shut so I looked for one where I could use what I had in the house.

You can see the original recipe on the Waitrose website here.  I didn't have any mustard seeds so used ready made wholegrain mustard instead.  The only vinegar I had was this one which is brown vinegar with added honey.  I didn't have a cooking apple so used two eating apples (golden delicious).  (I omitted the chilli as I personally can't eat it nowadays.)

I have listed below the ingredients that I used but suggest you refer to the original recipe which I used as a guide.


I remembered from the last time that I made chutney (which was some years ago) the best way to tell if it's thick enough and done.  You draw your spoon across the bottom of the pan and if it leaves a clear channel which doesn't immediately fill up with liquid it's ready.

The quantity of tomatoes I had made 2½ Bonne Maman jars of chutney.  Most of the recipes I looked at suggested you should keep it for 2-3 weeks before eating it but of course I had to have a little taste!

It is yummy!!  It's nice and chunky, just as I like a chutney, as I'd chopped the ingredients not too small.  The flavour is delicious, both sweet and sharp, and I wonder if the particular vinegar I used had something to do with that.

Anyway, I can't see me lasting 2-3 weeks before I open the first jar and it's most unlikely to end up at the back of the cupboard, unloved and still uneaten 2-3 years later!  It's a winner!

Ingredients

650g green tomatoes, washed and chopped

2 onions, peeled and chopped

2 eating apples, peeled, cored and chopped

200ml brown vinegar

50g sultanas

1 heaped teaspoon wholegrain mustard

1 tsp ground ginger

½ tsp salt

75g light soft brown sugar

Method

Put the tomatoes, onions and apples into a large, heavy based saucepan, with half (100ml) of the vinegar.

Bring gently to the boil and simmer for around 30 minutes, stirring occasionally, until the veg are soft.

Add the other ingredients and remaining vinegar and cook again, stirring frequently, until the mixture has thickened.  (See text for how to tell when it's ready.)

Spoon into sterilised jars while still warm.  Tap the jars on the worktop several times to dispel any air bubbles, seal and label the jars.

Makes 2½ 1lb jars of chutney.

To sterilise the jam jars

Wash the jars and lids thoroughly in hot, soapy water and rinse well.  Shake off any excess water (do not dry with a tea towel) and place on a baking tray.

Place the tray in a warm oven (160°C or thereabouts) for 10 minutes until dry.  Fill the jars while they are preferably still warm.

August 12, 2023

EASY TOMATO AND CHEESE TART


The weather here in the middle of France has been rather English this summer.  However, it's still been warm enough for us to get a bumper crop of delicious tomatoes.  This is in contrast to last year when heatwave followed heatwave, our tomato plants virtually gave up and struggled to produce any fruit at all.

This year I'm scouring my cook books and the internet for imaginative ways to use them up.


This is my version of a number of recipes I found on the internet.
It's dead easy to do and makes an excellent lunch or starter.


Slices of tomato are set on a bed of grated cheese on a pastry sheet then sprinkled with herbs.


It takes next to no time to prepare and is very tasty.

For a different variation, try my friend Susan's recipe here.

Ingredients

1 sheet of ready made, ready rolled puff pastry.  Round or oblong will both work.

1 tblsp Dijon mustard (more if you like a bit more of a kick)

50g cheddar cheese, grated (any hard cheese will work)

2-3 large tomatoes

2 tsp fresh thyme leaves (or any other favourite herb, chopped)

A sprinkling of Herbes de Provence

Salt and pepper

A little olive oil or Olive Fry Light

Method

Remove the pastry from the fridge about 15 minutes before you want to use it.  This prevents it from cracking when you unroll it.

Preheat the oven to 200° C / 180° fan / gas mk6.

Place a sheet of baking paper on a large baking sheet.  I usually use the paper the pastry comes wrapped in, trimmed to fit the baking sheet.

Unroll the pastry onto the baking sheet and with a sharp knife score a line about 2.5cm (1") from the edge without cutting all the way through.*

Spread the mustard evenly over the pastry and within the scored border, using the back of a spoon, palette knife or pastry brush.  Sprinkle the grated cheese evenly over the top.

Arrange the slices of tomato over the cheese, sprinkle with the thyme and Herbes de Provence and season with salt and pepper.  Drizzle with a little olive oil or spray with a few squirts of Fry Light.

Bake for 25-30 minutes until the pastry is golden brown.  Serve warm or cold.

Serves 6-8 as a starter, 4-6 as a lunch with salad.

*You could alternatively cut the pastry into individual tarts before scoring and filling, which just takes a little more time.

July 23, 2023

STUFFED CHICKEN FILLETS with thyme and goats cheese on a bed of courgettes and tomatoes.


When we recently invited some friends round for a bbq the weather decided to turn decidedly English - cool and showery. I was planning to serve the chicken, lemon and thyme kebabs with a ratatouille that I wrote about recently but had to have a quick change of menu that used mostly the same ingredients - especially as our veg patch is proving to be rather successful in producing courgettes this year!  We also have thyme growing in a corner of the garden. 

I spotted this recipe on the Good Food website and it ticked all the boxes.  All I needed in addition was some goats cheese and bacon which I happened to have in the fridge.


We looked at the weather forecast at about the time we would be marinading the kebabs and stuffed the chicken fillets instead, leaving them on a tray in the fridge. The most fiddly part of the recipe was stripping the tiny leaves from the thyme stalks, which I always find annoyingly tedious.   

It turned out well, looked good and was very tasty.   I served it with some buttery new potatoes (instead of the planned potato salad) and a dish of French beans (from the freezer) while the rain poured outside!

Ingredients

One skinless chicken fillet per person (six for this recipe)

1 log of goat’s cheese 

2 courgettes

4 tomatoes

4 sprigs of fresh thyme

1 pack of streaky bacon (you may need more)

3-4 tblsp olive oil or some Frylight spray

Method

Preheat the oven to 190°C / 170° fan / gas mk 5.

Strip the leaves from two of the sprigs of thyme.

Split each chicken fillet lengthwise but not all the way through.  Open out and flatten slightly by batting with a rolling pin or tin of beans.

Thinly slice the goat’s cheese, place two slices into a chicken fillet and sprinkle with thyme leaves. Fold the fillet over to enclose the cheese and wrap in two rashers of bacon.  Repeat with the remaining chicken fillets.

Slice the courgettes and tomatoes and arrange in a suitable oiled roasting tin or baking dish.  Drizzle with oil or spray with Frylight, season with salt and pepper and put the thyme sprigs on top.  Sit the chicken fillets on top with the ends of the bacon tucked underneath.

Bake in the oven for 40-45 minutes or until the chicken is cooked, the bacon crisp and the courgettes tender.

Serve with potatoes or other veg of your choice.

Serves 6.

July 2, 2023

RATATOUILLE


I saw Raymond Blanc make this version of the classic ratatouille in his TV series "Simply Raymond" a few years ago.  It's not easy to find on the internet but at the time of writing you can see it here.  It is obviously also in the book that goes with the series, which is full of great recipes.  I found a brand new copy in a UK charity shop for £2!  

(I would put Raymond Blanc on my list of famous people I would invite to dinner if I could choose from anyone living or dead.  I reckon he would get on well with some of the other guests (yet to be revealed) as he's such a sweetie pie.  Mind you, I would be nervous about my cooking skills so maybe I would invite him to get here early in time to cook dinner..............!!)

This recipe is my interpretation of Raymond's version of the classic dish.  I usually make it from what I have in the fridge (or growing in the veg plot) and only include an aubergine if plan to make it and happen to be going to the shops.  Also, Raymond uses 4 large tomatoes but I often use a tin of whole cherry tomatoes instead.

It's quick, easy and delicious, goes perfectly with barbecue food, sausages, chops, roast salmon or cod.  It's also excellent on its own with pasta or new potatoes.  The cold leftovers go well with a ham and egg or tuna salad, AND it makes an excellent base for home made soup (see here). The recipe is easy to size up to feed a crowd.

In fact the very first time I had ratatouille was in the 1980's without realising what it was.  I had gone to join some friends on their camping holiday in Italy.  They were both teachers and at the start of the six week school holidays they took their caravan to Tuscany where they camped on a beautiful site just outside Siena and stayed until it was time to come home and go back to work in September.  In my job I only had two weeks to take during the summer and they invited me to join them.  I got a flight to Rimini then an overnight train to Bologna where they picked me up at the station.  Quite an adventure for someone who had never been to anywhere warmer than Cornwall!

The camp site was wonderful, situated on a hillside in dappled shade with a fabulous swimming pool.   The view over the Tuscan hills was amazing.  On that first evening my friends cooked what they called "pasta with vegetables", outdoors where their camp kitchen was set up, and it was, essentially, ratatouille, served simply with a bowl of pasta.  It was so delicious that we had it several times that holiday and I made it myself regularly at home afterwards, long before I discovered it was a version of the famous Provence dish.

Ingredients.

1 aubergine (optional)

1 onion, peeled and chopped

2 cloves garlic, peeled and chopped

2 courgettes, 1 yellow, 1 green

1 red pepper, seeds removed

1 tin cherry tomatoes in juice or two large tomatoes 

1 tsp herbes de Provence

A few mushrooms 

1 tblsp olive oil

Method

Heat the oil in a large saucepan.  Add the onion and garlic and cook until soft but not browned.

Wash, trim and roughly chop all the other veg and add to the pan.  Add the tin of tomatoes and about half a tin of water.  Add the herbs and season with salt and pepper.

Cover and cook over medium heat for 6-8 minutes until all the veg are just tender.

Makes four generous servings or more as a side dish.

March 23, 2023

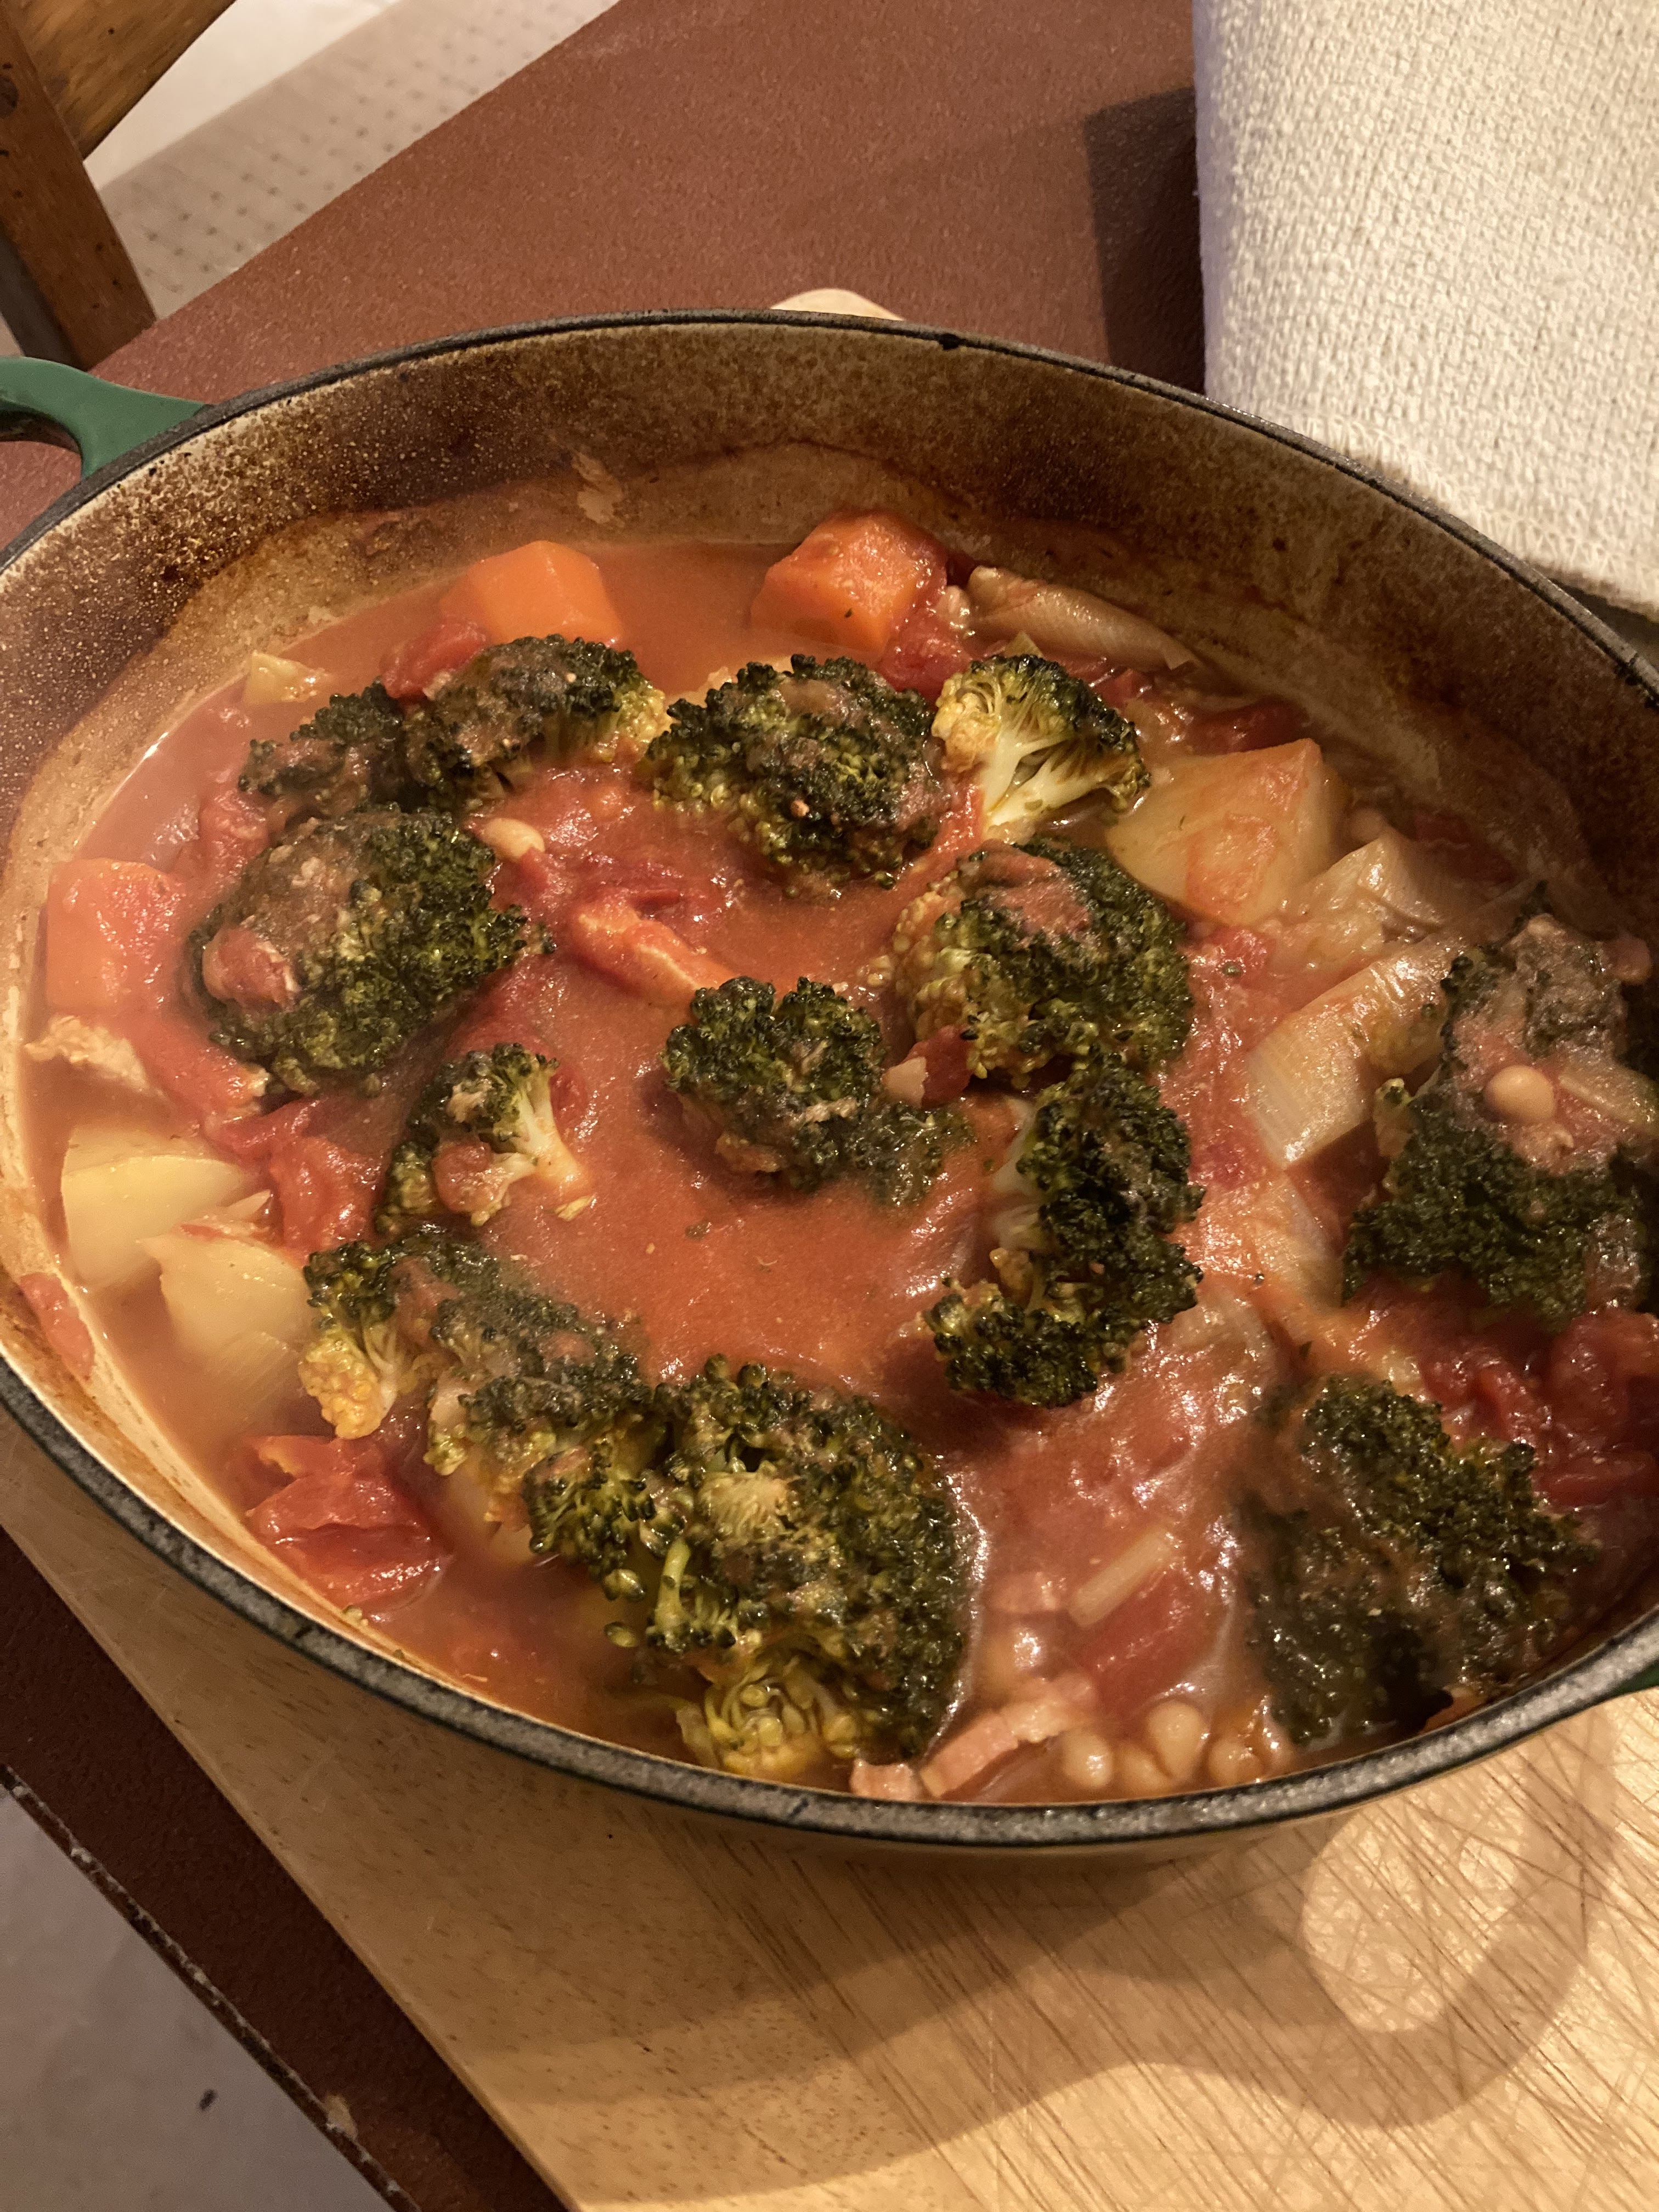
PORK WITH BEANS AND GREENS

This is an adaptation of a recipe in one of my slimming club cook books.  Now that we're back in France my membership has officially lapsed but I'm sticking to the plan as much as is possible in a country where the fat free versions of some things are hard to find.  I brought with me several bottles of low fat cooking spray as I had no idea whether or not you could get that kind of thing here.  I would like to lose a few more pounds but at least put none back on!

The recipe calls for cavolo nero or kale as the greens but I used broccoli as that's what I had.  Now that we're chez nous the supermarkets and other shops are some distance away and you can't guarantee the availability of anything, so cooking what you have in is the way to go.  Another adaptation from the original include using haricots blancs instead of borlotti beans as I had a tin of them in the cupboard.

In the book the recipe is cooked in a slow cooker but also includes instructions for cooking it on the hob.  We had the little French Aga-style of wood burner going to heat the house so I cooked it in that.  The hotplates were boiling it too fast so I transferred it to the oven for the cooking time.  To be honest, cooking anything in the woodburner oven is rather hit and miss as the temperature is not very controllable but if anything a casserole of some kind is what cooks best.  At a push I can cook a shepherd's pie or crumble in it but anything requiring accurate temperature control is a no-no.  I certainly wouldn’t attempt pastry or a cake in it!

It was delicious.  Cooking without lots of oil, or flour to thicken the sauce, is a revelation and definitely the key to losing (or not gaining) weight.  We had ours with no extra veg as there were already plenty in it.  Using just three slim pork steaks it made four generous portions but with a few more veg on the side it would have satisfied the hungriest appetite!  You could of course add other herbs or spices according to how adventurous you feel!


As an aside, I noticed that to use the right kind of tinned tomatoes for the recipe I had to look for "dés" or diced tomatoes.  Diced means chopped and anything else is literally pulp.  You can also get whole tomatoes - entières - just like you would have with your fried breakfast - and chop them yourself.  

Ingredients

3 pork loin steaks or chops, cut into large chunks

a small pack of smoked bacon lardons or 2-3 slices smoked bacon, chopped

low calorie cooking spray (or olive oil)

2 large carrots, peeled and thickly sliced

1 large leek, cleaned and thickly sliced

2 cloves of garlic, peeled and crushed

1 sprig fresh rosemary, leaves plucked and chopped

2 bay leaves

1 vegetable stock pot or cube made up to about 1 pint with boiling water

4-5 medium waxy potatoes

1 200g can chopped tomatoes

1 400g can borlotti beans (or cannellini or any other beans you like) drained and rinsed

1 head of broccoli, cut into medium florets

Method

In a large metal casserole dish or ovenproof saucepan fry the bacon and pork in the oil or spray until brown.  

Add the carrots, leeks, potatoes, herbs and stock, season with salt and pepper and bring to the boil.  Cover and simmer gently for 1 hour (or transfer to the oven at 170C for 1 hour).  Check after 30 minutes that it is not boiling dry - if so add more hot water.

Stir in the broccoli, tomatoes and beans and cook for a further 30 minutes.

Check for seasoning, remove the bay leaves and serve as it is in bowls or with bread, rice, pasta or more veg.

Serves 4.

January 15, 2016

PRESERVED ROAST TOMATOES (forgotten cakes and bakes of 2015)

preserved roast tomatoes

We did phenomenally well for tomatoes last year.  We planted a few tomato plants at the top of the garden in May, watered them a couple of times then more or less ignored them for the rest of the summer.  We harvested our first tomato on 1st July and they just kept on coming. 

preserved roast tomatoes2

Keeping up with the supply of tomatoes and thinking of ways of using them proved to be a challenge.  It seemed wrong to waste any so I made and froze tomato sauce, tomato soup and just plain chopped tomatoes. 

Round at a friend’s house for apéros one evening she served her own herby roast tomatoes in olive oil, simply squashed onto a thin slice of baguette.  They were delicious.  This made me think I should have a go at something similar myself.

preserved roast tomatoes3

preserved roast tomatoes4

I used this recipe on the BBC Good Food website as a guide, but it’s so easy that a recipe is hardly necessary.

preserved roast tomatoes5

preserved roast tomatoes6

Once the roasted tomatoes were cool, I packed them tightly into Le Parfait jars, pouring olive oil on the layers to make sure there were no air gaps.  Writing this five months after they were first bottled, I can confirm that they have kept perfectly well in the fridge for several months, although the oil does solidify and it’s a good idea to use up the contents in a few days once the jar is open. 

The tomatoes have many uses, in salads, soups, casseroles and so on, but are delicious just squashed onto a slice of fresh or toasted baguette.

Ingredients

freshly picked cherry or medium sized tomatoes

fresh or dried herbs, eg thyme and basil

a handful of garlic cloves

olive oil

balsamic vinegar

salt and pepper

Method

Preheat the oven to 160°C / 140° fan.

Cut each larger tomato in half and lay cut side up on baking trays.  The cherry tomatoes can be left whole.  Tuck in a few cloves of garlic and sprigs of thyme or basil leaves, or sprinkle lightly with dried herbs.  Drizzle liberally with balsamic and olive oil and season with salt and pepper.

Bake in the oven for an hour, then turn off the oven and leave the trays in until the tomatoes are cool.

Pack into jars in tight layers, covering with oil to avoid any air bubbles.  Fill the jars right to the top, leaving a layer of oil on the top.  Keep in the fridge.  Keeps for up to six months but use within a week or so once the jar is opened.