Showing posts with label baking challenge. Show all posts

January 26, 2021

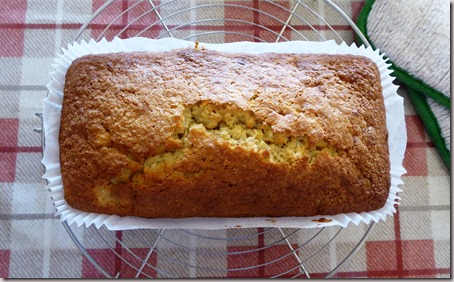
CRANBERRY AND ORANGE DRIZZLE CAKE

During the doldrums between Christmas and New Year I found myself near to Tesco when there were hardly any customers.  I made a quick dash inside and there were punnets of cranberries reduced in price.  They were an irresistible bargain so I swooped.

I had in mind the apple, orange and cranberry cake I made a couple of years ago which was lovely and you can see here.  Then just out of interest I did a bit of internet research and came across this recipe on the Waitrose website and thought I would try that instead.  I also fancied making a Bundt cake.


I am a fan of Bundt cakes and now have a small collection of lovely designs but the one problem with them is that they are all so huge.  They take a lot of mixture so I find myself having to seek out recipes written specially for them.  They also take a lot of eating - a lot of mixture means a big cake, much too big for just the two of us.  We end up with bits of cake filling up the freezer, or very happy neighbours (no bad thing).

When I spotted this tin on the Lakeland website it looked to me like it would work with the quantity of mixture you would put in a regular 8" round tin or a 2lb loaf tin.

I ordered one and it turns out I was right, it's exactly the right size for more normal cake recipes.

I was hoping the design of  the Lakeland tin would produce cakes similar to the beautiful Nordic Ware Anniversary Bundt tin (above).  It's the original Bundt tin and I have long admired its sharp angles and elegant lines.  It was a big ask!  But it's a well made tin and will be very useful.

The cake was yummy, had a good orange flavour with the sharpness of cranberries and the background of ground almonds.  I was also rather chuffed that my cranberries didn't sink to the bottom of the cake tin (therefore all ending up at the top of the cake).   

I can see me adapting this recipe for a lemon and blueberry cake, coconut and lime cake, and possibly even a cherry and almond.  It's a keeper for sure.

Ingredients

For the cake

225g softened butter (I used Anchor spreadable)

225g golden caster sugar

4 medium eggs

175 self raising flour, sifted

1 tsp baking powder

50g ground almonds

zest of 1 large orange

175g fresh cranberries, rinsed and dried

For the drizzle

50g granulated sugar

half of the juice of  the orange*

Method

Preheat the oven to 170° C / 150° fan / gas mk 3.  Grease and line a 900g loaf tin or prepare a 20cm Bundt tin using cake release.

Put all the cake ingredients except for the cranberries into a large bowl and beat until just mixed.  Fold in the cranberries.

Transfer the mixture to the tin, level the top and tap the tin on the worktop a few times to settle the mixture and prevent any air bubbles.  Bake for 50-60 minutes until done.  (Check after 45 minutes as my Bundt cake was done by then.)

Remove from the oven and here instructions differ depending on the tin:

If using a loaf tin, sprinkle the granulated sugar on top, pour the orange juice over and leave to cool in the tin.

If using a Bundt tin, cool in the tin for 10 minutes then turn out onto a wire rack, sprinkle with the granulated sugar and pour over the orange juice.

Cuts into 10-12 generous slices.

* the recipe says to use all of the juice of the orange.  That seemed like a lot to me and I wondered if it might make the cake too soggy - my large orange produced a lot of juice.  So I used just over half of it and the cake was well flavoured with the orange and moist enough.

September 26, 2020

RHUBARB AND ALMOND PIE


We have been enjoying Mary Berry's new TV series called "Simple Comforts".  With so much uncertainty about the coming months I need simple and comfort more than ever.  Mary is such a genius at what I would call proper home cooking.  Designed for us ordinary folk for every day meals and the special family occasion.  You really can't go wrong with her recipes.

However, I did with this one!


Here we are back in the UK for the next six months, pining for the lost months that we didn't have in France this year but at the same time feeling so thankful that we managed to get there at all and enjoy eight glorious weeks of almost uninterrupted sunshine.  Back home we are almost through our quarantine period and the weather has been perfect.  Some would call it an Indian summer.  It's been wonderful to be able to sit in our little garden and enjoy some fresh air, even on rainy days the sun has come out in the afternoon.  Quarantine could have been so much worse if it was cold and wet most of the time.


Nick has nurtured our flowering plants back to life so that we have been able to enjoy some colour in the garden.  I picked some of our flowers to cheer us up indoors.  To our delight we have also found that our rhubarb plant, only one year old, continues to keep on giving.


In the first episode of her new series Mary made an apple dessert called "brioche frangipane apple pudding" which looked both delicious and easy to make.  For the base she used slices of brioche and it just so happened that I had brought a sliced brioche back with me from France.


I also had loads of rhubarb from the garden so I decided to use that instead of apples.


Unfortunately it didn't work out quite right as I used the wrong size of dish.  Mine was slightly smaller in diameter and a bit deeper.  The upshot of this was that when the cooking time was up, the middle of the pie was still uncooked, positively liquid in fact.  So I had to cook it for much longer and in spite of covering it with foil to try to prevent burning it did end up being rather crozzled around the edges.  Which does go to show that size does matter!


I was disappointed to say the least and didn't do the extra step of brushing with an apricot glaze and sprinkling with flaked almonds.

However, it was yummy!  Ignoring the occasional rather dark tasting bits, it was quite delicious.  I will definitely be making it again, either with apples or with rhubarb.  Possibly even with sliced pears or plum halves.  But next time I will use a larger, shallower dish.

I especially like the idea of using a layer of brioche for the base of the pie (or pudding).  It worked really well and is a nice change from a pastry bottom.  (Although mine was a touch overdone.)  I shall be doing that again!

The episode with the recipe is currently still available on BBC iPlayer and you can see it on the internet here and here.

Ingredients

4-5 slices of brioche loaf
175g spreadable butter (I used Lurpak spreadable)
175g caster sugar
1 tsp almond extract
175g ground almonds
3 eggs
25g plain flour
about 6 sticks of rhubarb, washed and cut into 5cm lengths

Method

Preheat the oven to 200° C / 180° fan / gas mk 6.  Butter a large, shallow baking dish about 28cm dia.

Press slices of brioche into the bottom of the dish, filling in gaps but not overlapping.

Put the butter and sugar into a food processor and whizz until light and fluffy.  Add the extract, almonds eggs and flour and whizz again until nice and smooth.  Spread the mixture evenly over the brioche base and arrange the fruit on top.  

Bake for about 40 minutes until golden brown and the centre is firm.  Serve warm.

Cuts into 8 generous slices.

~~~~~~~~~~~~~~~~~~~~


I made it again using a larger, shallower dish and it worked better.  It was cooked perfectly in the 40 minutes stated in the recipe.  I also used slightly less ground almonds and more flour; 150g and 50g.  This was because that's all the ground almonds I had in stock but it was still delicious - if anything I preferred it.


I later made it in an even bigger dish, 28cm, using apples as per Mary's original recipe and that worked even better!  You can read about it if you go here.

August 21, 2019

RASPBERRY AND COCONUT CAKE, be careful what you wish for and a demon banished.


It has been a strange summer.  While in France we have had to endure not one, but three heatwaves.  They only ever last for a few days when at their worst but either side of those three days it can still be unbearably hot.  During the last heatwave we had temperatures of 38 - 43C and either side of that it was well over 30C for days on end.  Consequently we were glad to return to the UK for a couple of weeks to cool off a bit.

 
And so, back in the UK, we're getting typical school holiday weather.  A few sunny days in between pouring rain.  In years gone by I would have been spitting nails about the lousy summer weather but this time, having experienced how strangulating such heat can be, I'm glad to be able to get out and about as much as I like, albeit with an umbrella. However, having wished to be a bit cooler, when it was tipping it down the other day I wondered if I should have been more careful what I wished for!  Hopefully it will not continue to rain every day until we return to France. 
 
 
Last week was, apparently, "afternoon tea week". 
Who would have thought it?  Everything one does now has its own week!  Still, with visitors coming, at least it presented an excuse to be indoors, while it poured down outside, and bake a cake.  I chose to make a raspberry and coconut cake because there were boxes of beautiful raspberries being sold off very cheaply in the supermarket - a casualty of the cool, wet weather no doubt.
 
I'd been hankering after a good coconut and raspberry cake recipe for a while and found this one on the Waitrose website.  It looked very promising so I decided to risk it, although adapting it slightly to make a round cake rather than a loaf cake.


It was delicious!  Moist, with a perfect balance of the sweetness and texture of coconut and the sharpness of the raspberries.


I cheated a bit, having spotted a bottle of coconut flavouring in Waitrose (on one of our occasional pilgrimages to our nearest shop which is about an hour away).  I have no idea how much it actually enhanced the flavour of the cake but I would use it again anyway.
 
 
These pictures were taken outdoors the day after I made the cake, when the sun was shining.  I had to be careful not to leave my one last slice of the cake unattended as I seemed to be being watched!


The cake recipe is definitely a keeper.  Instead of decorating it with coconut yoghurt and raspberries as per the recipe I added a drizzle of plain water icing, a scattering of toasted coconut flakes and a sprinkling of freeze dried raspberry pieces.  It looked pretty glamorous I thought. 


The cake looked and tasted just as good the second time I made it, for a Macmillan coffee morning which we held in France.  (We raised £150.)


As well as the cake I decided I would have another bash at scones in honour of the concept of "afternoon tea week".  The visitors had been prewarned of my track record in the scone department and promised to bring a saw!  I used a recipe for ordinary fruit scones in the National Trust Book of Scones and......they worked a treat!  Maybe my scone demon has finally been banished - at last - I was pretty chuffed.  I have finally triumphed over my fear of scones after more than fifty years!
 
Ingredients
 
175g unsalted butter, softened
175g golden caster sugar
3 eggs
1/4 tsp coconut flavouring
175g self raising flour
100g dessicated coconut
150g raspberries, halved
2-3 tblsp icing sugar, sifted
a handful of coconut flakes
a sprinkling of freeze dried raspberry pieces
 
Method
 
Butter and line the base of a 20cm round cake tin.  Preheat the oven to 180C /160 Fan / gas mk 4.
 
In a large bowl, cream the butter and sugar using a hand mixer, until light an fluffy.  Beat the eggs in a jug with the coconut flavour and add a dribble at a time along with a little flour, beating well with each addition.
 
Fold in the remaining flour, then the coconut and raspberries.  Spoon into the tin and level the top.
 
Bake for 50-60 minutes, covering with foil after 30 minutes, until done.  When you remove the cake from the oven leave the heat on, scatter a handful of coconut flakes onto a baking tray and put in the oven for 3-5 minutes until nicely browned at the edges.
 
Leave the cake to cool in the tin for 10 minutes then turn out onto a wire rack to cool completely.
 
When the cake is cold, transfer to a plate or stand, mix the icing sugar with a little water to make a runny icing and drizzle it over the cake in a diagonal pattern.  Scatter the toasted coconut over the cake and sprinkle with the dried raspberries.
 
Cuts into 6-8 generous slices.  (Leftover slices are nice served warm as a pudding with pink custard!)

~~~~~~~~~~~~~~~~~~~~~~

I have since made this cake in a 2lb loaf tin with strawberries instead of raspberries. Decorated with a layer of a thick plain water icing made with 3 tablespoons of icing sugar spread over the top and some sliced strawberries to disguise the inevitable split down the middle!

I have also adapted it to make a CHERRY AND COCONUT CAKE which you can see here.

It was excellent as a COCONUT AND LEMON LOAF CAKE, omitting the fruit and adding the zest of one lemon instead. I decorated it with thick water icing made with the juice of the lemon, decorated with strips of lemon peel and a sprinkling of coconut. Edible flowers (violas) added along the cake to disguise the crack in the middle.  You can see that version here

March 18, 2019

STICKY TOFFEE PUDDING (with ginger but no dates)

 
You may wonder why anyone should bother to post about something as everyday as sticky toffee pudding, especially when the only picture is of a solitary slice.  The reason is simple, that it was wonderful, the best I have ever made (I have only ever made it twice before) and it doesn't contain any dates.  For reasons that I don't understand, Nick hates dates in his STP.
 
I made this for a family gathering on a cold wintry day when comfort food of the non-exotic kind was in order.  In other words, Dad and his lady friend were amongst the guest and at their ages (90 and 83) fancy food that's hard to chew would not have gone down well!
 
The recipe comes from Mary Berry's "Family Sunday Lunches" and is definitely a winner.  It made a huge pudding and even with most people having seconds there was still one piece left for me to photograph later.  It was delicious.  You can find it in several places on the internet, one of which is here. 
Of course, another reason for posting is that I know exactly where to find the recipe when I next need it!  Although it is so unbelievably sweet and bad for you that it won't be very soon.  My other attempts at STP can be seen here but I have to say that this recipe is my favourite so far.
(I dare say that if you don't have stem ginger in syrup in stock, a couple of teaspoons of ground ginger would do the job instead.)
 
Ingredients
 
For the pudding
75g softened butter (I used Lurpak Spreadable)
150g light muscovado sugar
2 large eggs
175g self raising flour
1 tsp bicarbonate of soda
2 tblsp black treacle
1 tsp vanilla extract
125ml milk
5 pieces of stem ginger, finely chopped
 
For the sauce
110g butter
250g light muscovado sugar
400ml double cream
1/2 tsp vanilla extract
 
Method
 
Preheat the oven to 180 C / 160 Fan / gas mk 4.  Butter a large 2 litre shallow baking dish.  A lasagne dish is perfect.
 
For the pudding whisk the butter and sugar with an electric whisk in a large bowl until light and creamy.  Add all the other pudding ingredients and whisk until smooth.  Pour into the dish and bake for 50-55 minutes until risen and springy.
 
While the pudding is in the oven, make the sauce by putting all the ingredients into a saucepan.  Heat gently until the butter has melted then boil for 2 minutes, stirring all the time.
 
Pour half of the sauce over the cooked pudding and serve the rest in a jug, possibly with another jug of cream, so that people can help themselves. 
 
Serves 8.

March 17, 2019

SAUSAGE TRAYBAKE

 
There are a couple of posts I want to do before our return to France which is imminent.  To say we're looking forward to it would be the understatement of the decade so far, what with the toxic atmosphere of living in Brexit Britain and the lousy weather we've been having lately. 
 
Having said that, we have enjoyed our months back in the UK.  Knowing that for much of the time the weather back in our part of France is not much better than it is here, and that keeping the two log fires there going all winter is hard work compared with just tweaking the central heating control, has definitely helped.  We have achieved a lot in the house, decorating the hall, stairs and landing, which is a big job (especially when you change your mind about the colour of the paint when half of it is done).
 
Before.

After.
 
We had a new staircase last spring, replacing the bouncy open tread job with the wrought iron banister for a modern, light oak version with chrome spindles.  Having that done was a big job in itself, not to mention moving the whole thing back a couple of feet and moving the radiator.  We started to tackle the decorating as soon as the Christmas decorations were put away and now that it's all finished we can hardly remember how horrible it was before.
 
 
The end of the work coincided with the couple of weeks of really nice weather that we had here in February.  We put the outdoor table up, ate our lunch outdoors and sat in the sunshine for a couple of hours for several days.  It felt so wrong to be doing that in February - in Derbyshire - but we made the most of it, knowing it couldn't last much longer and luxuriating in the warmth in the middle of the afternoon when all around us were out at work.  Sure enough, wintry weather has returned and salad is off the menu again to be replaced by traditional cold weather fare. 
 
With family coming for lunch we decided on something hearty but not too taxing so that we could spend time catching up instead of cooking and I spotted a recipe for a sausage traybake in Mary Berry's book "Absolute Favourites".  I adapted it slightly using different veg but the one thing I did do was to get sausages from the butcher instead of the supermarket.  What a revelation that was!  I had almost forgotten how good real, plump sausages could taste!  I bought a Cumberland and a Lincolnshire sausage for each person.
 
 
I got it ready to go in the oven well in advance, prepared some greens to go with it and set the table.  When the guests arrived all I had to do was turn on the oven and enjoy a glass of wine!
You can see the original recipe here and you could easily adapt it for more people by increasing the amount of veg and number of sausages, using a bigger dish.

 
Another, slightly different version, same recipe.

Ingredients
 
2 tblsp olive oil
1kg baby potatoes, or small potatoes halved
1 large leek, washed and cut into thick slices
1 large red and 1 large white onion, peeled and cut into wedges
1 red pepper, seeds removed, cut into thick chunks
1 stick celery, washed and thickly sliced
2 cloves garlic, peeled and quartered
8 large butcher's sausages, pricked with a fork (I used two different flavours)
200ml white wine
1 tblsp fresh thyme leaves (optional)
 
Method
 
Preheat the oven to 220 C / 200 Fan / gas mk 7. 
 
Put all of the veg into a large bowl with the oil, season with salt and pepper and swish around until they are all coated with oil.  Tip them into a large roasting tin or baking dish and arrange evenly.
 
Put the sausages into the same bowl and roll around so that they are also coated with the oil and arrange on top of the veg. 
 
Roast for 30 minutes until the sausages are browned on top, turn them over and toss the veg around, making sure the sausages are back on top.  Add the wine and roast again for 20 minutes or until the sausages and potatoes are completely cooked.
 
Serve immediately with more veg of your choice.
 
Serves 4.

January 11, 2019

LIGHT FRUIT CAKE or a tale of two fruit cakes #1.

fruit cake

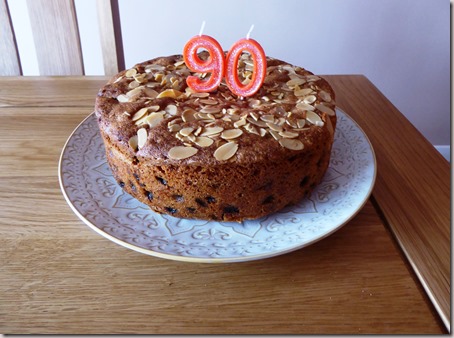
The first fruit cake I made in 2018 was for my dad’s 90th birthday last November.   He wanted a small family party and when I asked him what sort of cake he would like he said a fruit cake.  This rather took me by surprise. 

fruit cake2

All the years since Mum died I have been making him chocolate cakes, ginger cakes and many others, but never a fruit cake.  Maybe he was hankering after one for ages but was too polite to say!

I rarely make a fruit cake so I looked in my cook books and on the net for recipes and settled on one by Mary Berry called “Easy Fruit Cake”.

It comes from one of her cookery books that I don’t actually own called “Mary Berry’s Cookery Course” and you can see it on the internet here.

Fruit cake5

It really was delicious.  It had a lovely almondy flavour and nice light texture with the fruit evenly distributed.  (I have noticed that almond essence appears regularly in Mary’s recipes.)  It also kept well in an airtight tin.  I decided this would be my go-to fruit cake recipe for whenever I wanted to make another one – then along came fruit cake #2, Sandringham cake, as per a previous post……

Ingredients

225g softened butter or baking spread (I used Flora Buttery)

225g caster sugar

4 eggs

225g self raising flour

100g ground almonds

½ tsp almond essence

450g mixed dried fruit

25g flaked almonds to decorate

Method

Preheat the oven to 160C / 140Fan / gas mk 3.  Butter a deep 20cm springform cake tin and line the base and sides.

Cream the butter or spread and sugar with an electric whisk until light and fluffy.  Beat in the eggs one at a time.

Fold in the flour, almonds, and extract and mix thoroughly.  Add the fruit and mix well.

Spoon the mixture into the prepared tin and level the top.  Scatter the flaked almonds evenly over the top.

Bake for 1½ – 2 hours until done.  (Mine took 1¾ hours.)  Cool in the tin.

Cuts into 12 slices.

September 11, 2018

A TALE OF TWO COCONUT CAKES and a reminder that you should never judge a cake by its icing.

coconut cake2coconut cake
I am a fan of coconut in cakes and for our July Cake Club meeting where the theme was “flowers” I decided to make a coconut and rose cake.  Decorated with fresh roses and sitting on one of my favourite cake stands on the table, it looked very pretty but when I took a bite of the first slice it turned out to be an embarrassing disappointment.  There was rose water in the cake and the icing but you could hardly taste it and the cake itself was very dry.
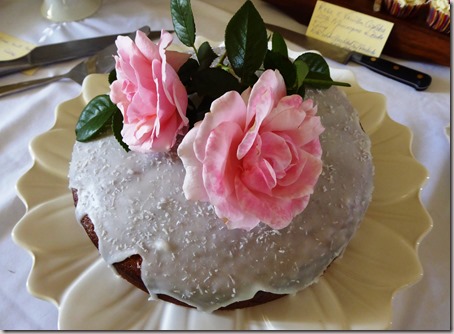
Goodness only knows what I did wrong but you can see the recipe here.**  I was so miffed that it turned out so badly that I’m half tempted to revisit the recipe and try again, maybe with a little tweak or two but in reality it will probably never happen.  Unless of course I just take a simple, reliable, coconut cake recipe and add some rose water…..hmmmm………

coconut cake3
Anyway, in sharp contrast this rather ordinary looking cake turned out to be absolutely gorgeous!  It’s a coconut and banana cake and I found the recipe on the Guardian website here.**

coconut cake5
Included in the recipe are instructions for a Malibu drizzle and/or a Malibu and coconut buttercream filling.  The first time I made the cake unexpected guests turned up and the cake got cut without its drizzle.  It was delicious.
The second time I made the cake was for a charity event and I gave it away, complete with the drizzle, so didn’t get the chance to taste the difference.  I imagine it would have been lovely but I’ll have to make it a third time to confirm!  That will be no hardship of course, although there are very few cakes that I make more than once…….so many cakes, so little time.  I’m not sure I would bother with the buttercream but you never know – I might even have to make the cake a fourth time to decide if it really needs it or not!
Which just goes to show that a gorgeous looking cake can disappoint but an ordinary one can be delightful.  Never judge a cake by its icing!

*Having made the cake again, this time with its Malibu drizzle icing, I can confirm that it does make a difference.  I found the quantity of icing in the original a bit too much so have amended it in the ingredients given here.
I'm not sure that I could be tempted to add the Malibu buttercream as well - maybe if I made it as a round cake……..

**Both of these recipes have now been removed from the internet.

Banana and coconut cake
Ingredients
170g caster sugar
170g softened butter or baking spread
170g self raising flour
1 tsp baking powder
2 medium ripe bananas, peeled and mashed
100g desiccated coconut
3 eggs
1 tsp vanilla extract
For the drizzle
1-2 tblsp Malibu (or you could use fresh lime juice)
100g icing sugar
Method
Butter and line a 2lb loaf tin (I used a paper liner).  Preheat the oven to 160° C / 140° fan / gas mk3.
In a large bowl, cream together the butter, sugar and vanilla until light and fluffy.  Beat in the eggs, one at a time with a spoonful of the flour and a spoonful of banana.
Sift in the remaining flour, add the coconut and banana and mix well to combine.
Pour into the prepared tin and level the top.  Bake for 50-60 minutes or until done.  Leave in the tin for ten minutes then remove to a wire rack to cool.
While the cake is cooling, make the drizzle by mixing together the Malibu and sifted icing sugar.  Make holes in the cake with a skewer and while it is still warm pour the icing over the cake so that some sinks in and some dribbles down the sides.
(Refer to the recipe in the link if you wish to fill the cake with the coconut buttercream.)

Cuts into 10-12 slices.

October 29, 2017

STICKY TOFFEE LOAF CAKE

sticky toffee pudding cake

Nick made this cake for the last CCC meeting.  I had made it myself (and blogged about it) a while ago and when I looked it up it turns out that that was three years ago – how time flies!  I remembered that it was a delicious cake, full of spice and just right for early autumn, with its dates and pecans.  You can read about it here.

sticky toffee pudding cake3sticky toffee pudding cake2

Autumn arrived unusually early in our little corner of France.  Considering that the cake club meeting was on 27th September, looking at the photos you would think that it was a month later.  September is usually a glorious month in the Loire Valley, warm and sunny, with all the joys of summery days without the baking heat of say July and August.  This year September was disappointing, cool and showery.  (Apparently October has been better – but we were not there to enjoy it, sadly.)

It was definitely a “mists and mellow fruitfulness” kind of day when Nick baked his cake and I had to take the cake outside to get enough light to take its picture.

sticky toffee pudding cake4

The cake is made to a Delia Smith recipe – Nick is very much a fan of Delia – and rightly so.  I can’t recall having too many failures with any of her recipes.

This time we decided that we liked the rustic look of the cake without its icing so decided not to ice it.  That was a good decision I think.  Sometimes an icing is called for but on this occasion the cake was perfectly delicious without it.  (For those who like the intense sweetness of a sticky toffee pudding, the icing would satisfy the need.)

It kept really well for several days.  Chunks of it sustained us on our long, twelve hour journey back to Derbyshire from the Loire.  The last few pieces kept us going and our spirits up when we faced the first tranche of building work on our new house in the UK.

You can see the original recipe with the iced version here.

Ingredients

1 tsp mixed spice

2 tsp ground ginger

1 tsp bicarbonate of soda

110g chopped dates

50g pecan nuts, chopped

110g Flora Buttery (or similar, such as Lurpak Spreadable)

50g black treacle

175g golden syrup

150ml milk

2 eggs, beaten

225g plain flour

Method

Preheat the oven to 150˚ C / 130˚ fan / gas mk 2.  Line a 2lb loaf tin with baking parchment or use a paper liner.

Put the butter, treacle and syrup in a large saucepan over a low heat and melt them together.  (Warming the tin of treacle in a saucepan of hot water will help to make it easier to measure out.)

Remove from the heat and allow to cool slightly, mix in the milk then the beaten eggs.  Sift in the flour, spices and bicarb, whisking in gradually until smooth.  Add the nuts and about two thirds of the dates, mix well and pour into the tin.  Drop the remaining dates onto the top of the cake and push them in a bit with a skewer.

Bake on a low shelf for 1½ hours to 1 hour 50 minutes until done, risen and cracked on the top.  Cool in the tin for 30 minutes then turn out onto a wire rack to cool completely.

Cuts into 10-12 slices, depending on how thick you like you slices of cake.

February 7, 2017

VALENTINE SURPRISE CAKE

Valentine surprise cake6

This cake was made by Nick for our Clandestine Cake Club meeting last February.  The theme was loosely based on St. Valentine’s Day and he simply Googled “Valentine cakes” and this came up first!

Valentine surprise cake4

Nick being Nick, he followed the recipe, line by line, to the letter and the end result was stunning.  He made an enviably beautiful and glossy ganache to cover it and decorated it with pink roses and little pink hearts that he chose himself.  Bless…….

Valentine surprise cake

Essentially the recipe makes two almond sponges, which have a lovely flavour and texture.  One is coloured and flavoured with cocoa powder, then cut into sections with a heart shaped cutter. 

You bury the heart shaped pieces in a log fashion inside the second cake before you bake that and therefore end up with a chocolate heart running through the length of the second cake.  Very effective and remarkably easy to do.

The only slightly disappointing thing was that the hidden heart was not very red in colour even though it contained a whole bottle of red food colouring .  Comments on the website indicated that other people had found this but it’s hardly surprising considering the cake contained so much dark brown cocoa powder to overcome.  The hidden heart in Nick’s cake had a slight hint of red, so that was fine.

We_Should_Cocoa_Logo

You can see the original recipe here.  I am entering this post into this month’s We Should Cocoa Challenge, from Choclette over at Tin and Thyme.  You can see the details here.

Valentine surprise cake5a

Ingredients

For each cake (we made the chocolate cake for the centre first and the second cake the next day.)

175g butter, softened.  (we used Flora Buttery)

175g golden caster sugar

3 large eggs

140g self raising flour

½ tsp baking powder

85g ground almonds

100ml milk

1½ tsp vanilla extract

For the chocolate centre

3 tblsp cocoa powder

1 bottle red food colouring

For the icing

100ml double cream

200g dark chocolate, finely chopped

50g unsalted butter

roses, hearts or other decorations of your choice

Method.

Preheat the oven to 160°C / 140° fan / gas mk 3.  Butter a large 900g loaf tin and put a strip of baking paper along the bottom and up the sides.

For the chocolate cake, cream the butter and sugar together until light and fluffy.  Beat in the eggs one at a time.

Sift together the flour, baking powder and cocoa powder then fold into the mixture along with the ground almonds.  Mix together the milk, vanilla and food colouring and add to the mixture, mix in until evenly combined.

Pour the mixture into the prepared tin and bake for 60-70 minutes until the cake passes the skewer test.   Cool in the tin for 10 minutes then turn out onto a wire rack to cool.

When the cake is cold, cut it into a heart shaped log by using a 5cm (approx) heart shaped cookie or pastry cutter.  To do this, measure the depth of your cutter and slice the cake into thick slices of this depth.  Lay the slices flat on a board and cut out a heart shape from each slice.  

The heart shaped slices will be laid end-to-end inside the second cake and inevitably there will be quite a lot of unused cake.  We used ours to make a chocolate trifle later but you can use your imagination – or just eat the pieces as they are.

Make a second batch of cake mixture exactly like the first except that there will be no cocoa powder or food colouring to include.

Pour two thirds of the mixture into the prepared loaf tin and then carefully lay the heart shaped pieces of chocolate cake, point downwards, side by side in the mixture so as to form a heart shaped log end to end along the length of the tin.  Carefully spoon the remaining mixture around and on top of the hearts and bake for about an hour until the cake is golden brown and passes the skewer test.  Cool as before, then turn out.

To make the icing, put all the ingredients together in a small saucepan and heat gently until combined.  Allow to cool then spread over the cake and add decorations of your choice.

Cuts into 12-16 slices.

June 12, 2016

MINI FRAISIERS

fraisiers

I spotted some lovely looking strawberries in the supermarket recently – sadly we don’t grow any of our own, one day perhaps.  Wondering what to do with them I had an urge to bake a  Fraisier Cake.  Or possibly even mini ones.

fraisiers2

I began looking at recipes and remembered that some of the contestants on Great British Bake Off had an awful lot of trouble with this cake one year.  If my memory serves me right, it was a technical challenge set by Mary.  When I looked at her recipe online it said “tricky to achieve, but certain to impress”.  Alarm bells started ringing in my head.

You can see the recipe here.  It requires home made sponge, crème patissière and a layer of marzipan.

Now I have to say that making crème patissière is not one of my strong points.  In fact I have only ever made it twice before and on both occasions it didn’t thicken.  Most disappointing when everyone and their grandmother seems to be able to whisk up a crème pat with effortless ease and it turns out perfect every time.  (I have the same trouble with scones.  Everyone seems to be able to make perfect scones but not me.  You could build houses with mine.)

Then I found a James Martin recipe online for a Fraisier, called “cheat’s strawberry gâteau”, where he uses shop bought sponge flan for the top and bottom layers.  You can see that recipe here and it gave me an idea.

fraisiers3

Mary’s recipe included a home made fatless sponge for the base and top.  I’m good at making fat free sponges but time was an issue so I decided to go with James’ bought cake version.  I really wanted to make individual cakes for a special evening with guests but I could imagine myself getting into a terrible mess trying to construct them and turn them out so that they looked half decent.  So instead, I decided to make them as desserts, in little glasses.

They were a huge success.  I even made crème pat and it set perfectly.  I used this recipe here.  I used shop bought cake which in France is called “quatre quarts” and its nearest equivalent in the UK would be a madeira cake.  I used French cream, beaten and thickened with something called “Chantifix”, which is guaranteed to always thicken your cream and is good as long as you don’t mind the added sugar – which in this case I didn’t as I was aiming for a chantilly effect.  In the UK double or whipping cream, sweetened with a little icing sugar would do the same job.

The ones without any alcohol for the children were marked using cocktail sticks, so that there could be no uncertainty.

LoveCakelinklogo

This month’s Love Cake theme is “no bake”, which, because I (couldn’t be bothered) didn’t have time to make my own sponge means that the mini Fraisiers fit perfectly.  You can see the details here.

Ingredients

I shop bought madeira cake or quatre quarts

1 punnet of strawberries

8 tsp Cointreau

250ml double or whipping cream, or crème entière and a sachet of Chantifix

For the crème pat

4 egg yolks*

65g caster sugar

15g plain flour

15g cornflour

350ml whole milk (I used semi skimmed and it was fine)

½tsp vanilla extract

icing sugar for dusting.

Method

You will need 8 glasses, tumblers or dishes of a suitable size.

First, make the crème pat.  Whisk the egg yolks and sugar together in a large bowl using an electric whisk, until they turn pale and thick.  Whisk in the cornflour and flour.

Put the milk and vanilla into a medium saucepan and bring to a gentle simmer.  Remove from the heat and allow to cool for 30 seconds.

Very slowly pour half of the hot milk onto the egg yolks, whisking all the time.  Pour the mixture back into the pan onto the remaining milk.  Bring gently back to the boil and simmer for one minute, whisking all the time, until smooth and thickened.

Pour the finished crème pat into a clean bowl and dust with icing sugar to prevent a skin forming.  Sit the bowl on top of another containing iced or very cold water to cool.

Slice the cake into thin slices about 1cm thick then, using suitable pastry cutters, wine glass rims or jam jar rims, cut 8 large and 8 small circles of the right size to fit the base of your chosen glasses.  Put a smaller circle in the bottom of each dish and splash over a teaspoon of Cointreau. (Omit this step for children.)   Add a layer of crème pat about 2cm thick.

Rinse the strawberries and slice them into thick slices vertically.  Push slices into the crème pat against the sides of the glass.  Just slice a few at a time as it’s not easy to say exactly how many you will need.

Whisk the cream until thick (follow the instructions on the Chantifix packet if using) and fill each glass up to the top of the strawberries, making them all even in fullness.

Place a larger disc of cake on top of the layer of cream and dust with icing sugar.  Add half a strawberry for decoration.  Put slices of strawberry on a cocktail stick to identify any alcohol free portions.  Chill in the fridge until needed.

*I have anguished many a time over what to do with unused egg whites.  Meringues are another of my not very strong points.  I have occasionally resorted to throwing them away after they have lurked in the fridge and haunted me for a few days.  I now discover that if you simply cook them in a saucepan like you would make scrambled egg with a whole egg, the dog loves them with her breakfast.  One conscience eased and one very happy dog!

Serves 8.