I looked through all my French themed cookbooks for a recipe. There were more for savoury dishes than sweet ones but I really wanted to make a dessert. I found one in Rick Stein's wonderful book "Secret France" which is based on the equally wonderful TV series of the same name. In the days when we were only part-time in France we would watch our recording of the series to help us get through grim Derbyshire winters until we could return to our house in France in the spring. You can see his recipe here.
August 24, 2026
FIG AND FRANGIPANE TART
I looked through all my French themed cookbooks for a recipe. There were more for savoury dishes than sweet ones but I really wanted to make a dessert. I found one in Rick Stein's wonderful book "Secret France" which is based on the equally wonderful TV series of the same name. In the days when we were only part-time in France we would watch our recording of the series to help us get through grim Derbyshire winters until we could return to our house in France in the spring. You can see his recipe here.
July 27, 2026
EASY FRENCH APPLE TART (tarte fine aux pommes)
Many recipes for this simple apple tart have a layer of cooked apple under the apple slices but his recipe uses a layer of marzipan. This very much appealed to me as apple and almond are a great combination. I also had a pack of ready made marzipan in the cupboard and a roll of puff pastry in the freezer.
I trimmed the pastry to a slightly smaller size (by about 2cm all round) so that it would definitely fit on my baking sheet and also the plate I had earmarked for serving it.
I followed the recipe pretty closely except that when it came to glazing the finished tart I used apricot jam for that "patisserie" look rather than melted butter.
It was a delicious tart, looked great and tasted wonderful. Next time I would probably pack in more sliced apples but otherwise it's a lovely dessert which looks way more difficult than it actually is to make.
Ingredients
1 pack ready made, ready rolled puff pastry
3-4 eating apples
1/3 (approx) of a 450g block of ready made marzipan
1 egg, beaten
50g butter, melted
2 tblsp caster sugar
2 tblsp apricot jam*
Method
Line a large baking sheet with baking paper. Preheat the oven to 200°C / 180° fan / gas mk 6.
Unroll the pastry and trim to fit your serving plate. Mine was circular as most French pasty comes in circles but an oblong or square tart is also good as long as you have a suitable serving plate.
Prick the pastry all over with a fork.
Slice the marzipan very thinly and lay the slices over the pastry leaving a small margin at the outside. It needn't look too pretty as it melts into a homogeneous layer under the apples.
Peel, core and thinly slice the apples*. Arrange them in a neat pattern over the marzipan leaving as few gaps as possible. Concentric circles work on a round tart and opposing rows or diagonals look good on square or oblong pastry. There are lots of ideas for inspiration on the internet if you Google "French apple tart images".
Brush the apples carefully with the melted butter and sprinkle over the sugar.
Bake for 20-25 minutes until the apples are tender, the pastry is golden brown and the marzipan bubbling at the edges. Remove from the oven and allow to cool until just warm.
Put the jam into a small saucepan and heat gently until melted. Brush carefully over the apples so as not to disturb the pattern.
Serve warm or cold, with cream or ice cream.
Serves 8-10 portions.
*Cheap apricot jam works best as it has less real fruit in it and therefore fewer lumps of apricot! You can of course pick out or sieve out the lumps or Sainsbury's sell small jars of apricot glaze which is perfect for the job. Personally I don't mind a tasty lump or two of fruit in my glaze for that home made look!
*Peeling the apples is optional, as seen in some of the Google images.
December 10, 2025
EMERGENCY MINCEMEAT
July 7, 2025
PLUM (OR NECTARINE) TART (can be gluten free)
The plum version before baking.
There is no pastry involved so some would ask - how can it be a tart? I spent a happy few minutes looking up the definitions of cake, tart, torte and gateau and came to the conclusion that although it was definitely not a cake, a flan or a pie I still had no idea! In any case it went down well for dessert at a BBQ one very hot June evening.
The plum version when cooked.
The first time I made this it was definitely a bit overdone - the plums looked a bit crozzled and it was a devil to get out of the tin. Only when I made it the second time did I realise that I had baked the first one at 160° fan instead of 160° C. A casualty of the debilitating heat - it had reached 39°C during the day and my concentration withers exponentially over 30°C!
The nectarine version - much less crozzled.
For the second time I used nectarines, didn't cram quite as much fruit in, and kept the slices away from the sides of the tin, which definitely made it easier to turn out, baked it at the right temperature and kept my eye on it. With its apricot glaze it had that patisserie glamour. It tasted great too.
Stoning the fruit can be a bit fiddly. An old fashioned grapefruit knife came in handy for getting the stone out of some of the firmer fruits. Changing the ordinary flour for gluten free flour (e.g. Doves Farm) will make it a gluten free dessert and a handy recipe to have instead of pavlova.
Ingredients
For the cake base
zest of 1 lemon
2 tsp lemon juice
30ml whole milk
125g softened butter or baking spread (I used Le Fleurier)
125g caster sugar
1 egg
125g plain flour or gluten free flour
125g ground almonds (or half and half ground almonds and ground rice)
For the topping/fruit
10-12 ripe plums or 3 large nectarines
2 tblsp apricot jam
Method
Butter the base and sides of a 23cm loose bottomed tart tin.
Put the milk and lemon juice into a small bowl or jug, mix together and set aside
In a large bowl, cream together the butter, lemon zest and sugar. Add the egg and beat well until well combined.
Fold in the ground almonds (or almonds and rice), then the flour followed by the thickened milk.
The mixture will be quite thick so transfer it to the prepared tin and level with the back of a spoon or small palette knife. Smooth the surface as much as possible then put the tin in the freezer while you prepare the fruit.
Cut each plum or nectarine in half and remove the stone. Cut into quarters and slice thinly. Plums should make 8 slices each, nectarines 12 slices.
Preheat the oven to 160°C / 140° fan / gas mk3.
Remove the tart case from the freezer and arrange the slices of fruit neatly in circles on top of the cake base.
Stand the tart tin on a baking sheet and bake in the oven for about 1 hour. The fruit should be tender and the cake base lightly golden and cooked.
Remove from the oven to cool slightly. Remove the tart from the tin and place on a serving plate.
To make the glaze, warm the apricot jam in a saucepan with 1 tblsp water. Brush over the fruit.
Serves 8-10.
This is my gluten free version, made with apricots. The cake base is as per the recipe above but using half and half ground almonds and ground rice, plus gluten free flour.
May 3, 2025
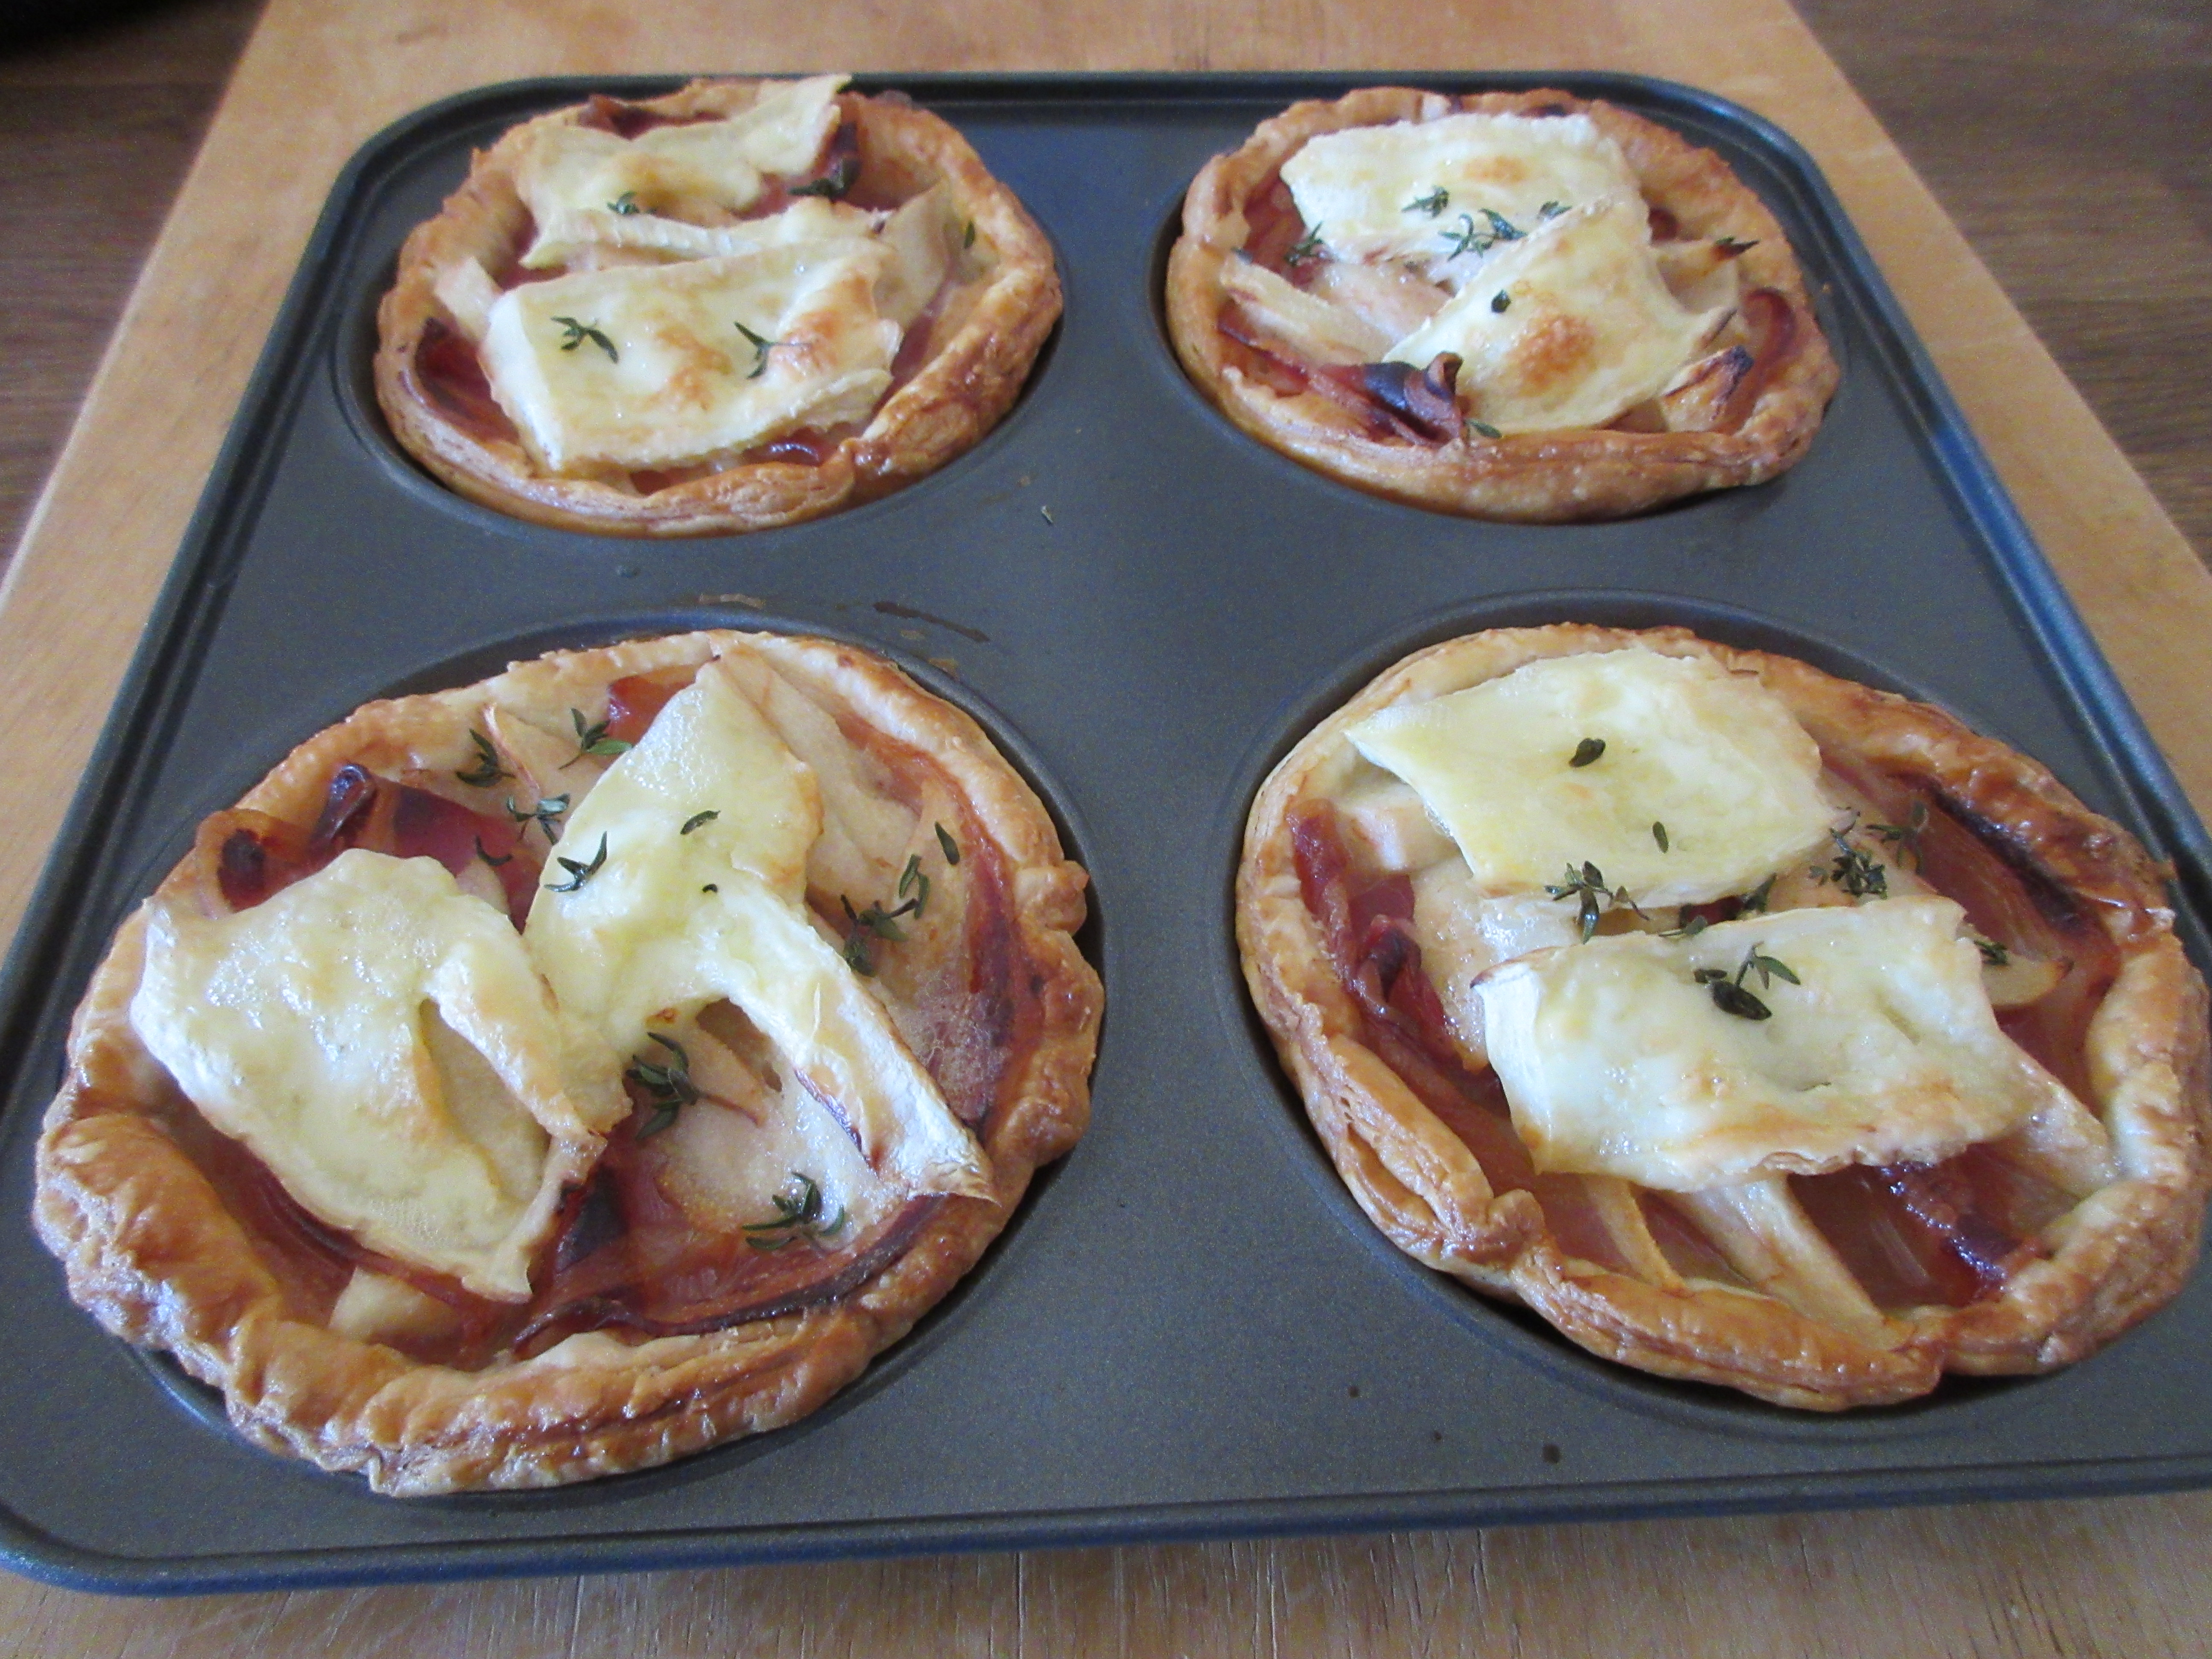
PROSCIUTTO, PEAR AND BRIE TARTS
These tarts came about after a lucky find at the local déchetterie. Three apparently brand new Yorkshire pudding tins on the table where people leave good useable items for others to help themselves to. I don't think I have seen tins like this for sale in France so suspect they came from an English household. We will never know!
I spotted them and swooped before anyone else did - the table is, I suspect, a good source of items for people to increase their own stock for sale at brocantes!
Thinking they would be great for making not Yorkshire puddings but small tarts for a starter or lunch, I took them home. Not long afterwards I stumbled upon a recipe for Prosciutto, pear and Brie aperitif sized tartlets, that could be adapted for larger versions.
They worked really well, looked slightly rustic but were tasty and the perfect size for a light starter. The only tricky part was finding the right object to use as a template to cut circles of pastry exactly the right size. It needed to be about 1cm larger in diameter than the holes in the tin so that there was not too much overlap or shrinkage. I tried various saucers, jars and plates but eventually found a terracotta dish at the back of the cupboard that was just right. It later occurred to me that we have a selection of new plant pot saucers that I could have tried!
One pack of pastry will make four tarts of this size with trimmings which can be made into something else, such as sausage rolls, mince pies, jam tarts or cut up and frozen to be used as the topping for a jumblefruit pie. I imagine that the recipe would work well with other fillings too, such as smoked salmon, mushrooms, lardons, and many other cheeses.
Ingredients
A pack of ready made, ready rolled puff pastry
8 rashers of prosciutto (or similar)
1 pear
8 slices of Brie
1 egg, beaten
A few sprigs of fresh thyme (optional)
Method
Remove the pack of pastry from the fridge about 15 minutes before you intend to use it, otherwise it can crack when you unroll it.
Grease the four holes of a Yorkshire pudding tin, or similar tart tins. Preheat the oven to 200°C / 180° fan / gas mk 6.
Unroll the pastry and cut out 4 circles using a cutter, template, dish or clean plant pot saucer about 1 cm larger in diameter than the holes in the tin. Press gently into the holes, avoiding leaving a bubble underneath the pastry. Crinkle 2 slices of prosciutto into each tart.
Peel the pear and cut in half vertically. Remove the core using a melon baller or teaspoon and slice thinly. Divide the slices between the tarts and arrange on top of the prosciutto.
Lay two slices of Brie on top of the pear. Brush the edges of the pastry with the beaten egg. Sprinkle thyme leaves over the top.
Bake for 20 minutes until the pastry is golden brown and the cheese has melted.
Serve warm. Can be made ahead and reheated from cold in a hot oven for a few minutes.
May 3, 2024
NOUGAT DE TOURS
There are plenty of recipes on the internet but in the end I adapted one by my friend Susan which you can see here. I used strips of candied orange peel rather than marmalade and then went slightly off piste adding some chopped green and red glacé cherries as well. Then I went even more off piste and slightly wrong.
To begin with I had chosen entirely the wrong baking dish, a round Pyrex one, simply because it was to hand and easier than trying to wrestle my loose based tart tin from the back of the cupboard. Then, as I was spreading the almond topping over the tart there seemed to be barely enough to cover it and it wasn’t until the tart was in the oven and I started stacking the dishwasher that I spotted the third egg white in its little pot on the kitchen worktop!
(When cracking the eggs for a meringue I usually drop the white into a small pot or cup and add them individually to the bowl. I've done this ever since the time that the fourth egg white for a pavlova contained a blob of unwanted yolk as I dropped it into the mixing bowl with the others!)
It was also the devil's own job to get slices of the tart out of the dish in one piece. Definitely not the best looking tart I have ever made but tasted delicious so I made a second one a couple of weeks later using the right tin and all three egg whites!
That one turned out much better and will teach me not to be so lazy and to pay more attention to what I’m doing in future! Mind you, both tarts were equally delicious!
It also occurred to me that mini versions, along the lines of the old Be-Ro tartlets, might work very well. I shall have to try that when the opportunities presents itself.
This is the tart we had at Le George and the topping was, I think, more like a Bakewell almond sponge than macaroon, but it set us on a little culinary adventure and Nougat de Tours will be on the menu regularly from now on.
~~~~~~~~~~~~~~~~~~
Susan's post is worth reading because she explains the history of the tart including the use of local jams. My jam was an apricot made from local trees by a friend that lives two miles away! The jar of apricot is now all used up and the next one in line is her peach jam. Tah-dah!
Ingredients
1 pack of sweet pastry
A layer of apricot jam, around 150g
A layer of chopped candied peel and a few chopped glacé cherries, around 150g
75g ground almonds
75g caster sugar
3 egg whites
2 tblsp icing sugar
Method
Remove the pastry from the fridge 20-30 minutes before you want to use it, otherwise it might crack when you unroll it.
Preheat the oven to 200°C / 180° fan / gas mk 6. Butter the base and sides of a 20cm loose bottomed tart tin.
Unroll the pastry and use it to line the tart tin, leaving the edges untrimmed and draped over the edge of the tin.
Spread a generous layer of jam over the pastry then scatter a generous layer of chopped peel over the top.
To make the topping, put the egg whites into a large bowl and whisk until stiff. In another bowl mix together the ground almonds and caster sugar then fold them carefully into the egg whites.
Spread the topping evenly over the fruit, making sure not to leave any gaps at the edges. Sprinkle with icing sugar, leave for a few minutes then sprinkle again.
Stand the tart on a baking sheet (this removes the risk of accidentally pushing the loose bottom up on removing the tart from the oven) and bake for 30 minutes. Cover with foil if it looks too brown after 20 minutes. Remove from the oven, remove the foil and cool in the tin.
When cool, carefully snap off the overhanging pastry and lift the tart onto a large can of food or small upturned bowl and ease the outer ring so that it drops down. You can then serve the tart from its metal base or transfer it to a flat serving plate by using a large cake lifter.
Cuts into 8-10 slices.
January 29, 2024
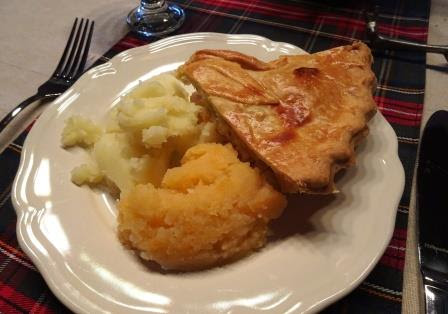
VEGETABLE PIE
For our our Burns Night Supper I had planned to make Scotch pies for the main course, which are made with lamb or mutton. One of the guests eats no red meat, only fish or chicken, so I wondered about making a vegetable version. I was not sure how well it would hold together so made a large top crust pie instead.
A common term for this kind of pie nowadays is a "pot pie". It’s basically a pie filling topped with either shortcrust or flaky pastry. This one was served with tatties and neeps - mashed potatoes and swede - but normally it would be good with a pile of greens - sprouts, broccoli, cabbage or beans.
The first time I made this pie was about fifty years ago. I was a student, just married to husband number one, and money was very tight. I remember it so well because we had asked friends round for dinner, which was my very first dinner party. We couldn’t afford enough meat of any kind for four people but I had spotted a recipe for vegetable pie in a magazine in a waiting room somewhere. It was essentially cooked veg in a cheese sauce with a pastry top.
I baked it in the Pyrex pie dish that came in a set with a mixing bowl and jug as a wedding present. I still have and use the pie dish and bowl. For this pie I included some broccoli but back then I’m sure I would have used brussels sprouts. If broccoli had been available it would have seemed far too expensive and exotic. I would have made the pastry myself from flour and lard as I’m not sure that ready made pastry - even if I could have afforded it - was a thing in the early seventies.
I also remember that we served grilled grapefruit as a starter and crème caramel for dessert. Remember those?!
Ingredients
1 pack of ready made, ready rolled shortcrust pastry
1 large carrot
1 large leek
1 chunk of swede
1 stick of celery
A few florets of broccoli
A chunk of broccoli stalk
1 egg, beaten
For the cheese sauce
1 heaped dessertspoon of plain flour
1 large knob of butter
1 pint of milk
50g of grated cheese such as cheddar
A pinch of mace or mustard powder
Method
Preheat the oven to 180°C / 160° fan / gas mk 4.
Peel the carrots and swede and chop into small dice of about 1cm. Wash and thinly slice the leek and celery. Trim the broccoli stalk and chop into 1cm dice.
Put all the vegetables apart from the broccoli florets into a large saucepan, cover with water and bring to the boil. Cook for 10-15 minutes until cooked but still firm, adding the broccoli florets for the last few minutes so that they don’t get too soft. Drain the veg and tip back into the pan.
To make the sauce put the flour, butter and about half of the milk into a medium saucepan and bring gently to the boil, whisking all the time until it thickens. Add enough of the rest of the milk to get the thickness you want, remembering that the cheese will also thicken it up slightly. You should aim for a "coating" consistency, i.e. a bit thicker than "pouring " and not too runny. Add the cheese and spice, and a little more milk if needed. It’s easier to thin the sauce by adding more milk than to thicken it up if it’s too thin!
Add the sauce to the veg, season with salt and pepper and stir well until the veg are all coated. Tip into a suitable pie dish, top with the pastry and decorate with leaves made from the trimmings. Make a hole in the middle to let out the steam, plus a few around the edge, brush with beaten egg and bake for 25-30 minutes until the pastry is golden brown. Rest for a few minutes before serving.
Cuts into 6 generous servings.
January 27, 2024
SCOTCH PIES
Haggis is not to everyone’s taste but I have enjoyed it in the past. It’s now one of the items we are no longer permitted to bring into France post Brexit. All meat and dairy products are banned so those expats who used to buy a couple of haggis during their Christmas UK visit to bring back to France for their Burns Suppers have to either smuggle them in their luggage or get creative. In a moment of pure insanity I proposed that I should make Scotch pies. How hard can they be?!
There is a recipe on the BBC Good Food website by Paul Hollywood which comes from his TV series "Pies and Puds". You can see the recipe here. It includes a video of how to construct the pies but I can’t view it from outside of the UK! ** Luckily I also have a copy of the book from the TV series, a charity shop find, and there’s a couple of pages of helpful photos.
To say they are fiddly is a gross understatement!
I practised two days before the event using some leftover roast pork from our Sunday lunch, scaling down the ingredients to make just two of them. I had never made hot water crust pastry before and the two pies took me about an hour to make, plus baking time. BUT they looked the part and were delicious! I was very proud of them. However, it dawned on me that at the rate of production it could literally take me all day to make the six I needed for the evening’s festivities and there was also the tatties, neeps, cock-a-leekie soup and cranachan to make!
I decided that the way to go was to cook the lamb the day before and mince it for the filling "shepherd’s pie" fashion. No risk of serving undercooked meat to our guests. I also decided I would make them in the morning and reheat for dinner. No risk of me still being up to my elbows in flour and pastry when the guests arrived!
I set to early, deciding to make the pies one by one as I thought that would be easier than rolling out such a huge amount of pastry. The website instructions are for four pies and the book for eight so I split the difference and portioned out the pastry for individual pies.
*Moulding the pastry around the filling is immensely fiddly. I found that for me the quickest way to get them made was to put a ball of filling in the middle of a circle of pastry, pat it down a bit, brush the edge with water and then place a circle of pastry for the lid straight on top. I then brought the bottom pastry up to meet the lid at four points, north, east, south and west, pinching it together to secure it. I then gathered up the rest of the pastry, pleating to fit, and pinched the edges together. This got my production time down to less than ten minutes per pie from rolling out to stringing up!
They were not the prettiest pies you have ever seen but they were really tasty and went down well with our guests. I have given the quantity of ingredients for six pies and my own adaptions to the recipe but suggest you look it up and work out your own best method! I have given it three stars in the faff factor but in reality they were about three and a half - incredibly fiddly but very definitely worth it!
Next time I think I would try to make them a bit smaller!
Ingredients
For the filling
900g cooked lamb
A pinch of mace
1 onion, cooked. Mine had been roasted under the joint of lamb
For the pastry
540g Plain flour
180g Lard or other white cooking fat. I used Trex.
240ml Water
A pinch of salt
1 egg, beaten, for egg wash
Method
Begin by choosing a small plate of about 18cm diameter and a saucer or jar of about 10cm diameter. These will be used as templates to cut the circles of pastry. Cut six strips of baking paper about 30cm long and 10cm deep, folded over lengthways. These will be used to encase the pies so they keep their shape while baking. Also cut six pieces of string long enough to tie around the pies.
Mince the lamb coarsely in a food processor. Add the onion and mace and process for a few seconds until blended in.
Tip the lamb onto a board and mould into a ball. Divide into six even portions and roll each one into a smaller ball. Place on a tray or dish and chill in the fridge while you make the pastry.
Put the flour into a large bowl. Put the fat, salt and water into a saucepan on medium heat and bring to the boil. Pour this liquid onto the flour and mix in with a spoon. (The flour will fizz briefly as you add the liquid.)
When the pastry starts to come together and is cool enough to handle tip it onto a floured surface and knead until smooth. (This took longer than I expected.)
Mould the pastry into a patty and cut into quarters, setting one aside for the lids. Divide each of the three remaining quarters into two giving you six equal portions of pastry. Divide the first quarter into six equal smaller portions.
On a floured surface roll a portion of pastry into a circle of about 18cm using your plate to cut it out. Roll one of the lid portions using your jar or saucer template.
Place a ball of meat on the large pastry and flatten slightly. Moisten the edges of the pastry with water and with your hands bring the sides up around the meat. Place a lid on top and pinch them together. (*See text for how I found the best way of doing this.)
Wrap a strip of paper around the pie and secure with string. Place on a baking sheet lined with baking paper. Repeat with the remaining pies.
Make a hole in the top of each pie and brush with the beaten egg. Chill in the fridge for 30 minutes.
Bake for 35-40 minutes at 200°C / 180° fan / gas mk 6 until golden brown. Serve hot.
Makes 6 pies.
** I have since been able to watch the video on a different device and it's for a single large pie, so nothing like PH's recipe and instructions! However, if I ever want to make a large pork pie, I'll definitely give it a try!