Showing posts with label snacks. Show all posts

April 8, 2026

EGGS BENEDICT

There is a salon de thé called the "Pink and Cosy" in La Roche-Posay where they serve excellent salads, cakes and light meals.  We usually go for the eggs Benedict as the eggs are always perfect and the Hollandaise sauce delicious.  

English muffins are readily available in French supermarkets so I bought a pack and decided to have a go at making eggs Benedict myself.  I used a Jamie Oliver recipe here for the Hollandaise sauce.  (This was my first time at making my own as previously I have used a packet mix.)

It took two of us to make the whole dish.  Getting the muffins toasted in the toaster, the bacon cooked in the air fryer and the eggs poached at the same time as making the sauce seemed to be a two person job.  The sauce requires the full attention of one person and the rest is a juggling act that requires a bit more practice.  Either that or two pairs of hands and eyes in the back of your head!!   However, they were utterly delicious and well worth the effort.

You can poach the eggs in advance, plunging them into cold water when just done, then reheating in simmering water for a couple of minutes.  You can even do them the day before and keep them in the fridge overnight.  

Jamie Oliver says that the way to keep your Hollandaise sauce warm is to pour it into a vacuum flask, warming it first by rinsing out with boiling water.  Or you can try keeping it warm in your bowl over simmering water by stirring every so often until you need to serve it.

Ingredients for the sauce

150g unsalted butter

2 large egg yolks

1 dessertspoon white wine vinegar

a splash of lemon juice (I used Jif lemon)

Method

Put the butter into a small saucepan and melt over gentle heat.  Set aside.

Put the egg yolks into a heatproof bowl over a saucepan containing just simmering water.  Choose a bowl that sits firmly on the rim of the pan without rocking about and make sure that it doesn’t touch the surface of the water.  Break the egg yolks with a whisk and begin whisking.  Whisk in the vinegar.

Dribble the melted butter into the eggs and continue whisking until you have a thick, glossy sauce.  Season lightly with salt and pepper.

Serve immediately or keep warm.

For the eggs Benedict 

2 English muffins 

4 eggs

4 rashers of bacon.

 Method 

Split the muffins and lightly toast both sides.

Grill or fry the bacon until as cooked or crisp as you like it.  (I did mine in the air fryer.)

Poach the eggs to your liking (see method here).

Place a split, toasted muffin on each plate.  Top each half with a rasher of bacon then a poached egg and spoon over the Hollandaise sauce.

Serves 2.

January 12, 2026

MICROWAVED POACHED EGGS

I first wrote about how to poach an egg here.  It's the method I use when I have more than one egg to cook and it works well every time as long as the eggs are quite fresh.  If they are not so fresh the whites tend to spread a bit but they still taste good!

A perfectly cooked microwaved poached egg.

Then I spotted on the internet a way to do them in the microwave, which is very handy and quick if I just want to poach one egg for myself.  There were various methods involving mugs, cups, ramekins and other dishes, water on top, water underneath, and I had mixed results including exploded egg all over the inside of the machine!

In the end I arrived at this method and came to the conclusion that the shape of the dish has a lot to do with the success. 

My best results came from using a rather conical shaped dish.


I acquired a set of these little Pyrex dishes (not actually Pyrex but ovenproof anyway) in order to bake a batch of Queen of Puddings (see here) which were a great hit.  The worst results (exploding eggs) seemed to happen when I used a straight sided mug or ramekin.


I also found that these small jars work well as they are about the right size.  They are Weck jars and they are sold in France with paté or rillettes in them.  They have a rubber seal rather like a Kilner jar seal and being oven proof are very useful for various things.  (The lids also make good wine bottle coasters.)

As you can see, they also have a slightly conical shape.


Another rather weird thing I discovered is that the rate of success improved if I put water on top of the egg rather than into the dish before dropping the egg in!

Obviously I have no idea if there is any sensible scientific reasoning behind any of this but as it's now quite a while since I had a less than perfect poached egg using this method I decided to risk sharing it!  I dare say any conical shaped container would work as long as it's the right sort of size.

I recently discovered the quick function button on my microwave too!  One press gives it thirty seconds at 800w, two presses sixty seconds and so on.  This is very handy for cooking the egg just right!  I give it two presses but open the door and have a look when there are still ten to fifteen seconds left on the clock.  If it's not done it goes back in for five seconds more.

Finally, remember to get your toast on first as it takes longer to do than the egg and you want it to be ready on the plate when the egg is nice and hot.

Method

Drop your egg into a smallish slightly conical shaped dish, mug or pot.  Very fresh eggs definitely work best.

Put about 1 tablespoon of cold water on top.

Microwave on high (800w) for 40-55 seconds.  The time required depends on the size of your egg so give it 40 seconds and if the white is still uncooked put it back in for 5 second bursts.  It only takes 5 seconds too long for the yolk to be solid not runny.  Another extra burst may result in your egg exploding all over the inside of your microwave!

Tip the egg into a slotted spoon to drain off the water and slide it onto your toast.  


Poached egg on toast for one!

September 14, 2025

COURGETTES ON TOAST #2


Blogger friend Angela recently posted about leftovers, how not to waste them and how to make a delicious meal from what could easily be just thrown away.  Sometimes it takes quite a bit of imagination to do that.  See here.

Whilst on holiday in our gite in Brittany on a rainy day we decided to stay indoors and do some painting.  The gite was a long way from any shops so I aimed to produce lunch from what we had in rather than go on a long trek for supplies.  What we really fancied was beans on toast but we had no beans!  We did have sliced bread for sandwiches but also had half a baguette from the day before, so I decided to use that.

It turned out really well, almost like ratatouille on toast!  Very tasty and something I would do again.

However, on return from our holiday we found that our rogue courgette plant had produced these monsters!  Even with quite a bit of imagination I'm not sure we can keep them from the compost heap!

Ingredients 

A splash of olive oil

Half a small courgette 

Half each of a small red and a small green pepper, de seeded 

Four mushrooms 

Two small tomatoes 

1 tsp herbes de Provence (or a dash of chilli flakes or Worcestershire sauce would work)

A sprinkle of grated parmesan

Two eggs

Half a stale baguette

Method 

Wash and dice all the veg.  Heat the oil in a small saucepan and add the veg and herbs, adding the tomatoes last and cooking gently until soft.  Season to taste with salt and pepper.

Cut the baguette into four chunks.  Slice through into halves vertically and remove the crust.  Toast.

Serve the veg piled onto buttered toast, sprinkle with parmesan and topped with a fried egg. (Or poached, or scrambled if you prefer, but sometimes only a fried egg hits the spot.)

Serves 2.

July 27, 2025

NOGGLE END TOMATO TARTS

Our tomatoes have started to ripen but although they taste delicious they would not win any beauty contest!  They are a bit "noggly" - lumpy and bumpy with the odd split.  With a pack of puff pastry in the freezer I decided to use some of them for little tarts.

There was also a selection of bits of cheese in the fridge - we call those "noggle ends" - bits you would put under the grill on toast or in a quiche.  I used Camembert and something called Tome aux Fleurs, a hard cheese with a crust of flower petals, which you can read about here.  Grated cheddar would have worked well.

Also lurking in the fridge was a small pack of cocktail frankfurters, purchased for some long forgotten event and never used but fortunately well within date. 

I used my free Yorkshire pudding tin (see here) to make four tarts but this time used a slightly bigger template to cut the pastry allowing me to crimp the edges more neatly.  (It's actually something I spotted in Ikea, is meant to be the base for one of those stainless steel kitchen tool holders and I had a hunch it would be just the right size.)

My pastry made four tarts and eight cocktail sausage rolls (recipe here) from the trimmings.  All fun to make and very tasty - a nice way to entertain children on a wet afternoon in the school holidays I think - they are very adaptable and bake in just the right amount of time to clear up then heat up a tin of baked beans!😋

Ingredients 

1 pack of ready made, ready rolled, oblong puff pastry

2 tsp French mustard (or brown sauce, onion chutney or ketchup if you prefer)

6 thick slices of tomato

Thin slices of any cheese you have (or grated cheddar if you prefer)

1 egg, beaten (optional but worth using if you are also making the sausage rolls)

Fresh or dried thyme

8 cocktail frankfurters (or one large frankfurter cut into bits or the filling from a sausage)

Method 

Preheat the oven to 200°C / 180° fan / gas mk6.  Grease the four holes of a Yorkshire pudding tin or four small tart tins (or use four ovenproof saucers placed on a baking sheet).

Allow the pastry to thaw and come up to room temperature.  Unroll and cut four circles about 2cm bigger than the holes using anything you have that’s the right size as a template.  Lay the pastry into the holes and crimp the edges.

Using the back of a teaspoon spread 1/2 tsp mustard over the base of each tart.  Add the slices of tomato, cutting to fill the pastry.  Arrange thin slices of cheese on top but leaving gaps as the cheese will melt and spread.

Brush the pastry edges with beaten egg (optional).  Sprinkle with fresh or dried thyme and bake for 20 minutes until the pastry is crisp and golden brown and the cheese has melted and bubbled.

Use the pastry trimmings to make little sausage rolls which can go into the oven at the same time.

Makes 4 tarts and 8 cocktail sausage rolls

May 24, 2025

AMUSE BOUCHE


An amuse bouche is an appetiser served before a meal usually with a drink or apéritif.  Usually it would be  blinis, dips or toasts, but sometimes something in a small glass called a verrine.  These are often layered up with  cream cheese, chopped veg or salad, chilled soup or even a mini prawn cocktail.


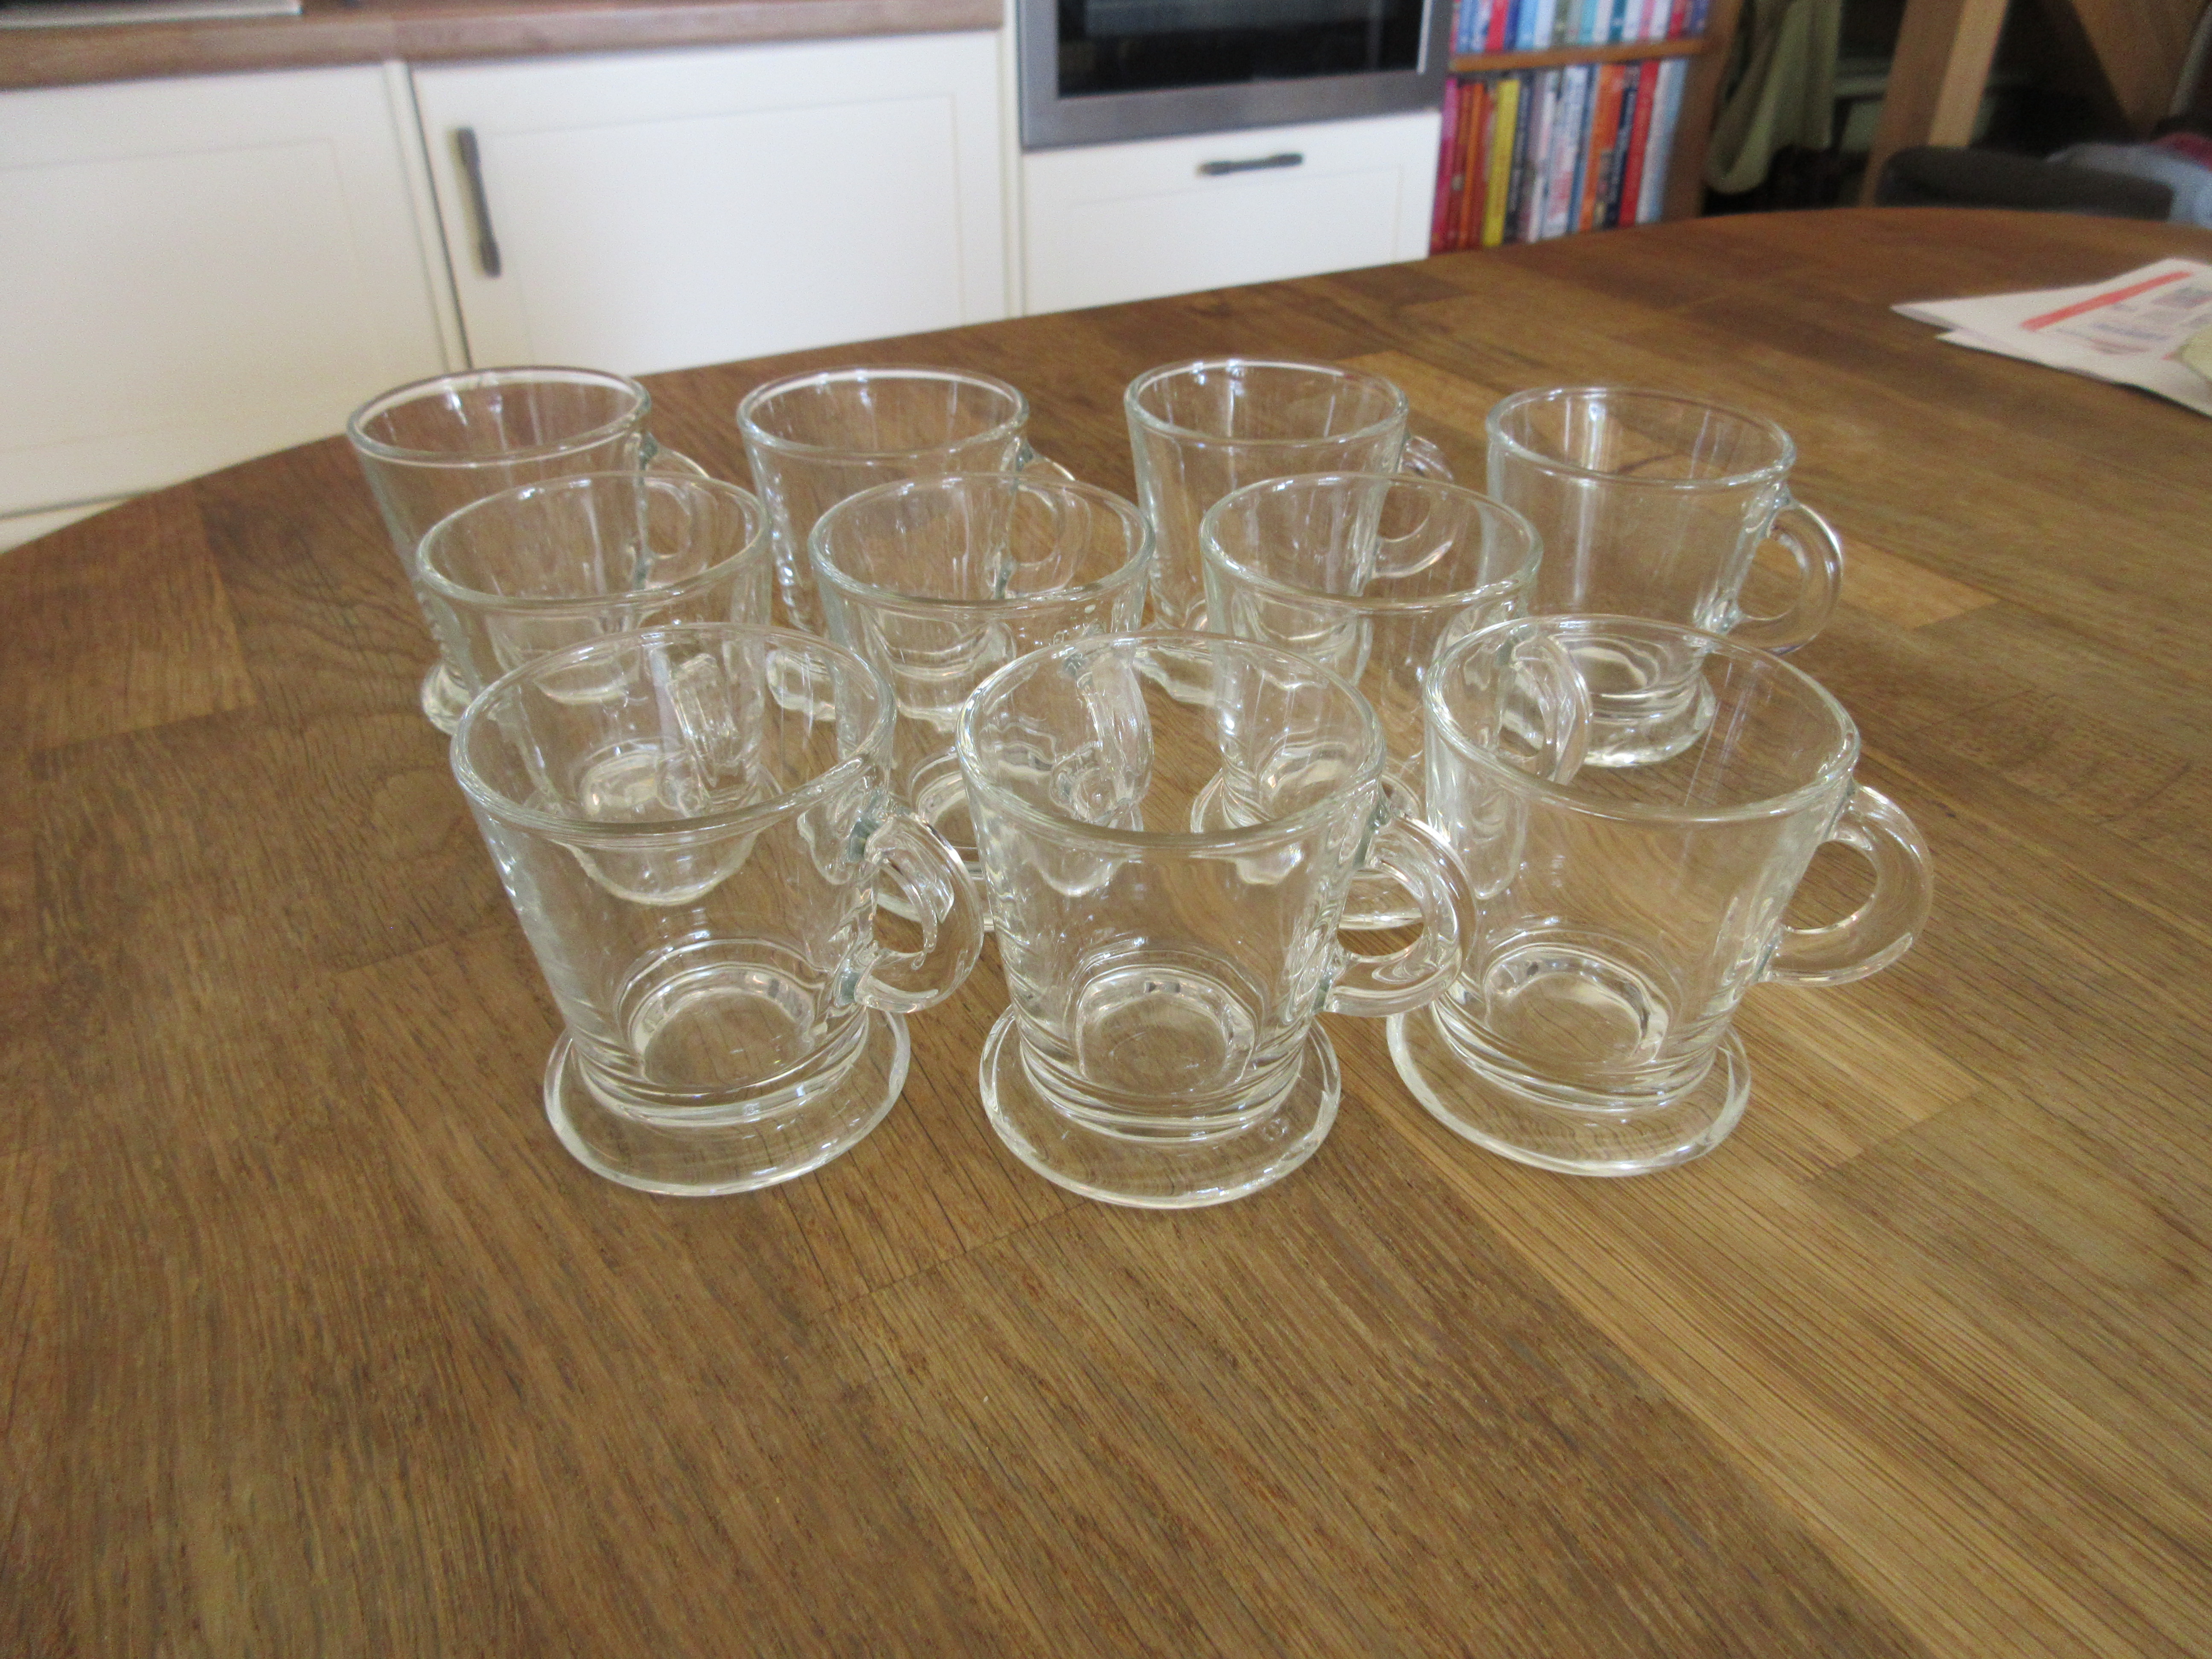
Some friends served a delicious amuse bouche a while ago (in little plastic pots) that she had bought locally and ever since I have been on the lookout for the right kind of glass or verrine.  When I spotted these glass espresso cups on a stall at a brocante it occurred to me that they would be perfect for an amuse bouche.  With a full set of ten for 3€ they were a bargain.  They could even be used for actual espressos if I was entertaining quite a crowd!  You can of course use any kind of glass of the right size but preferably glass not china so that you can see all the layers.  Mismatched glasses look very pretty too.


My first experiment was layers of whipped goat's cheese with crème fraîche, topped with chopped cooked green asparagus and finally chopped dice of smoked salmon mixed with a little lime juice, decorated with some snipped chives and an asparagus tip. For the second attempt I swapped the asparagus for chopped cucumber and decorated with a slice of cherry tomato.  

They were not quite as refined as the shop bought alternatives - a little more rustic or homely looking - but delicious!


I think I could improve the look by whipping the cheese and crème fraîche to give it more volume and  make it lighter in texture.  Piping it into the glass would make it a bit tidier.  But there was nothing wrong with the taste.  The friends I used as guinea pigs were very "amused"!

Ingredients 

2 tblsp whipped goat's cheese or other cream cheese

2 tblsp crème fraîche

1 tbslp chopped cooked asparagus stems (or chopped cucumber)

1 tblsp chopped smoked salmon

1 tsp lime juice

snipped chives

asparagus tips or cherry tomato slices to decorate

Method

Beat together the whipped goat's cheese and crème fraîche and divide between the glasses.  Mix the smoked salmon and lime juice together.  Layer the asparagus and smoked salmon on top of the cheese mixture, snip some fresh chives over, add the decoration and chill in the fridge until ready to serve.

Serves 4.  Serve with a small teaspoon or coffee spoon alongside, small enough to get to the bottom of the glass!


For a very quick vegetarian amuse bouche, which came about because of a couple of nearly empty tubs of shop bought dips in the fridge:

Ingredients 

1 dessert spoon tzatziki (a cucumber dip)
1 dessert spoon ktipiti (a red pepper and feta dip)
1 dessert spoon natural Greek yoghurt 
Chopped cucumber
Chopped pepper (red or green)
1 cherry tomato or 1 red and 1 yellow (you will only need half of each)

Method 

Stir half of the yoghurt into each dip to loosen it.
Layer up with the cucumber and pepper into espresso glasses
Top with sliced tomato
Garnish with a sprig of mint or chopped chives if you like (I didn’t get that far)
Chill for 30 minutes before serving, if you can wait that long!

Serves 2.

December 9, 2023

PARMESAN BISCUITS (canapé size)

I recently spent a happy half hour (or more) leafing through my cook books for recipes for nibbles.  We had friends coming for lunch and I found myself with the luxury of time on my hands that would enable me to do more than just spread some paté on bits of toast or put olives in a dish.

I found a Nigella Lawson recipe that I liked the look of and with all the ingredients to hand thought it worth a try.  The recipe makes a bowl full of little cheesy biscuits for now and enough mixture to freeze half of it for later.  Always a good idea in my book!

Very easy to do, delicious and highly recommended.

And then there were three!

Ingredients

150g plain flour

75g grated parmesan (I used the ready grated kind as that's what I had in)

100g butter, softened

1 egg yolk

Method

Put all the ingredients into a large bowl and mix together using an electric hand mixer until it comes together in a large clump.

Transfer to a work surface and knead briefly until smooth.  Divide roughly into equal halves.

Take one half and roll it into a log then an even cylinder about 3cm diameter, with nice flat ends.  Wrap in cling film, twist the ends to secure and chill for at least 45 minutes or until needed, by which time it should be firm enough to slice easily. Repeat with the other half of the dough.

Preheat the oven to 180C / 160 fan / gas mk4.

Unwrap one or both cylinders and slice neatly and evenly into discs about 1cm thick.  I got 20 discs from my first one (the second is in the freezer).  Some of my discs looked rather irregular in shape but miraculously turned into nice neat circles when cooked.

Arrange on a baking sheet lined with baking paper (one sheet for each cyslinder) and cook in the oven for 15-20 minutes until a pale golden brown (depending on how thick the discs are).

Makes about 20 biscuits per log.  Store in an airtight tin or box (if there are any left!).

March 18, 2021

EGG AND CRESS SANDWICHES


Egg and cress sandwiches on brown bread.

I hadn't had a home made egg sandwich for years until we attended one of the get-togethers in France organised by our friend and fellow blogger Susan.  She had formed an association called Claise Connexion where residents of many nationalities (mostly English and French) from the area around the Claise valley meet up socially every so often.  Everyone is invited to bring either a plate of finger food or something to drink.  You can read about one of the events if you go here.

At these events I have eaten some wonderful home made delicacies, French and English, also Dutch, Australian and American.  For the one I last attended I took a pile of my home made mini sausage rolls which were very popular.  To see the recipe for them go here.  Our friends Tim and Pauline turned up with a big tray of egg and cress sandwiches.  Their hens were laying well and they had lots of gorgeous free range eggs so they rustled up the delicious sandwiches, using French sliced brown bread.  They went down a storm and disappeared fast.  I had completely forgotten how yummy a plain old egg sandwich can be!

Since then I have been periodically buying cartons of egg mayo for sandwiches but they do vary in quality depending on where you buy them.  With a zoom birthday tea party coming up and a glut of eggs in the house I decided to make some myself.  How hard can it be?


To make egg mayo you need hard boiled eggs.  I always prick mine with an egg punch.


I once read somewhere that the eggs are less likely to crack and leak the white into the boiling water if you have them at room temperature and prick the shell at the rounded end to release the air.  This little egg punch produces a nice little pinhole in the egg without risk of breaking it.  You turn it to the "punch" position, push the egg firmly onto the middle and the spring mechanism pushes the disc down leaving the spike sticking up to pierce the egg.  In the locked position the spring is fixed to avoid accidents where you might accidentally prick your finger.  Of course, if you forget to unlock the punch you just smash the egg and yes, I have done that a time or two!  But I have had no cracked boiled eggs where most of the white ends up floating around in the water.


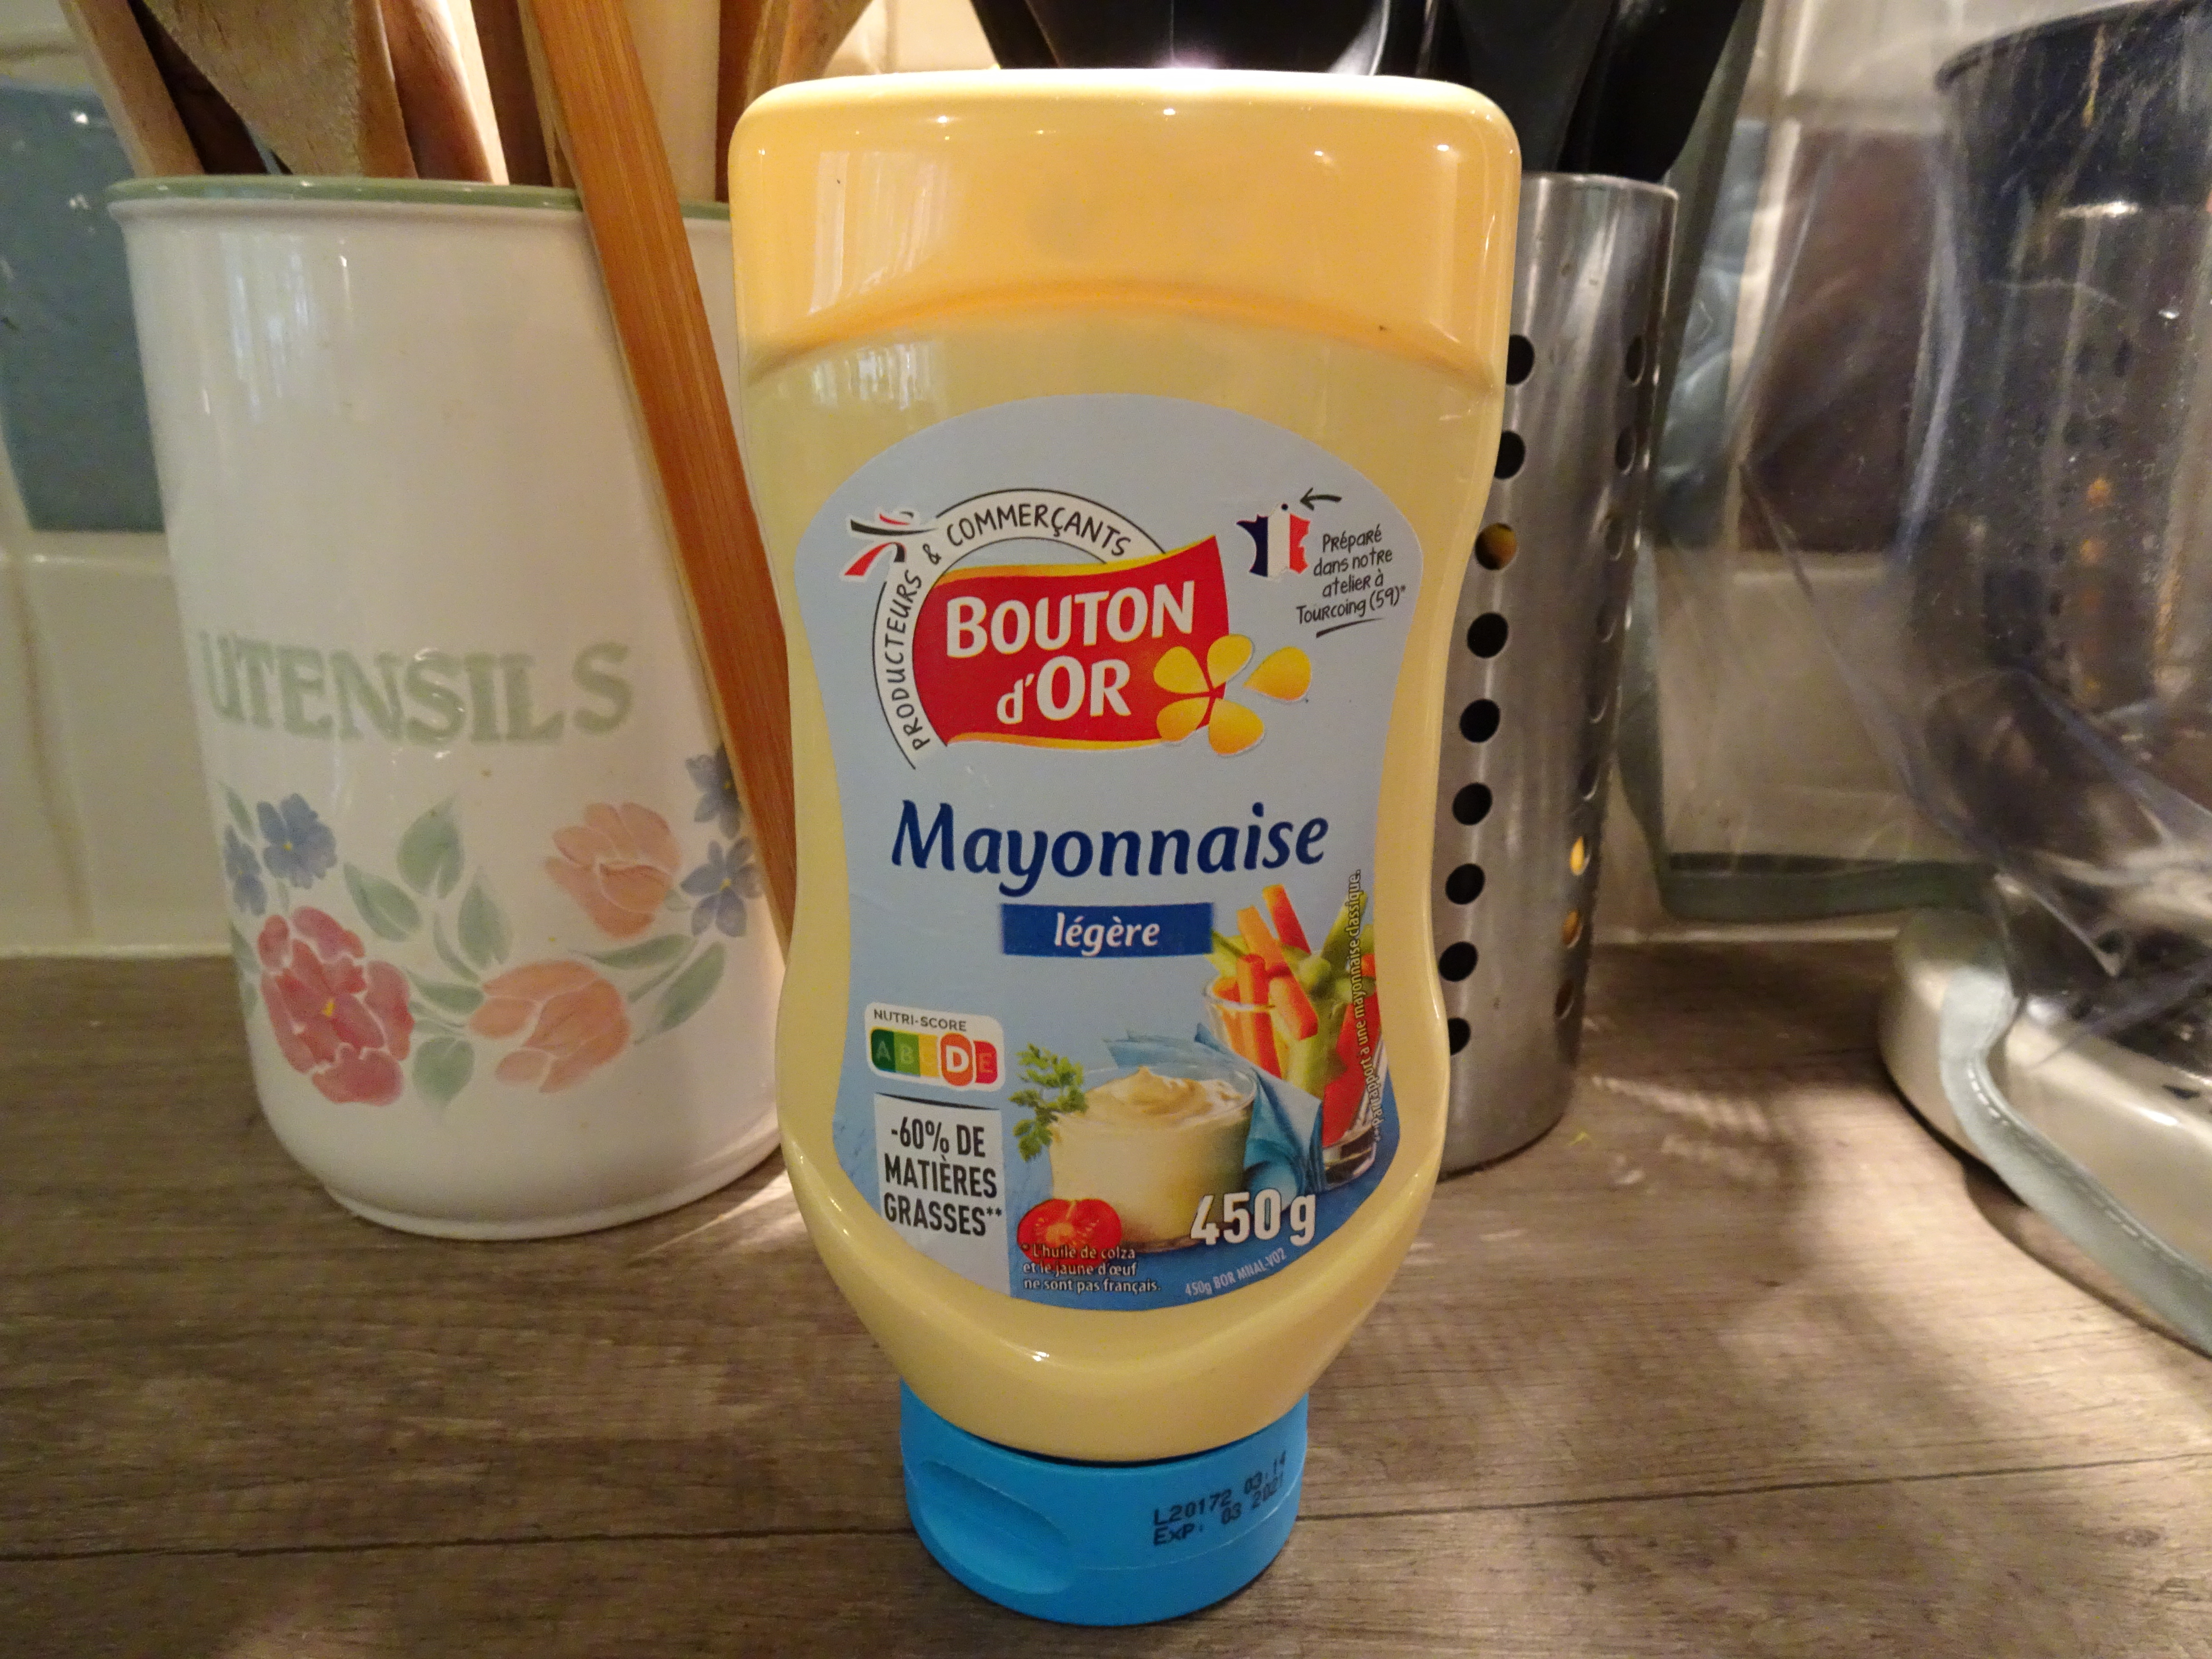
Another essential ingredient of egg mayo is obviously the mayo.  I also like a bit of mustard in mine and this brings me to the difference between French and English mayo.  

I always thought that once I'd retired I'd have the time to make my own mayonnaise but the reality is that it's still way down my list of priorities!  So we buy it from the supermarket and have found a difference between the French and English stuff.  Both list "mustard seeds" in the ingredients but, having performed a taste test, I can report that the mustard flavour is much more subtle in the English version and quite noticeable in the French one.  So, if you make your egg mayo with French mayo you may not need to add any mustard at all.


So there we have it, a dish of the most yummy home made egg mayo and the makings of a delicious egg and cress sandwich.

Ingredients

2 large or 3 medium eggs, preferably free range, at room temperature
2 dessert spoons of mayonnaise
½ - 1 tsp Dijon mustard to taste
salt and white pepper
cress, rocket or lamb's lettuce, or other herbs of your choice 
your favourite sliced bread, buttered with your favourite spread

Method

Prick the eggs at the round end and drop gently into boiling water.  Boil for 10 minutes.  As soon as the time is up, drain them and refill the saucepan with cold water to cool the eggs.

When the eggs are more or less cold, shell them and place in a small bowl.  Using either a knife or a fork, chop or mash them until there are very few large lumps of white left.

Add one spoonful of the mayonnaise and mix well.  Add enough extra mayo to get the consistency that you like.  

Add the mustard ½ tsp at a time, mix well and taste.  Season with salt and pepper and taste again.  Spread it as thickly as you like on your bread, season with extra black pepper if you like and add some greenery, something peppery if that's what you like.

Makes enough for three rounds (six slices) of sandwiches.  Keeps for a couple of days in the fridge.

October 5, 2020

PILCHARDS ON TOAST, NEW CAKE STANDS AND SOME SAD NEWS


Now I know this may be an odd thing to post about but bear with me.

The recipe, if you can call it that, popped up in my FB feed and I was instantly compelled to make it for lunch!  We had it that day.

I was brought up on pilchards.  Not sardines*, but tinned pilchards in tomato sauce, warmed in a saucepan or in the oven and served on thick slices of toasted wholemeal bread.  Proper Hovis bread that had that delicious and unique aroma that Hovis doesn't have any more.

We usually keep in stock those very small tins of Glenryck pilchards in tomato sauce and at around 50p a tin they are just the right size for lunch for two.  The tins usually contain two plump pilchards that when split open and served with hard boiled egg make one of our favourite salads.

However, this particular recipe is a bit more sophisticated than just pilchards on toast!  It includes crushed avocado and rocket.  So, late to the party as usual, I have finally discovered that crushed avocados can be quite nice - how exciting that you can do more with an avocado than just serve it in wedges in a salad or prawn cocktail!

On the day I spotted the recipe I happened to have both a packet of ready washed rocket and two avocados in the house.  We also had a home made wholemeal loaf that Nick had made the day before.  You can see the toast recipe here, although it is actually for sardines and includes a sprinkling of chilli seeds which I omitted.

Ingredients
2 slices wholemeal bread
1 avocado
1 155g tin Glenryck pilchards in tomato sauce
a handful of rocket.

Method
Empty the can of sardines carefully into a dish or plate and split them into two along the back and open out.  If like me you are not partial to the larger bones remove the spines.  Transfer carefully to a small saucepan so that they don't break up into pieces and heat gently.

While the sardines are warming through toast the bread.  Halve the avocado and remove the stone then the flesh with a dessert spoon.  Put the flesh into a small bowl and mash with a fork.

Spread the mashed avocado on the toast, top with the rocket then the sardines and serve warm straight away.

Serves 2.
*A sardine is a small pilchard.  In other words, pilchards are bigger and plumper than sardines.


Now for the cake stands.  I had a couple of Ebay successes recently and added to my collection.  This one is a Clarice Cliffe creation by Wedgwood and I was thrilled when it arrived.  I was not so lucky with the next one.


I often see cabbage leaf pottery on sale at French brocantes (a brocante is like a flea market) and it is usually quite pricey.  Most of it is also quite hideous.  I spotted this cake stand on Ebay just after I had already bid on the Clarice Cliffe one and it also came with two fairly large plates.  I was not fussed about having the plates but coveted the cake stand.  I turned out to be the only bidder and got the lot for £15.

Unfortunately the seller made the double error of not wrapping it very well and sending it via Hermes.  Over the last few years we've been doing a dog walk that begins at a small car park on the edge of town.  It's used by Hermes to decant parcels from their huge lorry to the cars and vans that deliver them to people's homes.  I have seen the way the parcels are handled and personally I would never use them to send anything even vaguely fragile or more valuable than a cheese sandwich. 
The seller has refunded my money and the three items are now in the bin.  Such a shame.  It will be a long time before I ever see another one like it I expect.

Lastly, the sad news as mentioned in the title is that the cake stall that we held at my place of work every year is no longer going to take place.  Not just this year (for obvious reasons) but not ever.  The owners of the business have decided that the Children in Need charity is already cash rich and any funds should be raised a different way and given to a different charity. 
 
So, no more huge baking sessions to supply the cakes.  
The first time we did it in 2003 we raised £130.  Last year we raised £2,113 and the grand total over the years is well over £15,000.  That's an awful lot of cake and I shall miss doing it.  It's what renewed my interest in baking and extended my repertoire beyond the annual Christmas cake and the occasional birthday chocolate cake.

~~~~~~~~~~~~~~~~~

I have done a bit of research and discovered that the "lettuce leaf" plates and cake stand are quite sought after and can be obtained elsewhere for quite large sums of money.  The design is actually "geranium leaves" and now I look at the pictures they do look like geranium leaves.  I can get a cake stand for £52 and the plates for £35 each.  What a shame that the seller did not pack them more carefully.  

July 9, 2020

RASPBERRY TURNOVERS

 
I was dying to try making these cute and tasty little puffs as soon as my roll of ready made, ready rolled puff pastry arrived in my "click and collect" supermarket order.
 
 
They are incredibly simple to make but absolutely delicious.  The raspberry flavour packs a punch and the sprinkling of crunchy demerara sugar on top is just right.  Ideal for a picnic or afternoon tea. 

 
The recipe comes from a delightful French blog called "Chic Chic Chocolat" which is full of gorgeous recipes.  Having a bit of O'level French or some experience of French ingredients would help with some of them but this one is so straightforward that you could have a go with the use of a dictionary if need be.  You can see the original here. In it the author uses a circular sheet of pastry and shows how to cut it to make the puffs.  In the UK ready rolled pastry tends to be in an oblong sheet which makes it easier although the shape ends up slightly different.  Puff pastry is also available as an oblong in French supermarkets but if your pastry is circular just follow the pictures on the original blog post.

I reckon you could also make these in exactly the same way using strawberries, blueberries, blackberries or even cooked apple or rhubarb.  Maybe even chopped plums, cherries or apricots.  In the comment section of the original post someone suggests using apple compôte and apple slices, which sounds delicious!

I shall experiment and report back!

Ingredients

1 pack of ready made, ready rolled puff pastry
1 jar of raspberry jam - you won't need a whole jar (I used Bonne Maman which has a wonderfully intense flavour)
1 punnet of fresh raspberries - you won't need a whole punnet (I dare say frozen would also work)
milk and demerara sugar to finish
icing sugar to decorate (optional)

Method

Take the pastry out of the fridge and allow to come to room temperature well before using, at least half an hour.  Pastry that is still chilled will crack when you unroll it.

Preheat the oven to 200C / 180 fan.  Line two baking sheets with baking paper.

Unroll the pastry and cut in half along its length.  Cut each half into six squares of equal size.

Put a teaspoon of jam and one or two raspberries on a square, slightly off centre.  Dampen the edges of the square and fold it diagonally over the off centre filling to form a triangle.  Press the edges together then seal by pressing a fork into the pastry along the edge.  Repeat with the rest of the squares and make three small slashes in the top of each triangle.

Brush each puff with milk and sprinkle with demerara sugar.  Divide the puffs between the two baking sheets and bake for 15-20 minutes until golden brown.  The jam will leak out a bit but this adds to the charm of the puffs!

Serve as they are, slightly warm or cold, or dusted with icing sugar or decorated with a zig zag of icing made with lemon juice and icing sugar if you like.

Makes 12 turnovers (or puffs, however you want to call them!)

January 27, 2020

POACHED EGGS

 
How do you poach your eggs?
 
I have struggled with poached eggs for years, along with the dreaded scones and meringues.  Having finally banished my scone nemesis and mastered meringues last year I am completely chuffed to say that - at last - I have worked out how to produce a decent poached egg.  My mum always said that things come in threes and it appears that it counts for successes as well as failures or disasters.  (Or buses.)  Another of her sayings was "if at first you don't succeed, try again".
 
In the past I have tried every method going.  Dropping the things into a saucepan full of swirling simmering water, which produced a kind of amoeboid blob with a detached yolk. 
Nigella Lawson's method of dropping them from a cup with a dash of lemon juice into almost still, barely simmering water.  That method was ok but not perfect as results were not reliable.
 
Years ago I bought a non stick poaching pan to which they stuck like glue, producing half a ragged poached egg for your toast.  That went into the bin along with the bits of egg stuck to it - I couldn't bring myself to take it to the charity shop where someone might fork out a quid for it to end up with only half an egg every time.


I own a set of very snazzy and brightly coloured poaching pods, along with the scoop that allows you to lift them in and out of the pan without scalding your finger tips.  They work but are a real faff, having to butter them first and still ending up with some of your egg refusing to come out. 
 
 
They also produce an egg that's absolutely fine but shaped like a flying saucer, not natural looking like you get in a good restaurant. 
 
One of my favourite starters at our local favourite restaurant is a poached egg served on black pudding on toast.  The egg is perfect every time, shaped like it's been quenelled - and we all know what that means according to James Martin.  The difference between a dollop and a quenelle is twenty quid.  I did once ask the waitress how the chef did it and she looked at me like I had just emerged from a flying saucer.  She said she would ask him but never returned to the table, sending someone else instead.
 
We have friends who have given us a full English breakfast a few times, skinny style, all grilled and poached instead of fried.  The husband cooks the eggs and they are perfect every time.   I have watched how he does it and it looks so easy.  When I have tried it his way we get the amoeboid blob again.
 
The key to success seems to be, for me, after all, vinegar. 
Nick has been averse to vinegar in the cooking of poached eggs after too many hotel breakfasts with vinegary eggs when he was working.  But I have discovered that if you use white wine vinegar, not malt vinegar, you can barely taste it.  In fact I defy anyone to know that vinegar has been used at all.
 
My tips for success are to get all your eggs shelled and ready in little cups or ramekins - this is probably not necessary if you only have two to poach but with more than two it allows them all to be dropped into the pan in quick succession so they are all cooked at the same time.
Boil the kettle and pour the water into a frying pan.  Depth is not important except that it should be deep enough to cover the eggs.  Slosh in a good splash of white wine vinegar, probably about a tablespoonful.  Bring back to the boil, reduce the heat so that the water is simmering gently then slide the eggs in carefully one at a time, from very close to the water, so that they stay where you have put them.  That way you know which one went in first and will be cooked first with just a few moments between each one. 
Then leave them alone, except maybe to spoon water gently over the top if they're not quite completely covered.  No pushing or stirring.  They are cooked when the whites are no longer translucent but white, which will be about five minutes for an average egg.  Turn off the heat.


Using a slotted spoon, slide it under the egg that went in first and gently lift it out onto your toast, plate (or a sheet of kitchen paper first if you want to drain it of water completely).  You might have to ease it gently off the bottom of the pan if it's stuck slightly but so far I have not burst a yolk doing this - gently does it.  Repeat with the other eggs in the right order - the water will still be hot so they will continue cooking until you lift them out.  Stand back and admire the beauty of your creation triumphantly. 
 
Season with salt and pepper and enjoy!

January 7, 2020

FRITTATA

 
This is yet another of those very useful recipes that I wish I had heard of decades ago.
 
 
I always had the idea that a frittata was some kind of exotic dish that required a lot of faffing and was therefore in the category of "not for us".
 
The very first time I had a frittata (as far as I know) was about two years ago, in France, when a new friend served mini ones as nibbles for apéros.  She made two varieties, cooked in a mini muffin tin and served slightly warm, and both were utterly delicious.  She gave me a copy of her recipe and I soon sussed that this was simply a kind of omelette and why oh why had I never made one myself?!
 
 
Since then I have been making frittatas for us at every opportunity.  By opportunity I mean the need to use up some bits and bobs in the fridge.  Believe me, there is never any need to go out and buy something specifically for a frittata, as long as you have eggs and a few tasty bits to use up you're ready to cook.  As a quick and tasty way of using leftovers it's up there with "fridge bottom quiche" and "Sunday dinner pie" but much, much quicker.  It makes an excellent meal for lunch, supper or even breakfast.
 
For this one I used green and yellow peppers, mushrooms, cherry tomatoes and about half of a Matteson's smoked sausage.  In the past I have also used bits of potato, cooked broccoli or other veg (peas and asparagus are very good), cooked lardons, smoked salmon or shredded chicken.
 
 
We had ours with garlic potatoes and a (small) green salad.  For the potatoes I just boiled a few baby potatoes (while the frittata was being created) and, when they were cooked and drained, tumbled them in a good tablespoon of Heinz garlic sauce while still warm.  Deelish.
 
Ingredients
 
Roughly half each of a green and yellow pepper, washed, de-seeded and cut into chunks.
a handful of mushrooms, washed and thickly sliced
6-8 cherry tomatoes, washed and halved
Roughly half of a Matteson's smoked sausage (or any other cooked sausage), thickly sliced
4 eggs, beaten and seasoned with salt and pepper
 
Method
 
Preheat the oven to 200 C / 180 fan.  Heat a tablespoon of vegetable oil in a frying pan, preferably one with a metal handle that can be used in the oven.
 
Add the chopped veg and cook on medium heat until just tender.  Add the smoked sausage and heat through.
 
Pour the eggs over the filling and cook gently as if you were making an omelette for about 5 minutes.  Check if the eggs are set underneath by lifting up the edge of the frittata to see if the underside is set and golden brown. 
 
If your frying pan handle is oven proof, transfer the pan to the oven.  If not, gently slide the frittata onto an oven proof plate or dish of a suitable size.  Cook in the oven until the eggs are set on top and beginning to brown.  (You can also do this under a hot grill if you prefer.)
 
REMEMBER THAT THE HANDLE WILL BE HOT - USE OVEN GLOVES!
 
Serve immediately with whatever you like to go with it - potatoes, salad, chips, veg, beans.....anything.
 
Serves 4 as a light lunch, 2 as a main meal.