November 27, 2023

PLUM AND APPLE CRUMBLE


Never in a million years did I think that I would need to consult a recipe for a crumble.  I have, after all, been making crumbles for about sixty years, ever since I first started helping my mum to make the Sunday dinner.

Crumbles in those days were very basic, either apple or rhubarb, using Bramley cooking apples bought from the greengrocer van that came round on Friday evenings, or rhubarb from the rhubarb patch at the top of the garden behind the greenhouse.  At the right time of year there would be wild blackberries to add to the apples.

They would be made the same way as pastry, half fat to flour, usually margarine, rubbed in by hand.  There were no embellishments, just fruit and crumble topping served with Bird's custard.  They were not fancy, just plain home cooked fare.

I made my crumbles like this for decades and always had some block margarine in the fridge for that purpose.  When I got my first food processor I made my pastry and crumble mix in that which saved a bit of time.

Latterly I have become extremely lazy.  Fruit chucked into the bottom of the dish with - quelle horreur - shop bought crumble mix on the top.  Maybe sprinkled with a few flaked almonds.


With friends coming round for supper I had decided to make a crumble and thought it was time I should up my game.  Hence the hunt for an actual recipe and the first one I liked the look of is by Mary Berry which you can see here.  The main difference is that the proportion of butter to flour is greater than half and the sugar used for the topping is demerara.  I had plenty of time so even rubbed the butter into the flour by hand!  

A crumble is a popular dessert in restaurants in this part of France I had noticed that the topping is often fairly thin, sometimes barely covering the fruit layer.  Quite different from my home made crumbles which had a good thick layer of topping.  Having decided to use a small bag of my cinnamon baked plums (see here) from the freezer, I supplemented it with a few apples and then wondered if the quantity of crumble in the recipe might be too much.  So, I made 1½ times the quantity, used half and put the other half in a bag in the freezer ready for another day.

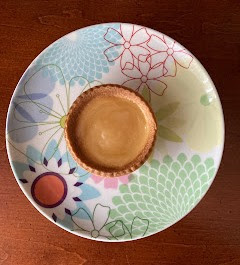
It was lovely, deep golden and fudgy and the demerara sugar sprinkled on top gave it quite a sparkly, glamorous appearance.  This is the way I will be making my crumbles in future.  

Ingredients

For the fruit layer

About 12oz plums

2 tblsp soft light brown sugar

a sprinkling of cinnamon

3-4 eating apples

For the crumble topping

9oz plain flour

6oz cold butter, cubed

3oz demerara sugar (plus extra for sprinkling)

*I have used imperial weights, i.e. ounces instead of grams, because that was easier when calculating the increased quantities compared to the original recipe! 

Method

Preheat the oven to 200° C / 180° fan / gas mk 6 and butter a suitable shallow baking dish.  Mine was about 20cm square.

My plums were ready cooked and in the freezer (see text) but if you are using fresh plums, wash them, cut in half and remove the stones then cut into quarters.  Put into a large saucepan with a tblsp of water, the brown sugar and cinnamon.  Peel the apples, slice them straight into the pan with the plums (discarding the cores) and cook gently until just soft.  Add a little more water if necessary and stir often.  Set aside to cool while you make the crumble topping.

To make the crumble topping, put the flour, butter and sugar into a large mixing bowl.  Rub together using your fingertips until you have the appearance of breadcrumbs.  A few larger clumps will be fine.

Tip the fruit into the baking dish and spread it out evenly.  Sprinkle roughly half of the crumble topping over the fruit and bag the other half for the freezer.

Sprinkle a little extra demerara sugar over the top and bake for 20 minutes.
Then lower the oven temperature to 180° C / 160° fan / gas mk 4 and continue baking for a further 20 minutes by which time the topping should be golden brown and the fruit bubbling slightly at the edges of the dish.  Keep your eye on it and check after 10 minutes to make sure it's not overcooked or burning.

Serves 6 portions.  Plus the extra crumble mix which is frozen for future use.  Thaw at room temperature for an hour or so before using.  

Update: I have since made the crumble using the food processor instead of rubbing in by hand, stopping before the crumbs were completely even in appearance.  In other words, left a few lumpy bits.  It was just as good!

~~~~~~~~~~~~~~~

I feel compelled to mention here the plate!
At our local déchèterie (council tip or recycling centre) there is a large table where people can put unwanted items that are still good.  You can simply help yourself.  There were huge piles of crockery the other day and tea plates like this are very useful for the larger gatherings that I sometimes host, or to lend out to others for theirs.  They are very pretty so I took six of them.

November 18, 2023

PORK WITH PRUNES

We recently invited friends round for a midweek dinner at short notice. We had commitments during the day they were coming so planning the meal was a challenge.  It was therefore a question of combining a quick trip to the shop with what we already had in stock and cooking something that wouldn't take all day in the kitchen to produce.

I looked up what I could do with the two pork steaks I already had, settled on this recipe and went to the nearest shop.  I ended up with a menu of Palestine soup (because the shop had Jerusalem artichokes) followed by pork with prunes, hassleback potatoes (because we had plenty of potatoes), green beans (in the freezer) and pumpkin pie for dessert (I had a tin of pumpkin purée).    All I needed to get was two more pork steaks, a bag of prunes, a pack of ready made pastry, a jar of redcurrant jelly and a tin of evaporated milk.  All available in the little supermarket (with the added bonus of spotting the artichokes).  I decided to use white wine rather than buy cider for the casserole as we had some already.

The soup was done in the soup maker earlier in the day while the pie cooked in the oven, both to be warmed up later.  The casserole and potatoes were happy to tickle along in the rather unpredictable woodburner oven in the afternoon while I laid the table and were ready when the guests arrived.

Apologies for the poor photo which I suddenly remembered to snap just before I took it to the table.  It was delicious.  The sweetness of the prunes and redcurrant jelly along with the creaminess of the crème fraîche turned it from a simple casserole into something rather special.  I shall definitely be doing this again.

Update……after a late afternoon visit to M&S in the UK between Christmas and New Year we came home with some amazing and fabulous yellow sticker items (called anti gaspi in France!). This included two gorgeous pork steaks.  I didn’t have any redcurrant jelly so used cranberry sauce instead.  It was delicious!

Ingredients

2 tblsp sunflower oil

4 pork loin steaks, halved  (or 500g cubed pork)

1 large onion, chopped

1 heaped tblsp crème fraîche

100 ml chicken stock (made with half a chicken stock cube or stock pot)

250 ml white wine

1 tblsp redcurrant jelly (or try cranberry sauce)

1 tsp Dijon mustard

16 prunes

2 level tsp cornflour

Method

Heat 1 tblsp of the oil in a frying pan and brown the pork steaks or pieces in two batches.  Transfer to a casserole or oven proof dish.

Add the remaining oil and the onions to the pan and cook for a few minutes until soft.

Mix the crème fraîche with the stock and add to the pan with the redcurrant jelly, wine and mustard.  Stir to combine, bring to the boil then transfer to the casserole dish.  Then add the pork with the prunes.  Stir, cover and cook in the oven at 180°C / 160° fan / gas mk 4 for about 25 minutes or until the meat is tender. 

Mix the cornflour with 2 tblsp water and stir into the casserole, returning it to the oven for another 5 minutes to thicken the sauce.

Serves 4.

November 16, 2023

GREEN TOMATO CHUTNEY

We harvested the last of the tomatoes the other day, dug up the plants and dispatched them to the compost heap.  All but one of the tomatoes were hard and green.

I had made green tomato chutney in the past and was not too thrilled with it but this time we had so many good tomatoes that it seemed a shame not to do something with them.  

With the rain pouring down outside and the wind howling it seemed like the perfect day to do some cooking on the wood burning stove so I searched online for a different recipe.  It was a Sunday and the shops were shut so I looked for one where I could use what I had in the house.

You can see the original recipe on the Waitrose website here.  I didn't have any mustard seeds so used ready made wholegrain mustard instead.  The only vinegar I had was this one which is brown vinegar with added honey.  I didn't have a cooking apple so used two eating apples (golden delicious).  (I omitted the chilli as I personally can't eat it nowadays.)

I have listed below the ingredients that I used but suggest you refer to the original recipe which I used as a guide.


I remembered from the last time that I made chutney (which was some years ago) the best way to tell if it's thick enough and done.  You draw your spoon across the bottom of the pan and if it leaves a clear channel which doesn't immediately fill up with liquid it's ready.

The quantity of tomatoes I had made 2½ Bonne Maman jars of chutney.  Most of the recipes I looked at suggested you should keep it for 2-3 weeks before eating it but of course I had to have a little taste!

It is yummy!!  It's nice and chunky, just as I like a chutney, as I'd chopped the ingredients not too small.  The flavour is delicious, both sweet and sharp, and I wonder if the particular vinegar I used had something to do with that.

Anyway, I can't see me lasting 2-3 weeks before I open the first jar and it's most unlikely to end up at the back of the cupboard, unloved and still uneaten 2-3 years later!  It's a winner!

Ingredients

650g green tomatoes, washed and chopped

2 onions, peeled and chopped

2 eating apples, peeled, cored and chopped

200ml brown vinegar

50g sultanas

1 heaped teaspoon wholegrain mustard

1 tsp ground ginger

½ tsp salt

75g light soft brown sugar

Method

Put the tomatoes, onions and apples into a large, heavy based saucepan, with half (100ml) of the vinegar.

Bring gently to the boil and simmer for around 30 minutes, stirring occasionally, until the veg are soft.

Add the other ingredients and remaining vinegar and cook again, stirring frequently, until the mixture has thickened.  (See text for how to tell when it's ready.)

Spoon into sterilised jars while still warm.  Tap the jars on the worktop several times to dispel any air bubbles, seal and label the jars.

Makes 2½ 1lb jars of chutney.

To sterilise the jam jars

Wash the jars and lids thoroughly in hot, soapy water and rinse well.  Shake off any excess water (do not dry with a tea towel) and place on a baking tray.

Place the tray in a warm oven (160°C or thereabouts) for 10 minutes until dry.  Fill the jars while they are preferably still warm.

November 14, 2023

APPLE AND RAISIN CAKE

I recently stumbled across a really nice website containing lots of lovely home baking recipes.  It’s for a brand of flour called Odlums which I had never heard of before and comes from Ireland.  From it I had bookmarked a nice looking recipe for an apple cake which you can see here.  

This week’s Monday walk was cancelled for the third time due to the wet weather.  I have to say that the weather has been grim for at least the last four weeks which is very disappointing.  However, our walking group are a social bunch so even if they can’t walk the debriefing in the bar afterwards usually goes ahead!  More often than not someone brings a cake so I decided to make the apple cake.  (I added a handful of raisins to the list of ingredients, just because it seemed like a nice idea.)  

I really liked the decoration for what was a very plain cake - rings of apple arranged on top.  This posed a challenge as my usual method for coring an apple wouldn't work.  I good old rummage in my kitchen drawer unearthed my little used apple corer.

I usually cut the apple in half vertically from north to south and dig out the core with a melon baller.  This method is good for producing thick or thin wedges.  To get the apple rings I cut the apple in half horizontally around the equator and used the apple corer.  I then sliced the apple thinly to get the rings.  Easy peasy.  You can never beat having the right equipment (even if you have to hunt for it).

It was a very nice cake.  I often find that apple cakes can be a bit fragile, especially those containing apple slices.   They can fall apart which makes being handed round rather messy.  This one held its shape perfectly, possibly because the apples were chopped into quite small dice and the mixture was quite stiff.  It had to be spread into the tin rather than poured.  

I baked it in an oblong tin measuring  11" x 7" rather than the loaf tin in the recipe.  It cut perfectly into 12 squares of just the right size for a group.  Definitely a recipe I will be using again.  The only change I would try is to add a little more spice next time.

The more eagle eyed of you might notice a different cat in one of the pictures.  We were so sad to have to say goodbye to our beloved Daisy last month when she (and we) lost the battle with her tumour.  Yvonne came into our lives just one week later.  Her owner had left her with a friend for a couple of weeks in the summer but two months later he made it clear that he was not coming back for her.  Word went out among the walking group that a new home was needed so she is now part of our little family.  She's nine years old and is settling in really well so far.

You can read more about Daisy here.

Ingredients

225g self raising flour

175g softened butter or baking spread

175g golden caster sugar

3 eggs

1 tsp ground cinnamon

3 eating apples

50g raisins

Method

Preheat the oven to 190°C / 170° fan / gas mk 5.  Grease or line a 2lb loaf tin or a 11" x 7" baking tin with parchment.

In a large bowl, cream the butter or spread with the sugar until light and fluffy.  Beat in the eggs one at a time, adding a tblsp of flour with each addition.

Sift in the rest of the flour and cinnamon and fold in.

Peel and core the apples.  Chop 2½ of the apples into small dice and add to the mixture with the raisins.  Stir into the mixture and transfer to the tin.  Level the top.

Cut the remaining half apple into thin slices and arrange on top of the cake.

Bake for 40-50 minutes until golden brown and set.  Cool in the tin for 5 minutes before transferring to a wire rack.

Dust with icing sugar before serving.

Cuts into 12 squares or 8-10 slices.

November 2, 2023

A PERFECT LEMON CURD TART


My mum used to bake every weekend and her jam or lemon curd tarts were very popular.  They were not, however, things of beauty!  The jam or lemon curd would always boil over, producing a slightly burnt or chewy edge to the tarts.  My dad used to joke that he could only eat one if it had a brown ring round it!

I very rarely make them but during the clearing out of the freezer recently I found a pack of ready made, ready rolled sweet pastry at the bottom of a drawer so thought I might like to have a go for old time's sake.  My dad died last year and his birthday is just around the corner.  It's nearly twenty one years since my mum died and baking something that they both used to enjoy brings back happy memories of life back home when I was a little girl.


Then, the other day, I stumbled across a tip for making perfect tarts.
It's not so much a recipe as a guide to how to avoid the brown, chewy rings and it's so simple.


To achieve the perfect tart shell you need two identical tart tins.
I used my new mince pie tins.  The holes have rounded not flat bottoms.

All you have to do is to grease one tin as usual and line each hole with a circle of pastry.  Then grease the underside of the other tin and place it on top of the first with the uncooked tarts.  Don't press it down, just sit it on the top.  It's effectively a way of blind baking the pastry without having to faff about with paper and beans.

Bake at 200° C / 180° fan / gas mk 5 for about 11-12 minutes.  Remove from the oven and take off the top tin.  Return to the oven for a 3-4 minutes until the pastry is golden brown.

You then have a dozen perfect shells which you can fill with lemon curd, spooning it straight from the jar.  If you want to have a jam tart you will need to heat the jam gently in a small pan before spooning it into the tart shell to get a smooth finish.


I stored my tart shells in a sealed plastic box and they were still perfectly crisp and delicious several days later, which meant that I could simply have one lemon curd tart as and when I fancied one, AND there was no problem storing them - no sticking of the filled tarts together.  (Although I have to say that getting two tarts stuck together in the cake tin was definitely a bonus when I was a little girl!)

My next experiment will be to make mini tart shells using two mini muffin tins.  Mini tart shells, sweet or savoury, are excellent for making party nibbles.  I have yet to discover whether this method will work as the holes are relatively deep.  I'm hoping it works as they are such a price to buy in the shops and the incredibly long use by date makes me wonder what they put in them to achieve that.

I shall give it a try and report back!!

The tip comes originally from Nancy Birtwhistle, a previous GBBO winner who has produced an enormous amount of material showing how you can save money, save the planet and live better.  She has also written several books on these subjects.

~~~~~~~~~~~~~~~~~~~


The method worked perfectly when I tried it using a mini muffin tin.  I used my Pampered Chef tins as the holes have slightly more sloping sides and they also came with a little "dibber" to push the pastry neatly into the holes.  I used a 2" pastry cutter and baked them for 11 minutes before removing the top tin plus 2 minutes more.  Success!!