With just four of us for Christmas lunch this year we decided to roast two small chickens.
That way we all get a leg each!
Also, plenty left over for Christmas dinner pie on Boxing Day!
HAPPY NEW YEAR AND ALL THE BEST FOR 2025!
With just four of us for Christmas lunch this year we decided to roast two small chickens.
That way we all get a leg each!
Also, plenty left over for Christmas dinner pie on Boxing Day!
HAPPY NEW YEAR AND ALL THE BEST FOR 2025!
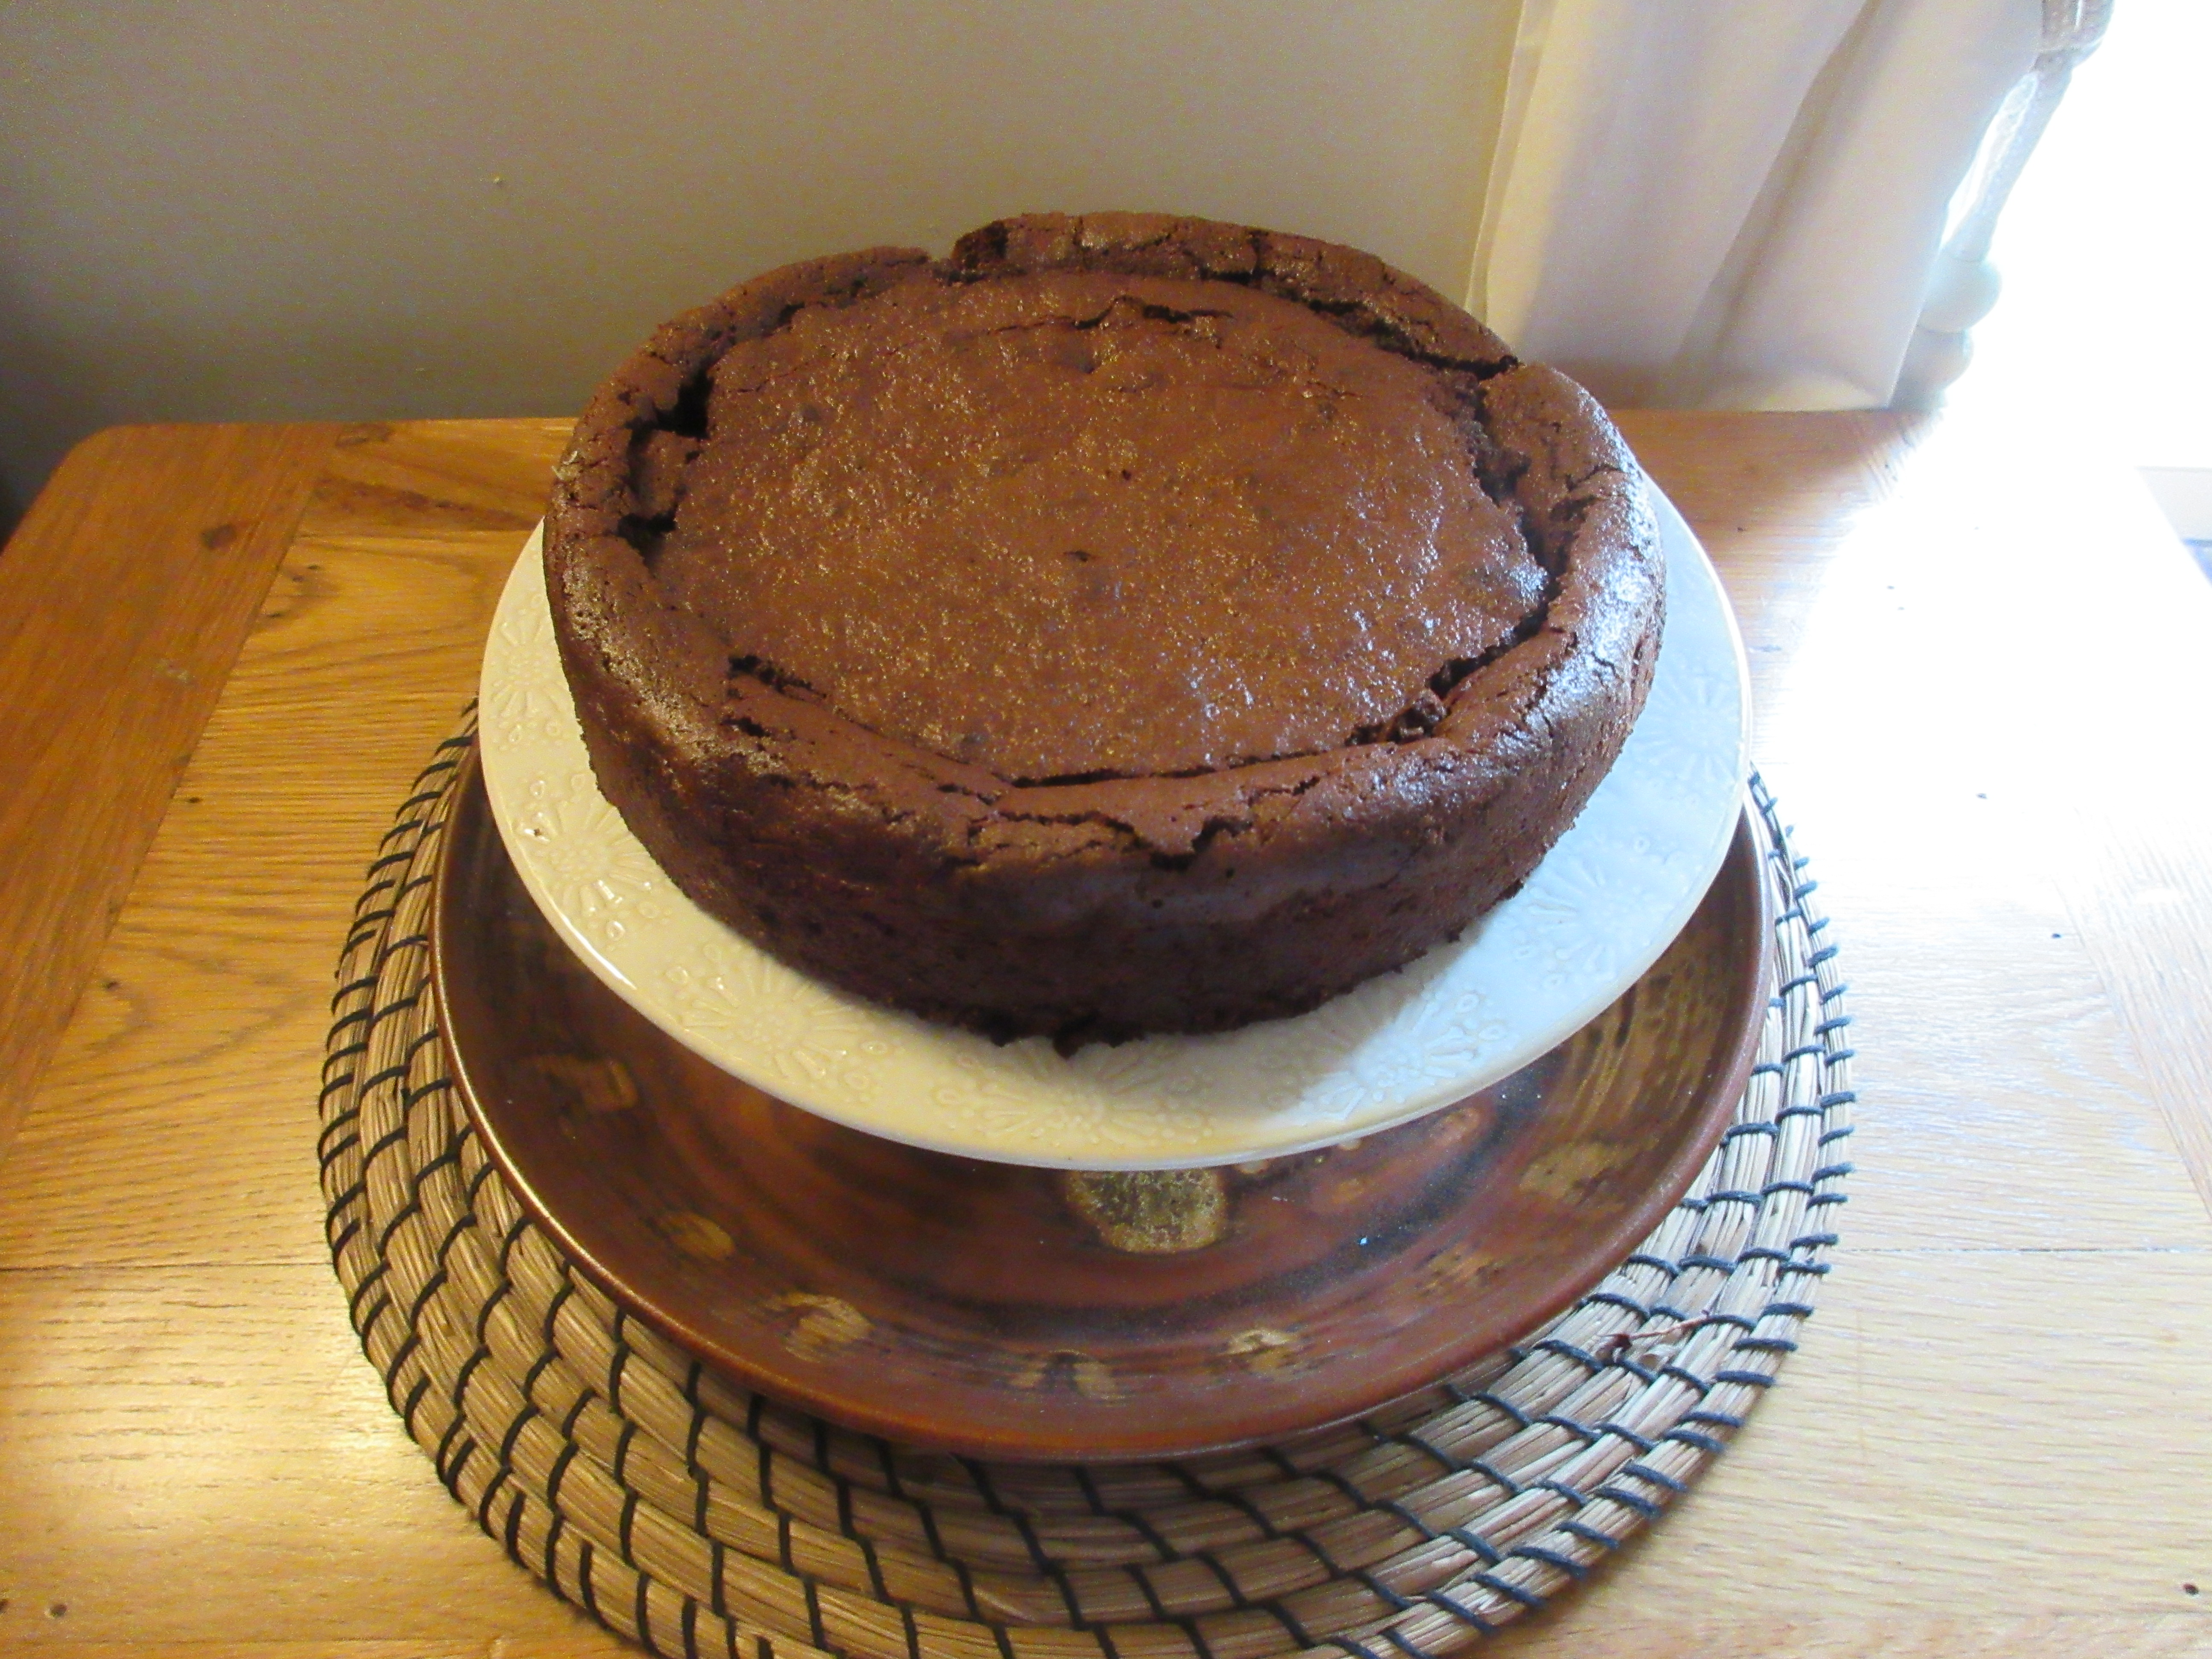
I recently needed a gluten free dessert recipe and none of the ones I had used before seemed to be just right. So I did a bit of internet research and stumbled across this recipe for a flourless chocolate cake. It had all the usual ingredients you would expect but also mascarpone cheese and as it happened I had a tub of it in the fridge. (A random purchase from when I thought "let's have tiramisu this weekend" but never got around to it.)
It was very easy to make but not so easy to get out of the tin! The instructions suggest it can be served warm or cold and to leave in the tin to cool for 30-40 minutes. I misinterpreted this and tried to remove it from the tin at this point when the cake was still slightly warm. It nearly disintegrated but luckily I managed to stick it back together on the cake stand with just an ever so slightly wonky appearance!
Lesson learned! If I wanted to serve it warm as a dessert I would bake it in something that it can be served in at the table and slice it straight from the dish. To get it onto a cake stand I would let it go completely cold before I tried to move it, which is clearly what I was supposed to do!!
It was however, delicious, very brownie-like and extremely rich, which is what you would expect with all that chocolate, butter and cream cheese in it! I served it in small slices with a poached pear alongside (see recipe here). It went down very well with our guests and I would definitely make it again.
Other similar cakes I have written about before include the chocolate amaretti cake, the flourless chocolate torte, chocolate and chestnut fondant and the gluten free black forest cake . Take your pick, they are all worth the effort (but not all of them are gluten free, check the recipe).
Update…….
I also noticed that Nigella Lawson made a very similar cake which contains amaretto during the recent repeat of her series "At my Table". Yum!! The recipe is available online on the BBC Food website. I shall try it myself and report back!
Ingredients
200g dark cooking chocolate (It doesn't need to have a high percentage of cocoa. I used SuperU own brand cooking chocolate. Cadbury's Bournville would work well.)
200g butter
3 eggs
175g golden caster sugar
100g mascarpone cheese (or soft cheese)
¼ tsp vanilla extract
100g ground almonds
30g cocoa powder
Method
Preheat the oven to 180°C / 160° fan / gas mk 4. Line the base of a 20cm springform tin with baking paper.
Chop the chocolate and butter into cubes and melt using a bowl over a pan of simmering water. Leave to cool slightly.
Put the eggs and sugar into a large bowl and, using an electric hand whisk or stand mixer, whisk for several minutes until thick and creamy. Whisk in the mascarpone and vanilla until evenly combined.
Fold in the melted chocolate mixture until everything is an even colour. Fold in the ground almonds then sift in the cocoa powder and a pinch of salt and fold in.
Pour the mixture into the prepared tin. Place it on a baking tray and bake for 30-40 minutes. The top will crack and the cake will puff up, but bake until there is not too much of a wobble in the middle. (Mine took an extra five minutes.) It will sink back down but the cracks will remain.
Remove from the oven an allow to cool. Serve warm as a pudding or cold as a cake (see my notes in text).
You can, if you wish, dust it with more sifted cocoa powder before serving which would hide the cracks a bit. I found it chocolatey enough without this and nobody seemed to mind the cracks!
Cuts into 10 slices at least as it is very rich.
It's years since I cooked a red cabbage. Nick is not keen because he sometimes finds them too vinegary so I don't bother just for myself. However, it was by now December, Christmas is not that far around the corner so I thought "why not" and decided to give it a go. Then I started looking for recipes.
A lot of recipes had apple in the ingredients. I didn't have any apples so carried on looking and found this recipe which didn't include apple and also looked very straightforward. You simply put everything into a large saucepan and cook it on the hob for a very long time. No need for sweating the onions separately.
The recipe uses cider vinegar which I didn't have so I used the sweetened vinegar called Melfor which I thought might do instead. Also, in a nod to all those recipes that do include apple I added a couple of tablespoons of the apple compote that contains chunks of apple for the last few minutes of cooking. (We have it on our cereals and porridge so get through a lot of it.) Both added to the sweetness I think and it was very tasty. Everyone had seconds including Nick so it will definitely be on the menu this Christmas.
Ingredients
1 small or ½ a large red cabbage (roughly 900g)
1 large red onion
70g soft light brown sugar
70m cider vinegar or similar
150ml red wine
1 large knob of butter
1 cinnamon stick
2 tblsp apple compote or apple sauce (optional)
Method
Trim the cabbage, remove the core and shred finely.
Peel and thinly slice the onion.
Put all of the ingredients (except for the apple compote) into a very large saucepan and season with salt and pepper.
Heat gently until simmering, stirring often. Turn the heat right down, cover and simmer gently for 1 hour and 30 minutes, stirring occasionally to make sure it doesn't stick or burn on the bottom of the pan. Remove the lid and simmer for another 30 minutes or until the cabbage is nice and tender. Stir regularly throughout the cooking time.
If using the apple, stir in just before serving and leave on the hob for a few minutes to make sure it's warmed through. Remove the cinnamon stick before serving. Serve hot.
This can be made one or two days before needed. Keep in the fridge and reheat either on the hob or in the microwave until piping hot.
Serves 6-8, depending on how much you like red cabbage!
Having friends round for dinner in November is a different kettle of fish from earlier in the year. There is definitely a need for something comforting and warming. On the actual day the fog never lifted and the temperature outside did not reach double figures. I was tempted to make a crumble for pudding but with a soup for starters and a casserole for mains settled on lemon tart instead, thinking it would be lighter.
I had made one before but instead of leafing through numerous cook books for the recipe I looked online. I somehow ended up using this recipe for Classic Lemon Tart on Mary Berry's own website. It comes from her Complete Cookbook.
The recipe uses nine eggs and six large lemons! When I looked again I saw that I needed a 28cm tart tin with a loose bottom, which I don't have. I used my 25cm tin and scaled down the ingredients accordingly. I also used ready made sweet pastry to save time, draping it over the edge of the tin as per the instructions. Somehow the side of the tart broke away from the overlap in a couple of places and shrank back a bit. This meant that the tart couldn't be filled right to the top because it would have overflowed. I ended up with filling left over so simply poured this into a small dish and baked it separately. Something to enjoy later!
It was absolutely divine, very sharp and lemony, and would serve probably about twelve people as it's very rich and you really only need a very small slice! It kept really well in the fridge and was still delicious several days later so I would definitely make it ahead next time. This would give me time to make my own pastry as I suspect the ready made one I used was a bit too thin and that might be why it split at the edge.
Since then I have found other Mary Berry recipes for lemon tart with more manageable quantities of ingredients! One is on the BBC Food website here and was a technical challenge in an early series of the Great British Bake Off. It appears in the book from the series called "How to Bake". A very similar version of it also appears on the current edition of Mary's Baking Bible (although not the original edition). I would use either of those next time although they both specify a 23 cm tin and at the current time of writing I only have a 20cm or 25cm! A reason to pay a visit to our lovely nearby cookware shop perhaps! (Or maybe I'll wait until our next visit to the UK where our local DIY/ironmonger's shop sells everything like that for much more reasonable prices!)
A tip for zesting lemons: always zest before you cut it in half to squeeze out the juice. Zesting this many lemons is time consuming but much more fiddly if you try to zest afterwards! Also: if you use a microplane zester the best way to get all the zest out of the groove is to use the rounded end of a teaspoon handle - not your fingernail as I once saw done in an episode of Celebrity Bake Off. Someone (I forget who) used her hideously long false nail to scoop out the zest before putting it in the cake and if you have ever noticed how grubby those nails can be underneath..........YUK !!
Ingredients
1 ready made, ready rolled pack of sweet pastry
7 eggs
240ml double cream
280g caster sugar
zest and juice of 5 lemons
Icing sugar to dust before serving.
Method
If your pastry is in the fridge bring it out about 15 minutes before you want to use it otherwise it may crack when you unroll it.
Preheat the oven to 200° C / 180° fan / gas mk 6. Butter a 25cm loose based fluted tart tin.
Unroll the pastry and line the tin with it, tucking the pastry into the sides and draping the excess over the edge. Place on a baking sheet, line with baking paper and fill with baking beans.
Blind bake the pastry for 15 minutes or until the edges are just golden. Remove the paper and beans and carefully trim away the excess pastry. Return to the oven for 10-12 minutes until dry. Remove from the oven and set aside to cool.
Reduce the oven temperature to 160° C / 140° fan / gas mk 3.
To make the filling, put all the ingredients into a large bowl and with an electric whisk beat until well combined. The mixture will still be very liquid.
Pour the mixture carefully into the cool pastry case but do not overfill, only close to the top if there are no gaps where it might leak.
Transfer carefully to the oven and bake for 35-40 minutes. The filling should be set but with a slight wobble in the middle.
Serve cool or completely cold. Give a generous dusting of icing sugar just before serving.
Serves 10-12.
I’ve tried various recipes for carrot cake from my collection of cookbooks over the years but was never completely ecstatic about any of them. In fact one of them turned out so awful that I actually wrote "horrible and inedible" at the top of the page because that’s what it was - soggy, oily, dull and unpleasant and I hadn’t made another one since!
So, with a surfeit of carrots in the veg drawer and a carrot soup already gurgling away in the soup maker, I decided to have another go. This time I used a recipe from Mary Berry's Baking Bible, the latest edition thereof. There were no spices or dried fruit in this recipe, unlike some of the others I had tried.
It turned out really well, delicious in fact. I then discovered that the same recipe appears in some of Mary's previous books with one principle difference; this most recent recipe says to use one teaspoon of baking powder and all the others say two! How odd! However, it rose well so one is clearly enough! Also, the instructions say to bake for 50-60 minutes. Mine was done in 50 minutes and if anything was slightly over. I would check after 40 minutes next time.
It's a pity I hadn't spotted this Mary Berry recipe before as I would have made dozens of them by now, especially as they are immensely popular at cake sales, especially it seems with the French.
I made this one as an uniced traybake for ease of cutting and handing round. I decided that the next time I would try adding a little mixed spice, and for a cake sale I would definitely ice it, but it was really good just as per the recipe. Very simple to make and delicious.
~~~~~~~~~~~~~~~
I have a tip for grating carrots. Weigh slightly more than you want and grate as far down as you dare until you have a short stump which you can do something else with (such as chomp on it while you grate the next carrot). That way you get the amount of grated carrot you want with your fingers intact!
~~~~~~~~~~~~~~~~
As is the way of things here, the opportunity arose to make the cake again for a cake sale at an event in the next village a few weeks later. This time I added a teaspoon of mixed spice and iced it as per Mary's recipe, decorating it with chopped walnuts and banana chips. It looked the business and sold out early in the day.
I would happily have used the little marzipan carrot decorations that identify it immediately as a carrot cake but the only place I could find them in France was online and the price worked out at 1€ per carrot! I resisted, as the cost of a pack of decorations would have been more than the cost of making the whole cake!
As an aside, it’s amazing how much the French seem to love English cakes, considering their reputation for fine patisserie. On the cake stall this time we were asked by a French couple if we ran a course on how to make them! Now there’s an idea……..
This is the recipe for the iced version with a little added spice.
Ingredients
For the cake
225g self raising flour, sifted
1 level tsp baking powder
1 tsp mixed spice (optional)
150g light muscovado sugar
50g chopped walnuts
115g carrots, peeled and coarsely grated
2 ripe bananas, mashed
2 eggs
150ml sunflower or vegetable oil
For the icing (if using)
175g full fat cream cheese
55g softened butter
115g icing sugar, sifted
To decorate
banana chips
2 tblsp chopped walnuts
(or mini carrot decorations if you can get them)
Method
Preheat the oven to 180°C / 160° fan / gas mk 4. Butter a 20cm square or round springform cake tin and line the base with baking paper.
Put all the cake into a large bowl and beat until smooth.
Spoon into the tin and level the top. Tap a couple of times on the worktop to dispel any air bubbles.
Bake for 50-60 minutes but check after 40 minutes as mine was well done by 50 minutes and a square cake may also be done sooner.
Cool in the tin for 5 minutes then turn out, remove the baking paper and leave to cool on a wire rack. Once cool it can be frozen by wrapping tightly in foil.
To make the icing, put all the ingredients into a bowl or food processor and beat well until smooth. Make sure the cake is completely cold (or thawed if it's been frozen) and spread the icing over the top. Decorate with the chopped walnuts and banana chips (or any decoration of your choice such as purchased sugar paste carrots).
Cuts into 10-12 slices.
This is one of those dishes that I always fall back on when I need something tasty that I know will go down well with everyone.
Some years ago I gave Nick a book for Christmas called "Classic French Cooking for Today". In it the recipe for boeuf bourguignon is very complicated and begins with the words "three days before serving". I think he did follow the recipe to the letter just once!
There are a couple of tips that are worth the effort though; to marinade the beef in wine overnight before the day of cooking and to stud the onions in the marinade with cloves. Long, slow cooking in the oven, up to four hours, makes the beef meltingly tender and flavourful.
With so many recipes out there in cook books and on the internet nobody needs another one but I'm writing this mainly for myself so that I remember how I made one that turned out really well. It's a combination of tips from various recipes.
I used a cut of beef which in France is called "paleron" and in the UK would be called chuck steak, but any stewing beef would be fine.
Ingredients
1 kg chuck steak (or similar)
2-3 tblsp sunflower oil
1 pack (200g) smoked lardons (or similar)
500g (approx) large shallots or small white onions
a small handful of whole cloves
2 carrots, peeled and thickly sliced
2 cloves garlic, peeled and crushed
2 tblsp tomato purée
1 bottle red wine (Merlot or similar)
150ml beef stock (made using a stock pot or cube)
1 tblsp brown sugar
50g plain flour
4 bay leaves
500g white or chestnut mushrooms
Method
The day before cooking, remove any excess fat or gristle from the meat, cut into large bite-sized chunks and put into a glass or porcelain bowl.
Peel the shallots or onions and press whole cloves into each one, roughly 3 or 4 per onion. Add to the bowl and pour over enough red wine to cover the whole lot. (You may not need the whole bottle.)
Cover with clingfilm and put into a cool place or the fridge to marinade overnight.
On the day of serving, preheat the oven to 160°C / 140° fan / gas mk 3.
If you have a flameproof casserole dish (such as Le Creuset) you can use it for frying. Otherwise, use a frying pan and transfer to an ovenproof casserole dish for the oven stage of the cooking.
Put the oil into your frying pan and turn the heat to high. Using a slotted spoon, lift the chunks of meat out of the marinade and dry on sheets of kitchen roll. Brown the meat in the hot oil in batches so as not to overcrowd the pan and transfer the browned meat to a plate. Add the lardons to the pan and fry until browned, adding a little more oil if needed. Set aside with the beef.
Lift the marinaded shallots or onion out of the bowl and remove all the cloves. Put them into the hot pan, adding a little more oil if necessary and fry until just golden. Add the garlic and tomato purée and cook for a few seconds.
Put the flour into a small bowl or jug and use some of the marinading liquid to mix it to a paste. Whisk in the rest of the marinading liquid and add this to the pan along with the carrots.
Return the meat to the pan with the sugar, bay leaves and stock. Bring to the boil then cover and put into the preheated oven for about 2 hours until the meat is tender. (This is the stage at which you should transfer from the pan to an ovenproof casserole dish if using.)
Add the mushrooms to the dish and cook for another 20 minutes until they too are tender.
After removing from the oven adjust for seasoning by adding salt and pepper to taste.
(To thicken if necessary use a little more flour (or cornflour) mixed to a thin paste with a little water. Stir this into the dish and return to the oven for a few minutes or cook on the hob if you are using a flameproof casserole dish.)
Makes 6 generous portions.
Anyway, having been asked to make some for another Bonfire Night gathering I wondered what to do. I have no idea if you can buy oatmeal as such in France so I set about finding an alternative recipe that was almost authentic but also like the sticky ginger cake we all love. I came across one on the Sainsbury's Magazine website.
It was stunningly good. Just like proper Parkin without the grit and with all the stickiness of a perfect ginger cake. You can (for now) see the recipe here. (These links do have a habit of disappearing.)
Ingredients
175g plain flour (gluten free flour also works)
125g porridge oats
200g caster sugar
1 tsp ground ginger
1 tsp bicarbonate of soda
2 balls preserved ginger, finely chopped (said to be optional in the original website but it's well worth it) or use 1 extra tsp ground ginger and 1 tsp mixed spice. My favourite way to chop preserved ginger without becoming extremely sticky is with a small fork and a small sharp knife on a small chopping board.
200ml semi-skimmed milk
110g butter
2 tbslp golden syrup (about 40g)
Method
Preheat the oven to 150°C / 130° fan / gas mk 2. Grease and line a 20cm square cake tin.
In a large bowl, mix together all the dry ingredients.
Put the milk, butter and golden syrup into a small pan and heat gently until the butter has melted.
Pour the wet mixture into the dry ingredients and beat with a whisk. Add and whisk in the preserved ginger.
Pour the mixture into the tin and bake for 45 minutes.
Cool in the tin and then cut into 16 squares. It keeps well for several days and if anything improves with keeping. Remember to line your tin or box for storing it with baking paper not foil as apparently (according to the website) it will stick to foil.
Cuts into 16 generous portions.