Showing posts with label chocolate. Show all posts

October 26, 2026

CHOCOLATE BIRTHDAY CAKE for children


The second cake for the little girl's birthday party was fun to make and decorate.


It's a version of something similar I made many years ago.

I fancied using a different recipe this time so spent a happy hour browsing through my cook books for one that would make a cake big enough for a party. I found one for a "classic tearoom chocolate Victoria sponge" in Annie Bell's wonderful Baking Bible.  This cake is made in one deep tin then sliced into two to be filled.  It’s also made using the “all-in-one” method in a food processor which makes the job simpler and quicker.

Slicing a cake into two is always a nervous moment for me but I got through it (literally) and instead of the buttercream filling in the recipe I just used a generous layer of raspberry jam as there was going to be a lot of buttercream on the outside!


The outside didn't need to look too tidy as it was going to be covered in chocolate fingers and sweets.

For the buttercream I used a chocolate fudge cake recipe from a book called "I love to bake" by Tana Ramsay.  It looked like it would make plenty of it and enough to cover the top and sides of the cake.  It also used melted chocolate rather than cocoa powder for the chocolate flavour.  That turned out to be rather good.

My friend Rachel (the birthday girl's grandmother) helped with the decorating.


It took two whole packets of chocolate fingers to cover the cake.

Then almost two packets of m&ms to fill the top.

The cake stand is an eBay purchase from many years ago.  

I knew it would come in handy one day and it set the cake off perfectly. 


I didn't get to taste the cake (other than the trimmings) but "feedback" from the party was very positive!

Ingredients

For the cake

225g unsalted butter, diced

225g golden caster sugar

175g self raising flour

50g cocoa powder

2 tsp baking powder

¼ tsp salt  

1 tsp vanilla extract

4 eggs

100ml whole milk (mine was semi skimmed)

For the filling

½ a jar of raspberry jam (or cherry, strawberry or apricot as you prefer)

For the buttercream and decoration

200g unsalted butter, softened

200g icing sugar

200g plain dark chocolate (I used Cadbury's Bournville which has a fairly low cocoa content)

2 packs of chocolate finger biscuits

2 packs of m&ms or other sweets such as Smarties or Jelly Tots

Birthday candles and any other decorations of your choice

Method

For the cake

Grease/butter the base and sides of a deep 20cm springform tin and line the base with baking paper.

Preheat the oven to 190°C / 170° fan.

Sift the flour, cocoa powder and baking powder into the bowl of a food processor.  Blitz briefly to combine.

Add all the other cake ingredients and process until smooth, scraping down a couple of times.  Spoon the mixture into the prepared tin, level the top and tap the tin on the worktop a few times to settle the mixture.  

Bake for 45-55 minutes until done then remove from the oven.  After a few minutes run a knife around the edge of the cake to loosen it and leave to cool in the tin.

When the cake is cold, remove from the tin, remove the paper from the bottom and place it on a board.  Use a bread knife to level the top of the cake if there is a significant dome.  Slice the cake in two horizontally using the bread knife.

For the buttercream

Break the chocolate into squares and place them in a bowl over a pan of simmering water.  Allow the chocolate to melt, stirring occasionally.  Remove from the heat as soon as it has melted and set aside.

Sift the icing sugar into a large bowl (or blitz it in a food processor to remove any lumps).

Add the butter and beat together with a hand held electric whisk until smooth and well combined.  Beat in the cooled chocolate until evenly incorporated.

To assemble the cake

Put the bottom half of the cake onto a cake plate or cake stand and spread it with the jam.

Place the other half of the cake on top and use the buttercream to cover the top and sides.  It doesn't have to be too neat but it's best if the top is level.

Press chocolate finger biscuits into the buttercream all the way around the sides.

Scatter the sweets over the top of the cake.  The chocolate fingers should sit just above the top of the cake and therefore prevent them all from rolling off!

Add a birthday candle and any other decorations you like.

Cuts into 16-20 slices.

October 19, 2026

CHOCONANA BIRTHDAY CAKE


The little girl that I made the pink castle birthday cake for her fourth birthday last year is now five years old.  (It was quite an undertaking and you can read about it here.)

This year a more modest cake was requested, in fact I offered to make two of them.
One for a family gathering on the actual birthday and a second for a birthday party a few days later.

For cake number one I made a choconana cake.

This is a variation of the mocha banana cake that I have made many, many times and which you can read about here.  It's essentially a chocolate banana bake and for a little girl's birthday I omitted the coffee, added some chocolate chips and some chocolate butter icing, plus decorations.

The lovely cake stand was gifted to me by a friend who is selling her second home in France and moving back to the UK.  She bought it some years ago at a French street market and I had admired it many times.  The little pig decorations were given to me by another friend after a recent visit back to the UK.  They are Percy Pig sweets that come from M & S.  The little girl's grandmother helped with the decorating and although I had lots of other decorations she thought the pigs would be fun.

Ingredients

For the cake

8oz self raising flour

4oz softened butter or baking spread (I used Le Fleurier unsalted spread)

4oz caster sugar

1 tsp ground cinnamon

2 ripe bananas, peeled and sliced

2 large eggs, beaten

1 tblsp milk chocolate chips (optional)

a splash of milk if needed

For the topping

2oz softened butter

6oz icing sugar

1 tblsp cocoa powder

1 tblsp warm water

a splash of milk if needed

Method

Butter and line the base of a 20cm (8") round springform cake tin.  Preheat the oven to 180° C / 160° fan.

Put all of the cake ingredients except for the chocolate chips and milk into a large bowl and beat well by hand or with an electric hand held whisk, until well blended.  

If the mixture seems rather stiff, add the milk and beat it in.  Add the chocolate chips if using and stir in.

Pour or spoon the mixture into the prepared tin and bake for 40-45 minutes until done.  

Remove from the oven and cool in the tin.

When the cake is cool, make the buttercream topping.

Beat the butter in a medium bowl with a wooden spoon until soft and sift in the icing sugar a spoonful at a time, beating well after each addition.  

Mix the cocoa powder with the warm water to a smooth paste in a small bowl or cup.  Add to the buttercream and beat in until evenly coloured.  If it seems rather stiff, beat in a splash of milk.

Remove the cold cake from the tin, remove the paper from the bottom and sit the cake on a serving plate or cake stand.

Spread or swirl the topping over the cake evenly and decorate with candles, sprinkles and any decorations of your choice.

Serves 8-12 slices.

~~~~~~~~~~~~~~~

My mum always said, in fact firmly believed, that all things come in threes.  This cake was number three in a string of almost baking disasters, all within a single week!

Number one was when making the cream cheese topping for a carrot cake.  I beat the butter and icing sugar together, added the cream cheese and on beating it in was horrified to see the whole thing turn to liquid within moments.  More about that in another post.

Number two was when making a caramelised apple clafoutis (see here).  The pudding had been in the oven for a good five minutes when I noticed the beaten eggs still in a bowl on the worktop.  I whipped it out of the oven sharpish, stirred the eggs as evenly as possible into the pudding and put it back in the oven.  It was fine.

Number three was when making this birthday cake.  The mixture was in the tin ready to go into the oven when I adopted my usual practice of licking the spoon.  It didn't taste very sweet but I wasn't sure as bananas are quite sweet anyway.  A quick glance around the kitchen and I spotted nothing untoward so put the cake in the oven.  As I turned to do the washing up I spotted the weighed out sugar still in a bowl next to the sink.  I whipped the cake out of the oven sharpish, tipped the mixture back into the mixing bowl and beat the sugar in.  After washing and re-lining the tin I got the cake back in the oven to bake and, as far as I know, it was fine!

Let's hope my mum's theory was right and, after three near disasters, that's it for now! 

December 7, 2025

CHOCOLATE BIRTHDAY CAKE and a tale of more haste, less speed


More haste, less speed, is a saying my mum used often.  What it means is that doing something in a rush will take you longer in the end because things go wrong and you have to re-do them.  I have found it to be very true!

On a beautiful, warm and sunny autumn day I had baking to do.  I thought that if I got a move on there would still be time to do some gardening or sit out in the sunshine but then things went wrong……

The first thing to go wrong was a simple chocolate cake; wrong size tin and wrong flour.  (French flours do not work the same as British flours.)  The sponges were flat and sad looking.  Had it been just for us I would have used them but it had been requested as a birthday gift so I remade it using Mary Berry's recipe for a chocolate sandwich cake and some of my stash of Homepride flour.  (The first set of sponges now resides in my freezer and will be used in future for something like a chocolate trifle.)

The second was in making some Parkin which I had also promised to someone else.  With a double batch in the oven and finally sitting out in the sunshine with my mug of tea I had one of those nagging doubts and went back inside to consult the recipe.  I had forgotten to put in the bicarbonate of soda. By now the Parkin had been in the oven for ten minutes and was just beginning to set.

I hesitated for a second but realised I could end up with two trays of flapjack if I didn't do something about it.  So quick as a flash, between us we scraped the mixture out of the tins and into a bowl.  I sprinkled two teaspoons of bicarb over the top and Nick used my biggest wooden spoon and a lot of muscle to beat like hell and mix it in.  We dolloped it back into the tins and put it back in the oven for the rest of the baking time.  It turned out fine!  You can see the Parkin recipe here.

As we finally sat outside in the last of the afternoon sunshine with a glass of something to calm my nerves I could hear my mum whispering "more haste, less speed!" in my ear and see her cheeky smile.  It’s almost twenty three years since she died and I miss her and her little sayings every day!

The cake went down well with the birthday girl.  Having made one before I knew it would be a lovely soft sponge and I decorated it with my standard chocolate buttercream recipe and a few girly sprinkles.

Curiously, when I looked for the recipe online I stumbled across a peculiar page on the Silver Spoon (sugar manufacturers) website comparing Mary Berry's recipe with Nigella's.  They reckon Nigella's was best!  You can see it here. What a very odd thing to have on a product website. I wonder what Mary would make of that!

Ingredients

For the cake

2 tblsp cocoa powder

3 tblsp boiling water

225g each of

    self raising flour

    caster sugar

    baking spread

1 level tsp baking powder

4 large eggs

For the icing

50g butter

150g icing sugar

1 tblsp cocoa powder

1 tblsp warm water

Method

To make the cake, grease and line the base of two deep 20cm sandwich tins.  Preheat the oven to 180c / 160 fan / gas mk4.

Blend the cocoa powder with the water in a large bowl and allow to cool slightly.  Add all the other cake ingredients and beat well with an electric whisk until nice and smooth.

Divide the mixture evenly between the two tins and bake for 25 minutes until done.  Leave in the tins for a few minutes then transfer to a wire rack to cool completely.

To make the icing, beat the butter until soft then sift in the icing sugar a spoonful at a time and beat until smooth.  Mix the cocoa powder to a smooth paste with the water and beat into the mixture.

Use half of the icing to sandwich the sponges together and swirl the other half over the top.  

Decorate with your favourite sprinkles and candles.

Cuts into 10-12 slices.

February 23, 2025

CHOCOLATE AND RASPBERRY CAKES for Valentine’s Day

With my OH back in the UK for a week I had arranged a Valentine’s Day meet up with some other ladies who are on their own and without a hot date for the evening.  Feeling at a loose end, I abandoned all the chores I had planned and decided to do something frivolous instead.  I made them all a little Valentine’s gift.

My first idea was to make some fairy cakes, or butterfly buns.  I used my basic all-in-one chocolate cake recipe which you can see here and poked a frozen raspberry into each one.  They turned out a bit craggy* which proved tricky for making the butterfly wings so having struggled with a few I gave up on that idea.  For the rest I just flattened the tops and swirled on some buttercream then sprinkled them with freeze dried raspberry chips.


I wrapped them up in food gift bags, putting a round coaster in the bottom of each one to keep them from falling over.  They looked very pretty and were much appreciated.  Luckily the bar we had chosen to meet was not full of twosomes staring lovingly into each other’s eyes so we didn’t feel too out of place!

*There are several possible reasons for the cragginess, including oven temperature, tin size (small paper cases) but it might be because I used a bag of sponge SR flour which was slightly out of date.  I added a half teaspoon of baking powder to compensate for the possibility that the raising agent might not be as effective but clearly it wasn’t needed and they rose a bit too much!

Ingredients

For the cakes

150g self raising flour

3 eggs

150g softened butter or baking spread

150g caster sugar

1 tbslp cocoa powder

1 tblsp warm water

12 fresh or frozen raspberries

For the icing

50g softened butter

100g icing sugar

1 tblsp cocoa powder

1 tblsp water

To decorate

freeze dried raspberry chips to sprinkle over or other red sprinkles

Method

Preheat the oven to 160°C / 140° fan.  Put 12 paper muffin or cupcake cases into a muffin tin.

In a small bowl, jug or cup mix the cocoa powder and water together to make a paste then put all the cake ingredients except for the raspberries into a large bowl and beat well until combined or use a hand held electric whisk.

Divide the mixture evenly between the paper cases (using an ice cream scoop will make this easier).  Push a single raspberry into the top of each cake.

Bake for 20 minutes until done.  Leave in the tin for a few minutes then remove to a wire rack to cool.

To make the icing, mix the cocoa powder and water together to make a paste.  Beat the butter until smooth, sift in the icing sugar and beat well.  Add the cocoa mix and beat in.

To make the butterfly buns, scoop out  a disc of cake from the top of each bun using a sharp knife.  Cut the disc into two halves.  Fill the hollow with a spoonful of chocolate icing and push the halved discs into the top to resemble butterfly or angel wings.  Sprinkle raspberry chips over the icing between the wings.

Alternatively, spread the top of each cake with a swirl of buttercream and sprinkle with the raspberry chips.

Makes 11-12 cakes

December 6, 2024

CHOCOLATE AND ALMOND CAKE gluten free

I recently needed a gluten free dessert recipe and none of the ones I had used before seemed to be just right.  So I did a bit of internet research and stumbled across this recipe for a flourless chocolate cake.  It had all the usual ingredients you would expect but also mascarpone cheese and as it happened I had a tub of it in the fridge.  (A random purchase from when I thought "let's have tiramisu this weekend" but never got around to it.)

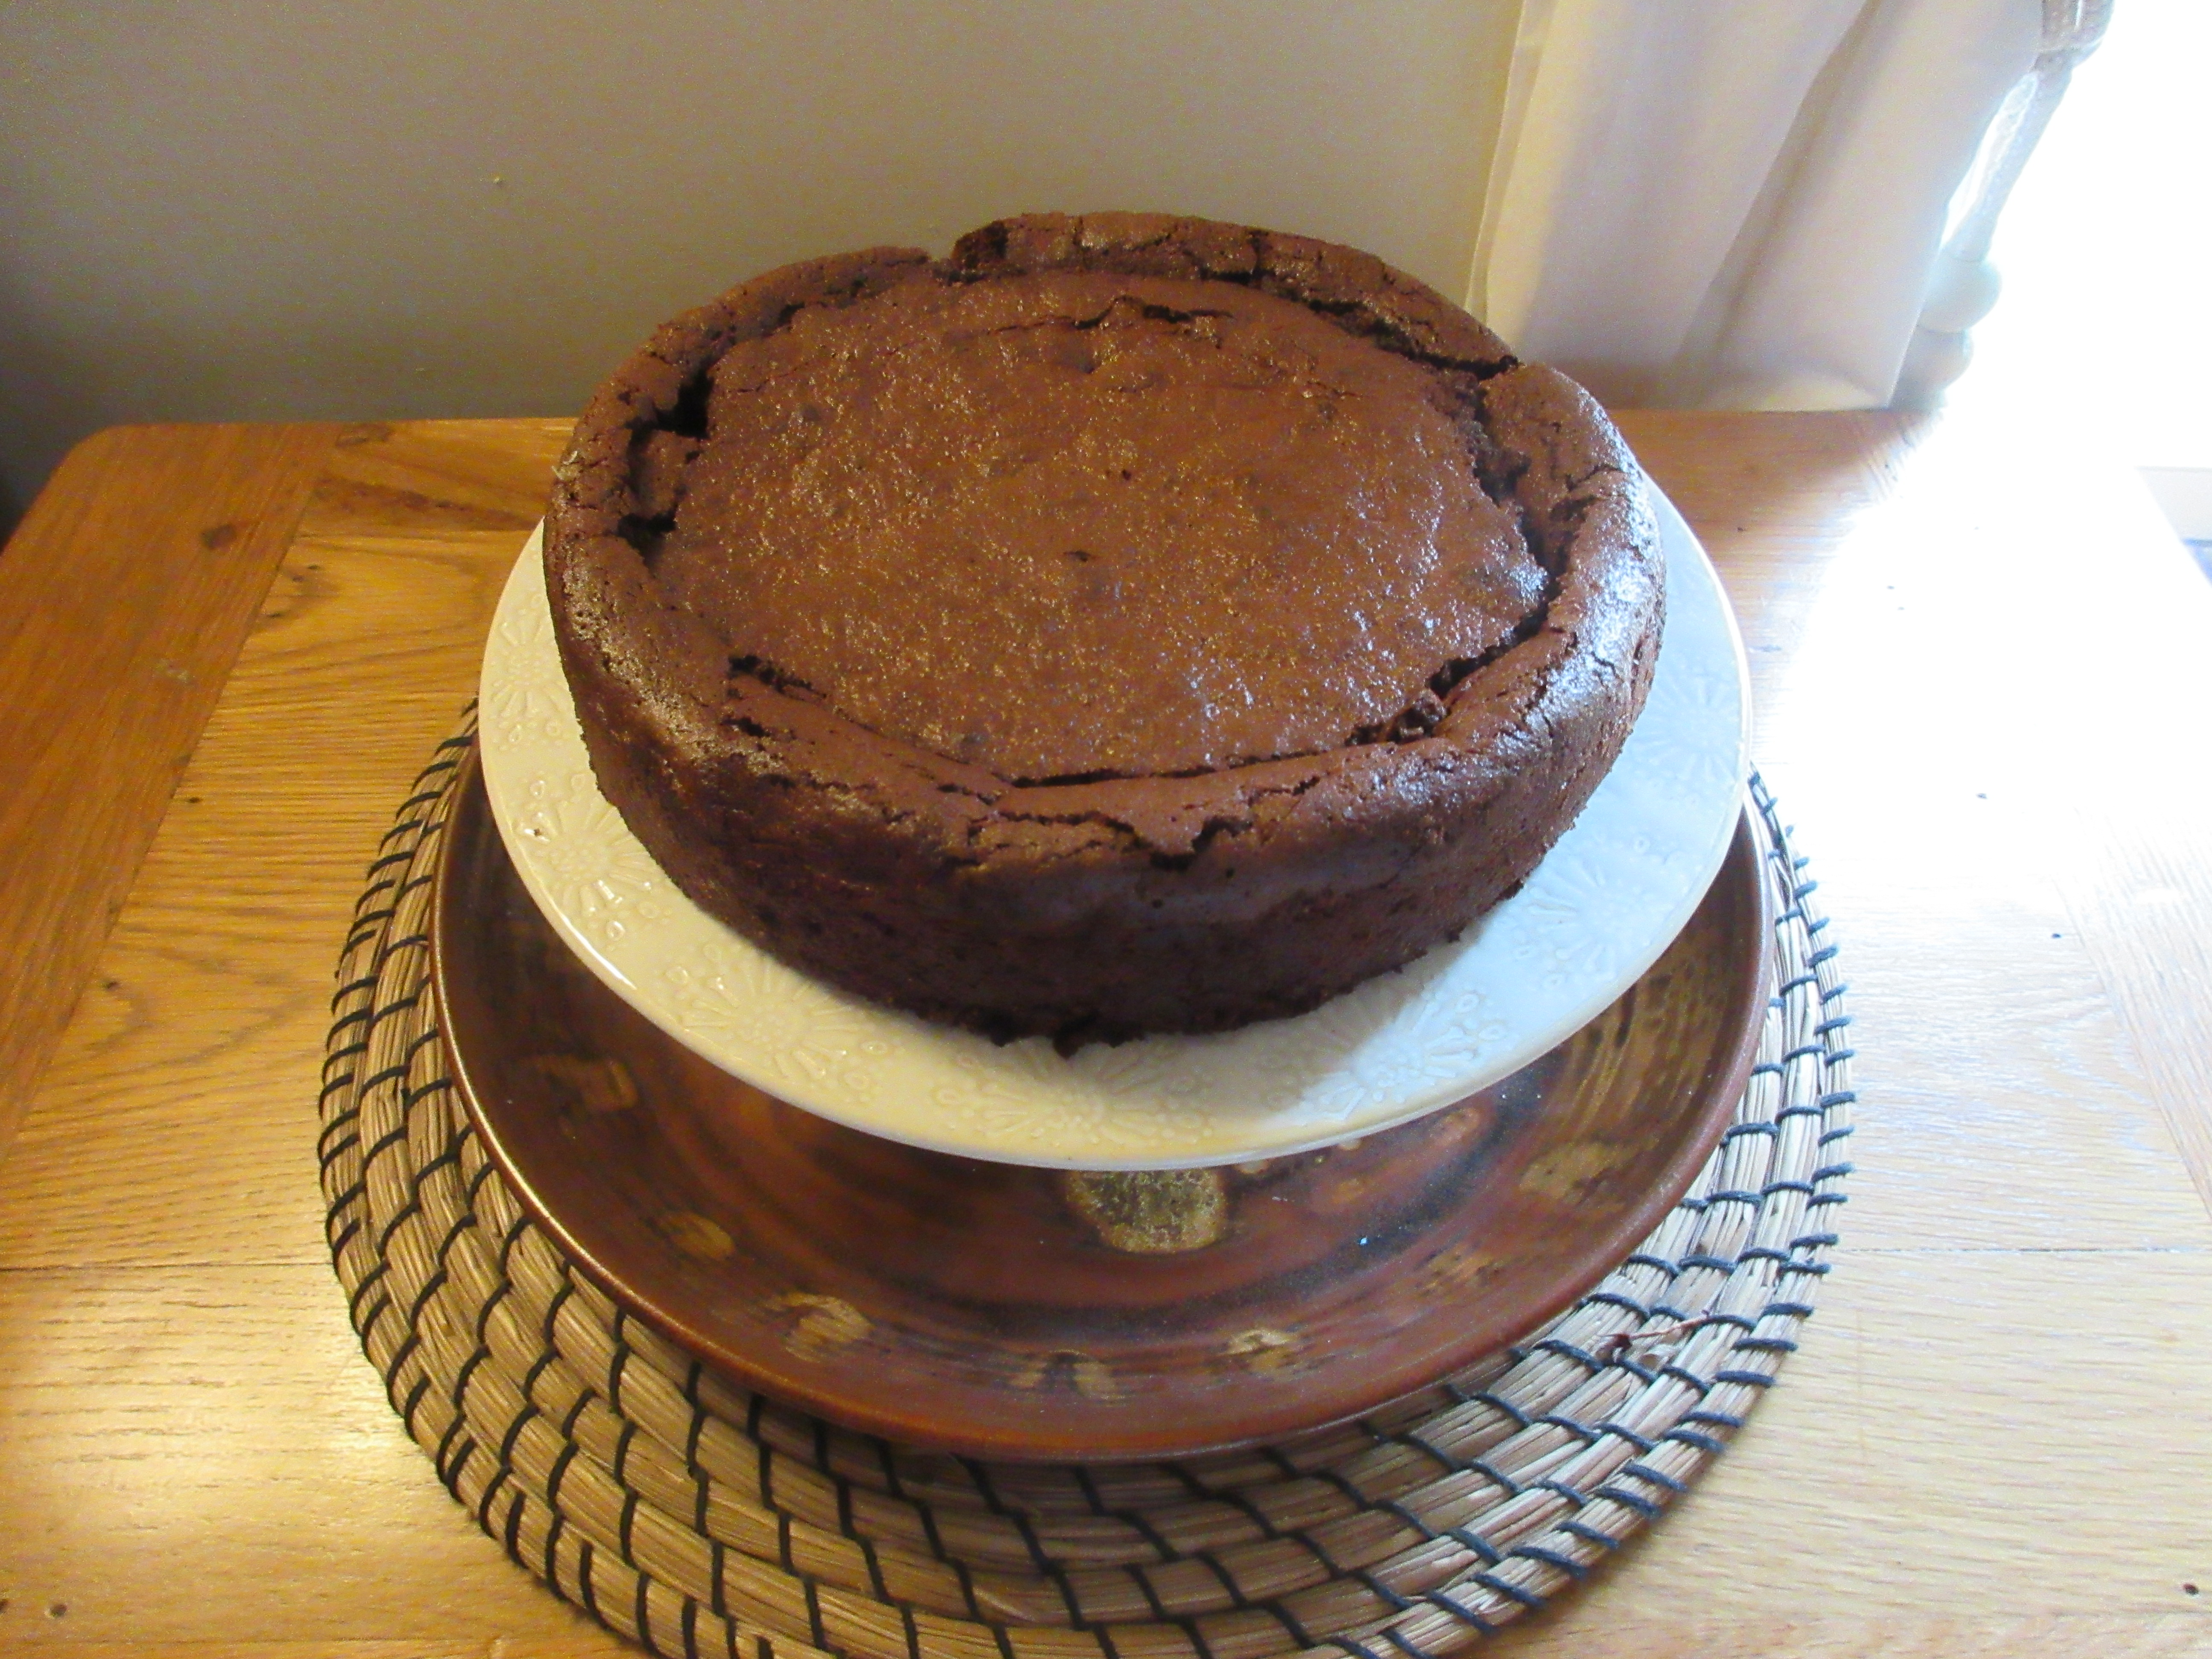
It was very easy to make but not so easy to get out of the tin!  The instructions suggest it can be served warm or cold and to leave in the tin to cool for 30-40 minutes.  I misinterpreted this and tried to remove it from the tin at this point when the cake was still slightly warm.  It nearly disintegrated but luckily I managed to stick it back together on the cake stand with just an ever so slightly wonky appearance!

 Lesson learned!  If I wanted to serve it warm as a dessert I would bake it in something that it can be served in at the table and slice it straight from the dish.  To get it onto a cake stand I would let it go completely cold before I tried to move it, which is clearly what I was supposed to do!!

It was however, delicious, very brownie-like and extremely rich, which is what you would expect with all that chocolate, butter and cream cheese in it!  I served it in small slices with a poached pear alongside (see recipe here).  It went down very well with our guests and I would definitely make it again. 

Other similar cakes I have written about before include the chocolate amaretti cake, the flourless chocolate torte,  chocolate and chestnut fondant and the gluten free black forest cake .  Take your pick, they are all worth the effort (but not all of them are gluten free, check the recipe).

Update…….

I also noticed that Nigella Lawson made a very similar cake which contains amaretto during the recent repeat of her series "At my Table".  Yum!! The recipe is available online on the BBC Food website.  I shall try it myself and report back!  

Ingredients

200g dark cooking chocolate (It doesn't need to have a high percentage of cocoa.  I used SuperU own brand cooking chocolate.  Cadbury's Bournville would work well.)

200g butter

3 eggs

175g golden caster sugar

100g mascarpone cheese (or soft cheese)

¼ tsp vanilla extract

100g ground almonds

30g cocoa powder

Method

Preheat the oven to 180°C / 160° fan / gas mk 4.  Line the base of a 20cm springform tin with baking paper.

Chop the chocolate and butter into cubes and melt using a bowl over a pan of simmering water.  Leave to cool slightly.

Put the eggs and sugar into a large bowl and, using an electric hand whisk or stand mixer, whisk for several minutes until thick and creamy.  Whisk in the mascarpone and vanilla until evenly combined.

Fold in the melted chocolate mixture until everything is an even colour.  Fold in the ground almonds then sift in the cocoa powder and a pinch of salt and fold in.

Pour the mixture into the prepared tin.  Place it on a baking tray and bake for 30-40 minutes.  The top will crack and the cake will puff up, but bake until there is not too much of a wobble in the middle.  (Mine took an extra five minutes.)  It will sink back down but the cracks will remain.

Remove from the oven an allow to cool.  Serve warm as a pudding or cold as a cake (see my notes in text).

You can, if you wish, dust it with more sifted cocoa powder before serving which would hide the cracks a bit.  I found it chocolatey enough without this and nobody seemed to mind the cracks!

Cuts into 10 slices at least as it is very rich.

December 3, 2023

BROWNIES

I wanted to bake something for the walking group that was quick and easy, preferably a traybake, and brownies came to mind.  I hadn’t made brownies for years and looked for a recipe that didn't require melted chocolate as I didn't have any real chocolate to melt except for a bag of chocolate chips.  This one by Mary Berry has to be the easiest recipe ever.

They turned out to be really good with a crusty top and a squidgy middle.

What more could you want?!

Ingredients

275g softened butter

375g caster sugar

4 large eggs

75g cocoa powder

100g plain flour

100g dark chocolate chips

Method

Preheat the oven to 180°C / 160° fan / gas mk 4.  Grease a large baking tin or roasting tin measuring about 30 x 23cm and line with baking paper.  

Put all of the ingredients except for the chocolate chips into a large mixing bowl and beat together using an electric mixer or a wooden spoon and a hefty amount of muscle power! I started with the wooden spoon but resorted to a hand held mixer which was working very hard.  Next time I will use my Kenwood food mixer.

Add the chocolate chips and stir in.  Transfer to the tin and level the top.  Tap on the worktop a few times to settle the mixture and dispel any air bubbles.

Bake for 30 minutes then cover loosely with foil.  Bake for a further 10 minutes until just done.  Over baking will cause the brownies to lose their gooey centre.  Cool in the tin.

Cuts into 24 generous squares. 

October 31, 2023

CHOCOLATE AND BANANA CAKE (with walnuts)


It was the usual story.  Three bananas in the fruit bowl, past their best and whispering "cake, cake" every time I passed by.

I fancied making a banana cake that I hadn't made before and the recipe comes from a little book called "Cakes and Slices".  It's one of those compilation cook books where no one person lays claim to the recipes. 

The cake was a bit of an ugly duckling (very craggy) but very easy and quick to make, and yummy all the same!  I took it to our walking group for the "debriefing" so was able to see how it cut and to taste a slice.  It was very good and I made a second one for a cake stall at a local event where it sold well.

Although it was in principle very easy, I've given it two stars in the faff factor as I find chopping chocolate and walnuts rather tedious!

Ingredients

3 ripe bananas, mashed

170g caster sugar

185g self raising flour

2 eggs

3 tblsp light olive oil or sunflower oil (I used groundnut oil)

3 tblsp milk

100g dark chocolate, finely chopped 

90g walnuts, chopped

Method

Preheat the oven to 180°C / 160° fan / gas mk 4.  Butter and line a 2lb loaf tin or use a paper liner.  A 20cm round tin would also work.

In a large bowl, mix together the banana and sugar.  Sift the flour into the bowl.  Add the eggs, oil and milk and mix well together.  Stir in the chocolate and walnuts.

Pour the mixture into the tin and bake for 50-60 minutes.

Cool in the tin for five minutes then turn out onto a wire rack to finish cooling.

Cuts into 8-10 slices.

January 20, 2023

CHOCOLATE GUINNESS CAKE


My round-up of favourite cakes would not be complete without including my all time favourite, the chocolate Guinness cake by Nigella Lawson from her book "Feast", first published in 2004.

It always goes down well at special occasions and I have made it dozens of times over the decades.  I have adapted it slightly since the first time and, because recipes on websites have a nasty habit of disappearing, (or linking to something else) here is the recipe that I now use.  At the time of writing, the original can be seen on Nigella's website here.  

It's a very "grown up" kind of chocolate cake, not the sort of children's birthday parties and, because the topping is quite sweet, I now make about half the quantity of the amount in Nigella's original recipe.

Ingredients
For the cake

250 ml Guinness (original)

250g butter, cubed

75g cocoa powder

400g caster sugar (golden or white)

142ml pot soured cream (or 150ml full fat crème fraîche)

2 large eggs

1 tblsp vanilla extract

275g plain flour

2½ tsp bicarbonate of soda

For the topping

150g full fat cream cheese

75g icing sugar

60ml double or whipping cream

Method
For the cake

Preheat the oven to 180°C / 160° fan / gas mk 4.  Butter and line the base of a 23cm springform cake tin.

Pour the Guinness into a large saucepan, add the butter and heat gently until the butter has melted.

Remove the pan from the heat.

Add the sugar and cocoa powder and whisk in.

In a small bowl, beat together the eggs, soured cream and vanilla.  Pour into the pan and whisk in.

Add the flour and bicarb and whisk in until well combined.

Pour the mixture into the prepared tin and bake for 45-60 minutes until done.  The centre should still seem damp and it may well crack and dip slightly in the middle.

Cool in the tin.

For the topping

Lightly whip the cream cheese until smooth and sift in the icing sugar.  Beat together then add the cream.  Beat again until you get a spreadable consistency.

Alternatively, use a food processor, blitzing the icing sugar first to remove any lumps, then adding the cream cheese and process again.  Finally add the cream and process again.

When the cake is completely cool, remove from the tin, remove the paper and place it on your serving plate.  Swirl the topping over.

Cuts into 12-15 slices.

Leftover cake should be kept in the fridge because of the topping. 
The cake freezes well, with or without the topping.

August 9, 2022

PRUNE AND CHOCOLATE MINI MUFFINS

For the afternoon tea in France a few weeks ago (see here) I made some mini muffins to a recipe by Delia Smith.  I spotted the recipe in one of her older cook books, simply called "Baking", when I was actually looking for something else - the lemon curd layer cake that's on the cover (and in the next post).

I wanted some little bite sized cakes to adorn the top layer of the cake stand and these sounded perfect for the job.  I haven't found the recipe anywhere on the internet but it does seem that chocolate, prune and Armagnac (or other alcohol) is a combo that Delia is quite fond of as she has other recipes such as for a cake, mini cakes and a chocolate log.  I can't fault it - they are a match made in heaven...well probably not quite that saintly, owing to the booze!


For the icing I used Lynn Hill's recipe for a chocolate glaze which you can see here although I only made a half quantity.  In the above picture it looks a bit dull because the cakes had been in the fridge for a while, but on the day of making it looked fabulous - dark and glossy.  I decorated my muffins with halved glacé cherries, chocolate raisins and chocolate vermicelli, but you can obviously use your imagination here.  

They were very rich, boozy and chocolatey!  The prunes gave a slightly fruity hint but I doubt anyone would have identified it as prune if they didn't already know.  (Prunes do have a bad press, owing to their 1950's health food connotations !)  Each one was a perfect little morsel.


I froze the leftover muffins to enjoy later and they were just as good.

Ingredients
For the muffins

50g Agen prunes, stoned
55ml Armagnac
150g plain flour
2 tblsp cocoa powder
1 dessertspoon baking powder  (a dessert spoon is about ⅔ of a tablespoon)
¼ tsp salt
1 large egg, beaten
40g golden caster sugar
120 ml milk
50g butter, melted and slightly cooled
50g plain chocolate drops

For the topping

100g dark chocolate, chopped
45g unsalted butter
glacé cherries, halved, chocolate raisins and chocolate vermicelli to decorate.

Method

Chop the prunes into small chunks and soak in the Armagnac overnight or for as long as you can.

Preheat the oven to 200°C / 180° fan / gas mk 6.  Put 24 mini muffin cases into a mini muffin tin.

Sift the flour, cocoa powder, baking powder and salt into a large bowl.

In another large bowl, mix together the beaten egg, sugar, milk and melted butter.

Sift the dry ingredients (again) into the wet mixture and fold them in quickly.  Then add the chocolate drops, prunes and Armagnace and mix briefly again.

Divide the mixture evenly between the muffin cases (about one heaped teaspoonful in each) and bake for 10 minutes.

Cool in the tin for 5 minutes before removing from the tin to cool completely on a wire rack.

To make the topping, melt the butter and chocolate together in a heatproof bowl over a saucepan of simmering water.  Stir frequently until smooth and allow to cool slightly before using.  Spread about a teaspoonful on the top of each muffin and decorate as you like.

Makes 24 mini muffins.

June 6, 2022

AFTERNOON TEA


With all the Queen's Jubilee celebrations for being on the throne for 70 years there has been much talk of street parties and afternoon teas.  In fact in our part of France friends held their own afternoon tea party to celebrate but unfortunately I was unable to attend.  I'm back home in the UK because my father is in hospital and his future care is again under debate.  

So instead I decided it was time I posted about the afternoon tea I held for a friend's birthday just a couple of months ago.  That was in France too.

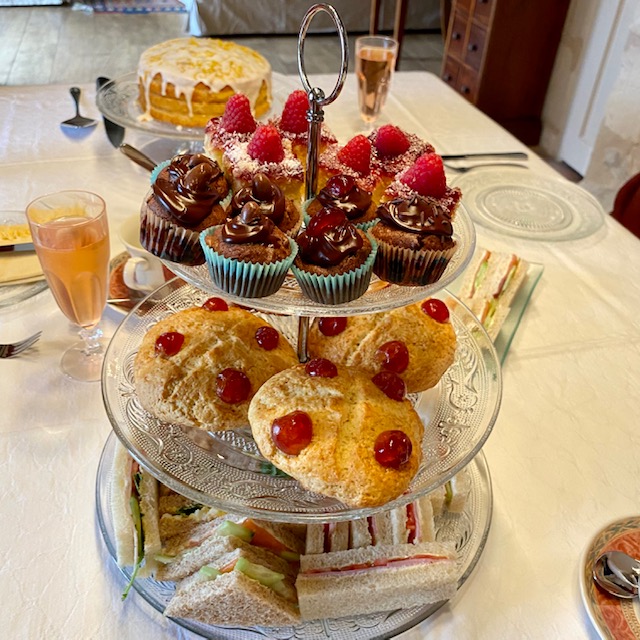
I used my three tier glass cake stand which I acquired at a brocante a couple of years ago for just 2€.  It matches some dessert plates and a regular one tier cake stand that were also collected for next to nothing from brocantes over the years.  My best white tablecloth doesn't come out very often but with that and real cups and saucers the table looked the business, even if I say so myself! 

The bottom layer was a selection of sandwiches with the crusts cut off (of course!).  There were home made egg mayonnaise and rocket on brown bread, smoked salmon, cream cheese and cucumber on brown and smoked ham with tomato and cucumber on white.

You can see the recipe for egg mayonnaise here.  I have never seen cress for sale in France so opted for rocket instead.  It was a good substitute.

Being in France, the sliced bread available is not quite like in the UK.  Generally the texture is nice but it always seems to me to be slightly sweet.  We toyed with the idea of making our own bread but as it was only a few days after we had arrived and we were still dealing with all the usual problems of being away from the house for so long decided it was a step too far.


The middle layer was Victoria scones.  For such an important occasion I didn't trust myself to make ordinary scones, my success with those being variable.  The Victoria scones are easy to make from the Be-Ro book recipe and for me they work every time.  They looked cute on the stand although someone who saw the pictures on Facebook said they looked like fat rascals!  


I can't say I've ever eaten a fat rascal so wouldn't know but they sound like fun so will add them to my ever lengthening bucket list of thing to bake!  You can see the recipe for Victoria scones here or look it up in the Be-Ro book - it's in all the recent editions.


The top layer, the crowning glory, was of small cakes.  The raspberry sponges were cut from a traybake recipe for a jam and coconut sponge, otherwise known as "school cake" and which I have been hankering after making for some time!  I used a recipe on the Asda website which you can see here.  It is very quick and easy and the little squares looked very pretty when topped with fresh raspberries.  You can also see the recipe here.

The little chocolate cakes were to a recipe from one of the collection of slim volumes that Delia Smith put out many years ago called "Baking".  They are chocolate, prune and Armagnac mini muffins and I topped them with an excellent chocolate icing from Lynn Hill's website Traditional Home Baking.  You can see the icing recipe here and I added a few decorations including halved glacé cherries, halved chocolate covered raisins and choclate vermicelli.  They were delicious!


No afternoon tea would be complete without an actual slice of cake so for that I made a lemon layer cake filled with lemon curd to another Delia recipe from the same book.  You can see that here.  I didn't make my own lemon curd but used a Bon Maman jar which I brought over from the UK.  Bizarrely you can buy lemon curd in France but not the Bon Maman one!

I had never made this cake before but had eaten it several times as it's a family favourite of Nick's sisters.  It was easy to make and, of course, yummy!


Our birthday guests enjoyed the afternoon tea and so did we.  Being Americans they had only ever had afternoon tea a couple of times before when in London.  It was fun to make and fun to eat.  It does involve a lot of preparation and baking with all the different elements but it's well worth the effort.

You can see my lemon curd layer cake here.
The prune and chocolate mini muffins are here.
The little raspberry cakes are here.
The egg mayonnaise recipe is here.

July 3, 2020

CHOCOLATE AND GINGER CAKE and the importance of licking the spoon!

 
It was my little brother's birthday recently and he came to have a socially distanced lunch with us to celebrate.  He's ten years younger than me and not so little any more!
 
The forecast was for a nice warm, sunny day so we opted to have a barbecue.  For dessert I made a raspberry trifle, a favourite of his and of Nick's.  For a birthday cake a chocolate and ginger cake was requested.  At the back of my mind I vaguely remembered a Mary Berry recipe for the very same thing and with a bit of googling found it in several places.  One is on the Sainsbury's website here and the other is on the Happy Foodie website here.
 
I have given both links because links have a habit of disappearing after a while.  I find it really annoying to find that a link for something I have got all excited about has disappeared altogether, but that's the nature of the internet I suppose.  Hopefully with two links to go at one of them should still be there in a couple of years' time!
 
In any case, the recipe comes from a book entitled "Mary Berry cooks the perfect" and of course that's where I had originally seen it - although my copy is in France and we are not.  Yet.
 
 
This particular book is a "how to do it" kind of book, not just a series of recipes.  However, Mary in her wisdom omitted to remind the reader of one very important fact.
 
You should always lick the spoon, as soon as possible.
 
When I was a little girl I was always allowed to lick the spoon.  As soon as the cake was in the oven I couldn't wait to do it and, with no little brother around for the first ten years of my life, I had it all to myself.  It's a custom that I have continued to this very day and it has on several occasions saved the day.  This day was one of them!
 
On licking the spoon I thought "it doesn't taste sweet enough".  Within nanoseconds I had realised why.  The carefully weighed out sugar was still in a little pot on the worktop and not in the cake!
 
The cake had only been in the oven for about three or four minutes at the most (I'm that eager to get to the spoon licking part) and it was still liquid.  I whisked it out of the oven at the speed of lightening.  Getting the mixture out of the tins and back into a bowl was a messy job and the tins had to be washed, greased and relined.  Luckily it's an "all in one" kind of cake recipe (my favourite kind) so all I did was beat the missing sugar into the mixture as evenly as I could and get it back in the oven pronto.   
 
The cake was delicious and a great success.  You would never have known how close it was to being a complete disaster- although you might have if I hadn't licked the spoon so promptly.
It had a lovely texture, a good chocolatey flavour with a hint of ginger and the frosting looked pale and inviting against the darkness of the cake.  The only thing I did differently to the recipe was to decorate with sprinkles rather than shavings of preserved ginger.
 
It was a hit with the birthday boy and everyone else and I shall definitely be adding it to my list of favourite cakes.  But I'll try to remember to put all the ingredients in next time.
 
Cuts into 10-12 slices.

April 11, 2020

HAPPY EASTER !


Happy Easter!


Our Easter cake is a Mary Berry's Very Best Chocolate Fudge Cake and you can see the recipe here.

Ingredients

For the cake

50g cocoa powder, sifted and blended with 6 tblsp boiling water

3 large eggs

50m milk

175g self raising flour

1 rounded tsp baking powder

100g butter, softened (or use baking spread)

275g caster sugar

For the icing and filling

3 tblsp apricot jam

150g plain chocolate, not too high percent cocoa solids, Cadbury's Bournville is ideal

150ml double cream

Method

Butter two 20cm sandwich tins and line the base with baking paper.  
Preheat the oven to 180° C / 160° fan / gas mk4.

Put all the cake ingredients into a large bowl and beat well until smooth and thick.  Divide between the two tins and level the tops.

Bake for 25-30 minutes until done, cool in the tins for a few minutes then turn out onto a wire rack to finish cooling completely.

Warm the apricot jam and spread onto the top of the cakes.

Break the chocolate into chunks and place with the cream into a bowl sitting over a pan of simmering water.  (Ikea sell a very useful stainless steel bowl with a handle that does this job for a few £.)

Stir the mixture frequently until the chocolate has melted then remove from the heat to cool.  When it has thickened but not set, spread over the jammy tops of the cakes and sandwich together.

Decorate with Easter eggs or other decorations of your choice.

Cuts into 10-12 slices.

August 14, 2019

A CRAFTY CHOCOLATE CAKE

 
These have to be some of the worst photos of a cake that I have ever put up in this blog but the cake is one of the best.
 
 
Some time ago Phil of "As Strong as Soup" blog posted about Michael Barry's Crafty Chocolate Cake and ever since then I have been meaning to bake it. It's hard to believe that I have waited seven years to make this cake! (So many cakes, so little time.)  You can read Phil's post about it here.
 
Michael Barry had the cooking slot in the old Food and Drink series on the BBC and I remember enjoying his no nonsense style.  Phil gives more information about him in his post and a link to the recipe on the Oxfam website.  Sadly the link no longer works so I googled the cake and came across it posted as a contributor's recipe on Nigella Lawson's website.  Something about this version of the cake somehow didn't quite ring true and at the back of my mind I thought it was not the same as the original.


Luckily, not long ago I acquired a copy of  the book that it comes from, Michael Barry's Food and Drink Cookbook, published in 1991. (From a charity shop for £1, where else?)  There are subtle differences between his recipe and the one on Nigella's website so I decided to go with the original.
 
 
The cake was destined for a birthday get together of just five ladies and I was dismayed when the cream I intended to fill it with would simply not whip up stiffly enough to use it.  Glurpy cream oozing out of the middle of an otherwise acceptable cake just will not do for a birthday so I left it out and just filled it with a good layer of cherry jam instead.  I was equally, if not more dismayed when the second sponge cracked as I placed it on top of the first.  A good dense dusting of icing sugar was not enough to hide the crack but nobody seemed to mind.
 
Cracked top and lack of cream notwithstanding, this was an excellent cake.  Phil waxes lyrical about it and quite rightly so.  In the book Mr Barry boasts that his cake was quicker to make and preferred by the Food and Drink team over a similar recipe by the WI! 
It is a doddle to make, (although it takes longer to bake than other all-in-one sponge cakes) has a lovely light texture and good chocolate flavour.  What more could you want from a recipe?
 
Ingredients
 
175g self raising flour
4 heaped tblsp cocoa powder
1 heaped tsp baking powder
100g caster sugar
1 dessert spoon black treacle
150ml sunflower oil
150ml milk
2 large eggs
 
For the filling
 
4-5 tblsp cherry jam
approx. 200ml double cream
 
Method
 
Grease and line the bases of two 18cm sandwich tins.  Preheat the oven to 160C / 140 Fan.
 
Put all the cake ingredients into a food processor and blend until you have a dark brown creamy batter.
 
Divide between the two tins and bake for 40-45 minutes.
 
Remove from the tins and cool on a wire rack.
 
To serve, sandwich the cakes together with a good layer of jam and some whipped cream.  dust thickly with icing sugar on top.
 
Cuts into 8-10 slices.