Showing posts with label CCC. Show all posts

October 11, 2020

APPLE AND CINNAMON CAKE


I had been meaning to make this cake ever since I first spotted it on Lynn Hill's website here. I had in fact already tasted it, when a friend made it for our cake club meeting last October.  Sadly the cake club as such no longer exists.  It's been replaced by a "cake and bake" club that, more often than not, meets at lunchtime instead of mid afternoon.  This means that there are more savoury bakes, quiches and the like, because it's at lunchtime, (even salad, soup and sandwiches have made an appearance) as people think that lunch is not lunch unless you have something other than just cake.

It depends on your perspective I suppose!!


Anyway, this cake (diets notwithstanding) was baked because we were having visitors and a cup of tea in the afternoon just doesn't seem right unless there is a cake to go with it.  (Sounds like a good excuse to me!)  As usual I made it in a 23cm round tin rather than the square tin in the original recipe.

Like all of Lynn's recipes, it's straightforward to make and works perfectly.  After all, what else would you expect from the lady whose brainchild was the Clandestine Cake Club, a brilliant idea that ended up with thousands of members all around the world.  Sadly it is no more and I still miss it.  However, I urge you to check out the website and browse all the lovely recipes.

This was an excellent cake, just the right amount of moistness and spice.  The drizzled warmed golden syrup on top is a trick I might try on other cakes.  Our visitors loved it, had second helpings and jumped at the offer of a slice to take home.  Mind you, they thought it could stand more spice and suggested adding some ginger.  Judge for yourself if you make it.  I was concerned that I had sprinkled too much ground cinnamon over the cake before drizzling the icing on top, and that it might taste a bit "soapy", but in fact it was just right.

It's one of the few cakes I have made that have been gone in less than 24 hours.  Here's my adaptation of it.

Ingredients

For the cake

1 dessert apple (or eating apple as my mum used to say!)

180g spreadable butter (I used Country Life Spreadable)

180g soft dark brown sugar

3 eggs

200g self raising flour

1 tsp ground cinnamon

3 tblsp golden syrup

For the topping

3 tblsp golden syrup

1-2 tsp ground cinnamon

4 tblsp icing sugar 

1 tsp preboiled water (you could use lemon juice)

Method

Grease and line the base of a 23cm round springform cake tin.  Preheat the oven to 180C / 160 fan.

Peel the apple, cut out the core and chop into 1cm dice.  Put the chopped apple into a small bowl and cover with cold water.  This will prevent the apple from going brown.  Set aside.

Put the butter and sugar into a large bowl and beat with an electric hand mixer until lighter and fluffy.  Add the eggs, one at a time, along with a little of the flour and beat in.

Fold in the flour and cinnamon, mixing until well combined.

Drain the apple and tip onto a tray lined with baking paper.  Place another sheet of paper on top and pat the apple pieces dry.  Add to the mixture with the golden syrup and stir well to combine.

Tip the mixture into the tin and level the top.  Bake for 30-35 minutes until golden brown and done.

While the cake is cooking, put the 3 tblsp golden syrup for the topping into a small saucepan and heat gently until melted and very runny.

When the cake is done, remove from the oven and prick all over with a skewer.  Pour on the melted golden syrup and brush over with a pastry brush.

Cool in the tin for about 10 minutes before turning out onto a wire rack.  

When completely cool, dust with ground cinnamon.

Make a water icing using the icing sugar (sieved) and water (or lemon juice) and drizzle it decoratively over the cake.

Cuts into 10-12 slices.

May 1, 2020

EMERGENCY GINGER CAKE.

 
My brother, who lives 60 miles away, has been in more or less solitary confinement for six weeks and has barely ventured out except to buy food, most of which he gets from his small local Co-op. 
 
One of the things he struggled to get was bread.  No problem, he thought, as he has a breadmaking machine.  Then he discovered, like the rest of us, that there was no flour to be had in the shops, even extending his search to larger supermarkets. 
 
 Anyway, I have been lucky.
 
In our local Tesco and Aldi I managed to get some self raising flour - Homepride in Tesco and own brand in Aldi.  I didn't have high expectations of the Aldi flour but in fact it was perfectly ok.
We also have in our area a small chain of shops called Taylor's who are actually corn merchants.  They look like pet shops as they sell pet food and accessories, but they also sell excellent flour.  Apparently the local flour hoarders haven't realised that you can buy flour in a pet shop so there is usually some available.
 
I parcelled up a supply of bread flour to send to my brother so that he could make himself some bread.  Also some dried yeast, granulated sugar and a few other bits and pieces that the panic buying locusts had cleared from his local shops, including soap.  I also included a loaf tin (in case he preferred to just make the dough in the machine and bake the bread in the oven and apologising for the colour - pink), the box of Homepride SR flour and a jar of ground ginger so that he could make a cake. 
 
I thought about what recipe he could use with what he was likely to have in stock, adapted this recipe for sticky ginger cake from the Clandestine Cake website, and decided it might be best to try it out myself first.  I substituted granulated sugar for the brown sugar, more ground ginger for the preserved ginger, used Stork instead of butter because it creams so easily by hand and drizzled it with golden syrup as I didn't think he would have icing sugar in stock.  Because it was baked in a loaf tin, not a round tin, it took 15 minutes longer to bake.


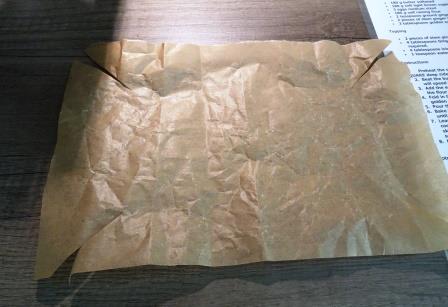
I explained how to line the tin with baking paper, although a bigger piece than this would have been better.
 
 
 It turned out to be a very nice cake. 
 
It would of course have had a different flavour using the brown sugar and preserved ginger in the recipe, but it was lovely.  It was nice and gingery with a soft, even crumb and would also be excellent as a pudding with some custard.  Most people could make it from what they have in the kitchen cupboard.
 
Ingredients
 
180g Stork margarine (or any spreadable butter, or really soft butter)
180g granulated sugar
3 eggs, beaten together in a small bowl
180g self raising flour
5 tsp ground ginger
2 tblsp golden syrup
 
1 tblsp golden syrup for drizzling
 
Method
 
Grease a 900g (2lb) loaf tin.  Cut an oblong of baking paper and use it to line the tin.  Slashing the corners will make it easier to fit neatly into the tin.  Preheat the oven to 180C / 160 fan / gas mk 4.
 
Put the margarine into a large bowl with the sugar and beat like hell with a wooden spoon until smooth and creamy.
 
Add the eggs in thirds, beating in well.  Add a spoonful of flour if the mixture seems to curdle.
 
Add the flour, ginger and golden syrup and stir in gently.  (Don't beat.)
 
Spoon the mixture into the prepared tin and level the top.  Bake for 45-50 minutes until golden brown and done.
 
Remove from the oven and poke holes in the top of the cake with a skewer or knife point.  Drizzle some more golden syrup over the cake, probably about a tablespoonful, and spread over the cake with the back of a spoon.
 
Cool in the tin for 10 minutes.  Use the edges of the baking paper to carefully lift the cake out onto a wire rack. 
Remember it will be fragile while still warm so, if it doesn't lift out easily, place a plate on top of the cake tin and invert it so that the cake drops out of the tin.  Then lift off the tin and place the wire rack on top of the bottom of the cake and tip it upside down again so that the cake ends up the right way up on the rack.
 
Cuts into 10-12 slices.

January 12, 2020

STICKY GINGER CAKE and a new cake stand!

 
For Nick's birthday last November he requested a ginger cake (again).
 
No surprise there but I was glad to have a reason to bake a recipe I had been hanging my nose over for some time.  It's on the Clandestine Cake website and is one of Lynn Hill's own recipes.  The Clandestine Cake Club as such folded some time ago but the concept is still alive and well in websites and social media.
 
 
It was easy to make and ticked all the birthday cake boxes.  Very gingery with a lovely crumb and a slight stickiness - there's a clue in the name.
 
 
I was also pleased to have a reason to use my new black cake stand.
 
As a person who has more cake stands than a sensible person should ever need I did hesitate briefly before buying it.  (Very briefly.)  I had been hankering after a black one for a few years but never found one that I liked.  Last year I made one for myself - from a black plate glued to an almost black (charcoal grey) candle stick.  It's fine but, just like buses, when you have finally given up hope and ordered a taxi, the bus you were waiting for turns up.  This one turned up in an antique/vintage shop at Cromford Mill and was very modestly priced, so I swooped.  It's made from black glass and is said to be vintage 1950's.
  
The cake was so good it will be my go-to ginger cake from now on.  You can see the recipe here but it can be difficult to read due to the multiple adverts obscuring the text.  If, like me, you mostly use an iPad it can be impossible.  Consequently I have given my version here.

I used a 23cm round springform tin instead of the square one in the recipe and it worked fine.

Ingredients

180 softened butter or baking spread (I used Sainsbury's Buttersoft)

180 soft light brown sugar

3 eggs

180g self raising flour

2 tsp ground ginger

2 pieces stem ginger from a jar, chopped

3 tblsp golden syrup

For the topping

2 pieces of stem ginger from a jar, chopped

4 tblsp ginger syrup from the stem ginger jar

For the icing

4 tblsp icing sugar

1 tsp boiled water

Method

Preheat the oven to 180C / 160 fan / gas mk 4.  Grease and line a 20cm square or round springform tin.

Cream the butter and sugar together using a hand held electric whisk (or a wooden spoon and beat like mad!).

Beat in the eggs one at a time.  Adding a tbslp of the measured flour with each egg will help to prevent the mixture from curdling.

Fold in the flour and ginger powder then stir in the golden syrup and stem ginger.  Mix well.

Pour or transfer the mixture to the tin, level the top and bake for 30-35 minutes.

Cool in the tin for 10 minutes then turn out onto a wire rack.

While the cake is still warm, poke a few holes in the top and pour over the ginger syrup.  Scatter the chopped ginger pieces evenly over the top.

To make the icing, mix the icing sugar with enough water to make a runny but creamy consistency and drizzle imaginatively over the top.

Cuts into 8-10 slices.

March 14, 2019

CURD TART


This is another of those bakes that doesn't look much - definitely no glamour here - but in the eating the pudding is proved to be absolutely delicious !!

The recipe turned up in my email inbox as a post from Lynn Hill of the organisation formerly known as the Clandestine Cake Club.  Being a Yorkshire lass and therefore fond of Yorkshire curd tart, Lynn has found a way of making the tart using cottage cheese. 

I have very fond memories of Yorkshire curd tart myself.  When my mum went on her weekly bus trip to Matlock to do the shopping she would return with a selection of delicious goodies from the baker's shop, usually a custard tart, a vanilla slice, an iced bakewell tart with a cherry on top and, if we were very, very lucky, a Yorkshire curd tart. 
As an aside, I have to say that Mum's shopping trips were not as onerous as you might at first think.  She didn't have enough arms to bring several bags of shopping, enough for a family of four, home on the bus.  That would have been impossible, even in those days (the 1950's and 60's).  The reality is that the butcher, baker, greengrocer and ironmonger would turn up in their van at least once a week and park near the house so that we could get most of the shopping we needed literally on the doorstep.  I have wonderful memories of the baker bringing a huge basket containing a selection of bread and cakes to the back door for us to choose from.  Being only a nipper the goodies were at just the right height for me to dip in and pick one out before anyone could stop me!  Between the home deliveries, the village post office and the few shops in the next village which was just two stops away on the bus, we got everything we needed to live on without having to go very far at all and certainly not as far as Matlock!
However, my mum enjoyed her Saturday morning shopping trips to buy the few things that you could only get in town, such as her favourite boiled ham or cheddar cheese.  I enjoyed going with her and looked forward to the little cake or bun that would be for tea later in the day.   A Yorkshire curd tart was one of my favourites.

 
My Be-Ro book has a recipe for curd tart using curd cheese but I have never, ever seen it for sale in any supermarket.  You can make curd cheese yourself of course and in actual fact it doesn't look too difficult so if you google curd tart you will find instructions in several places.  I might try that one day when I have the time but on this occasion, I found myself looking at a pack of cottage cheese in the fridge that was just past it's best before date.  Lynn's recipe had turned up just a couple of days before that and I also remembered that I had a pack of ready made pastry in the freezer, unused over Christmas.  So yet again, with all the stars aligned, fate seemed to be telling me to make a curd tart.
 
Of course, as usual, I didn't quite make it exactly right.  The pack of pastry turned out to be puff pastry, which is not ideal and the cottage cheese was a fat free variety which I thought probably wouldn't work - but it did!
 
 
As Nick tucked into his slice he looked up at me with a twinkle in his eye and said "this one's a keeper!".  And he was absolutely right, it was truly delicious.  Very reminiscent of the Yorkshire curd tarts of my childhood and definitely one I'll be making again.
You can see the recipe here.


As another aside, I made it in my very ancient Pyrex pie dish, the one that came in a set of Pyrex bakeware that I bought when I first got a home of my own in the 1970's.  My mum made an apple pie for Sunday lunch in hers every other week.  She also used it for cheese pie, baked eggs and many other things.  It's the perfect size for a family of four and after forty years mine is still going strong and in regular use.  You can't buy them any more - except of course in our local charity shops!  I recently acquired this one for my friend Susan and for just £1 it's an absolute bargain!  I'm sure she will love it.
 

March 5, 2019

RHUBARB UPSIDE DOWN CAKE


A couple of years ago I heard of a liqueur made from rhubarb, called Rhucello.  Being a huge fan of rhubarb I was keen to find some but this isn't easy.  It's made by a Yorkshire family from the beautiful pink rhubarb that is raised lovingly in the Rhubarb Triangle in Wakefield.  It is sold at food fairs up and down the country but until the other week I had never been in the UK at the right time to go and buy some.

 
When I heard that there was a Rhubarb Fair taking place in Wakefield and that the makers of Rhucello were having a stall there, only wild horses and six foot snow drifts would have kept me away!  After years of only dreaming about Rhucello I was at last able to get my hands on a bottle (or two) and, as the name implies, it tastes of rhubarb in the same way that Limoncello tastes of lemons. 
 
 
Not only does it taste delicious, it is also a gorgeous pink colour!
 
The Rhubarb Festival was great fun, lots of food and drink stalls selling anything and everything you could possibly make out of rhubarb from gin to chutney.  Also bars, a music tent and cookery demonstration tent.  We spotted Gordon Ramsay posting for selfies as we breezed between the stalls.  Naturally there was plenty of the beautiful pink rhubarb itself for sale and I bought a bundle.  That was just before we treated ourselves to a bowl each of delicious home made rhubarb crumble in the cathedral café - at £1.50 each a real bargain.
 
 
And so with visitors coming for lunch last weekend I decided to use some of my precious rhubarb to make an upside down cake using and adapting a recipe on the Guardian website that you can see here.


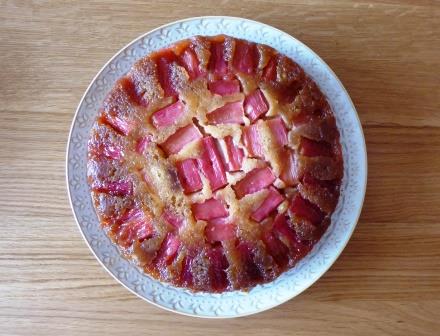
You arrange the rhubarb on a layer of sugar and butter in the bottom of a tin, cover with a sponge mixture and bake.
 
 
It was lovely, had a nice texture and just the right balance of sweetness from the caramel and tartness from the rhubarb.  Naturally we served it with a glass of our new rhubarb liqueur alongside!
 
Ingredients
For the topping
80g unsalted butter, diced
140g light soft brown sugar
250g (2-3 stalks) rhubarb, trimmed, washed and cut into 5cm pieces
For the cake
150g caster sugar
175g plain flour
1 heaped tsp baking powder
2 tsp ground ginger
150ml sunflower oil
2 large eggs, lightly beaten
 
Method
Place a circle of baking paper in the bottom of a 23-24 cm round tin with a fixed base.  Alternatively us a springform or loose bottomed tin but line it with foil that comes well up the sides to prevent any leakage.
 
Preheat the oven to 180C / 160 fan / gas mk 4.  Scatter the butter and brown sugar evenly over the bottom of the tin and put in the oven for 5 minutes to melt the butter.
 
Remove from the oven and arrange the pieces of rhubarb over the melted butter mixture, pressing them in carefully.
 
Put the dry cake ingredients into a large bowl and mix together.  Beat in the oil and eggs, adding a little milk if the mixture seems very stiff.  Spoon the mixture carefully over the rhubarb and level the top.  Bake for 45-55 minutes until done (mine took 50 mins).
 
Cool in the tin for 5 minutes before inverting onto a plate to release the cake.  Remove the baking paper or foil carefully. 
 
Serve warm or cold with cream or ice cream.  Cuts into 8-10 slices.

February 22, 2019

CARROT UPSIDE DOWN CAKE


Nick is rarely fazed by a recipe and abides by the theory that as long as you can read you can do anything.  Consequently he frequently tackles cakes that I would have ruled out as too complicated or fiddly.  This one, which he baked for a CCC meeting last year, required caramelised carrots.


I like a good carrot cake but never thought I would be married to someone who was prepared to slave over a hot stove for ages in order to caramelise carrots for a cake.
 
 
It was worth the effort, although I'm glad it was his effort, not mine.  As a carrot cake it was delicious and the sweetness of the carrots on top made it even more so.  It looked amazing, too.  You can see the recipe on the BBC website here.

Ingredients
For the cake
200g light soft brown sugar, plus 3 tblsp
150ml light rapeseed oil (or vegetable oil)
100g natural yoghurt
3 eggs
2 tsp vanilla extract
3 oranges
300g self raising flour
1 tblsp mixed spice
1 tsp ground cinnamon
250g coarsely grated carrot

For the caramelised carrots
225-250g small or baby carrots, peeled and halved lengthwise
juice of 1 of the oranges above
25g butter
4 tblsp light soft brown sugar

Method
First make the caramelised carrots.  Put them in a single layer in a large saucepan or frying pan.  Add the juice of 1 orange, the butter, sugar and enough water to cover them by just 1 cm.

Bring to the boil and cook until the water has almost evaporated and the carrots are left in a sticky syrup.  Keep an eye on the pan so that the carrots don't catch.

To make the cake, preheat the oven to 160 C / 140 fan / gas mk 3.  Grease a 23cm round cake tin.  Gently lift the carrots out of the pan and arrange cut side down in the base of the tin.  Reserve the pan and syrup for later.

In a medium bowl, whisk together the brown sugar, oil, yoghurt, eggs, vanilla and the zest from 2 of the oranges.  In a large bowl, sift in the flour and spices, then add the grated carrot and mix together.  Stir in the liquid ingredients and mix until smooth.  Spoon carefully over the carrots in the tin, being careful not to disturb their arrangement. 

Bake for 45-50 minutes until done.  Leave in the tin to cool for 20 minutes before turning out onto a plate or stand. 

While the cake is cooling in the tin, add the juice of 2 of the oranges to the pan containing the reserved syrup with the 3 tblsp brown sugar.  Simmer until slightly reduced then stir in the zest of the third orange.  Spoon the syrup over the cake once it has been turned out. 

Cuts into 8-10 slices.

February 6, 2019

BEETROOT, ORANGE AND GINGER DRIZZLE CAKE


I had had my eye on this recipe for some time and eventually got around to making it for one of our last CCC meetings last year.  It comes from a book called "Freeze and Easy" by Sara Lewis, who writes for magazines such as Sainsbury's magazine and has a number of other book titles published including "Gluten Free and Easy" as well as "The Complete Slow Cooker".  I have cooked recipes from all of these books with great success including Sharon's Hotpot which you can see here.

 
The recipe suggests sprinkling pumpkin and sunflower seeds on top of the cake before baking but I didn't because I didn't have any so I just went with the chopped crystallised ginger instead.  The instructions were for an oblong tin but I wanted a round cake so used a 23cm round one.
 
It was lovely and interesting.  Beetroot cakes are not to everyone's taste as they have an earthiness which not everyone likes.  I have friends and relatives who recoil from the very idea of beetroot in any shape or form but we love it.  Maybe because we were brought up on pickled beetroot in salads for Sunday tea when we were small.  Cheese and beetroot sandwiches (on sliced white "wonderloaf" style bread of course) are still regarded as a special treat in this house!
Anyway, it had a lovely texture with a slight purpleness to it and of course with ginger and orange in it, what's not to love?
 
Ingredients
3 eggs
150ml sunflower oil
175g light soft brown sugar
225g self raising flour
1 tsp baking powder
3 tsp ground ginger
1 orange, zest and juice
175g cooked beetroot (cooked without vinegar), coarsely grated
40g preserved ginger, drained and finely chopped
140g granulated sugar
 
Method
Preheat the oven to 180C / 160 fan / gas mk 4.  Grease and line a 23cm round springform tin with baking paper.
 
In a large bowl, whisk together the eggs, oil and sugar, briefly.  Sift in the flour, baking powder and ginger and whisk in until just mixed.  Add the orange zest and beetroot and mix until smooth.
 
Pour the mixture into the prepared tin and bake for 30-35 minutes until brown and done.
 
While the cake is cooking make the drizzle by combining 3 tablespoons of the orange juice with the granulated sugar.  As soon as the cake comes out of the oven, prick all over with a skewer and spoon the syrup over the top.  Dot with the chopped ginger and leave to cool in the tin.
 
Cuts into 8-10 slices. 

August 29, 2018

BLACK FOREST CAKE

black forest

I have made more chocolate cakes than usual this year, for reasons that completely escape me.  Which is no bad thing because you can’t beat a nice chocolate cake and in fact for virtually a whole decade (in my thirties) the only two cakes I made regularly were a chocolate cake (for birthdays and other occasions) and the annual Christmas cake. 

I look back on those years now with amazement.  How can my life have been so dull that only an occasional chocolate cake ever graced my table?  I do know the answer of course, I was busy doing other stuff, and dull it certainly wasn’t, working full time and scuba diving when I wasn’t working.  Looking back I can hardly think it was really me that did all that.  Now that I am retired I can hardly remember ever going to work, as if it was a bad dream for forty years.  As for scuba diving, I wonder who that woman was that I used to be, that lived and breathed underwater swimming for nearly fifteen years.  Crikey.  How things change.  I gave up sub aqua when I reached forty and took up motorcycling instead.  Now I bake and still ride my Harley.  Hey ho.

I made this cake for the very last Loire Valley CCC meeting where the theme was European cakes.  I had been hankering after making a Black Forest Gateau for a while, having a fascination for things retro, and this was the perfect opportunity to get it out of my system.

black forest2

The recipe comes from one of my favourite cook books, “Gorgeous Cakes” by Annie Bell.  I have made several cakes from this book, all have been a great success and turned out more or less as they should have.  You can’t expect more than that from any cook book I think.

This one is described as a Black Forest Victoria and is a variation on the famous sponge cake recipe.  It was very good.  I filled it with cherry jam and cream, plus a few black cherries (from a tin) between the layers of sponge.  I decorated it with a few fresh cherries from our own cherry tree in our French garden and added a few chocolate coated raspberries just because I had the packet open.  I will be making it again – probably for dessert when we have prawn cocktail for starters and chicken chasseur for mains.

Ingredients

225g unsalted butter

200g golden caster sugar

1 tblsp golden syrup

200 self raising flour

2 tsp baking powder

25g cocoa, sifted

4 eggs

100ml milk

For the filling

3-4 tblsp cherry jam

1 tblsp Kirsch

350 ml double cream

1 tin black cherries

2 tblsp grated dark chocolate

a few fresh cherries

Method

Preheat the oven to 190°C / 170° fan / gas mk 5.  Butter and line the bases of 3 18cm sandwich tins.

Put all the cake ingredients into a food processor and blitz until smooth and well blended.  Divide the mixture equally between the three tins and bake for 20-30 minutes until done.  Remove the cakes from the tins and cool on a wire rack.

For the filling, blend the jam with the Kirsch and set aside.  Whisk the cream until spreadable (not too stiff).

Spread one of the cooled cakes generously with cherry jam and then with half of the whipped cream.  Push a few black cherries into the cream and put another cake on top.  Repeat and add the last cake.  Spread it thinly with cherry jam and sprinkle the grated chocolate over the top.  Add a few fresh cherries and other suitable decorations as you like.

Keep in the fridge and bring up to room temperature before serving.

Cuts into 8-10 slices.

July 14, 2018

SPANISH ALMOND CAKE

Spanish almond cake2

Nick made this cake for our very last Clandestine Cake Club meeting.

You may or may not know that the CCC is closing down at the end of this month.  It seems that the club became immensely popular and with free membership costs spiralled out of control and so those at CCC HQ decided to call it a day.

There is a CCC Facebook group that seems to be thriving but in our Loire Valley branch of CCC not all of the members have a Facebook account so that was a non-starter for our club.

For us the cakes were the central point yet almost incidental – a reason to get together for tea and cake (or more usually wine and cake) and have a good old chinwag about this and that and life in the Loire Valley in general.

Numerous spin-off cake clubs have been formed to continue the tradition and there was never any possibility of our members hanging up our aprons for good.  So we formed the Loire Valley Cake and Bake Club and have our own blog which you can see here.  The major difference between our former club and the new one is that members opted overwhelmingly to abandon the “cake only” rule and be able to bring any baked item that fits with the theme of each meeting.  Personally I confess to being slightly disappointed about this. 

Spanish almond cake6

The sight of as many as fifteen absolutely drop dead gorgeous cakes on the table at every meeting was simply amazing, beyond my wildest expectations when I started the club.  Even the odd plain and humble offering blended in well and was always appreciated.  As in life, looks are not everything and it was often the plain, old fashioned cakes that disappeared first.  I can’t really see how a plate of buns or flapjacks can compare to all of that but am more than willing to be convinced!

Spanish almond cake5

Anyway, the theme for our last meeting was “Cakes of Europe” and it was appropriate that for it Nick should choose to bake a recipe from one of the CCC cookbooks.  He chose a Spanish Almond Cake, a traditional Mallorcan cake containing lots of eggs and almonds and flavoured with cinnamon and lemon.

Spanish almond cake4

It was a great success and went down well at the meeting.  Nick only used to bake occasionally before the Loire Valley CCC was formed but has turned into an accomplished and adventurous baker.  In fact the club has a number of male bakers, prepared to have a go and not miss out on the fun.

Ingredients

300g ground almonds

1 lemon, zest only

1 tsp ground cinnamon

300g caster sugar

7 eggs

icing sugar for the top

Method

Preheat the oven to 190°C / 170° fan / gas mk 5.  Butter and line the base of a 23cm springform tin.

Combine the almonds, lemon and cinnamon in a bowl and set aside.

Separate the eggs and beat the yolks with the sugar, using an electric whisk, until light and creamy.  In a separate bowl whisk the whites to the soft peak stage.

Fold alternate spoonfuls of the egg whites and dry ingredients into the yolk mixture until all is used up.  Pour into the prepared tin and bake for 40 minutes or until done.

Cool in the tin.  Turn out onto a plate or stand and dust liberally with icing sugar before serving.

Cuts into 10-12 slices.

June 10, 2018

RUM AND DATE CAKE (gluten free)

rum and date gluten free cake

This is an adaptation of a recipe for a gluten free lemon drizzle cake that I found on the Tesco website.  You can see that recipe here.  I was making a cake for a boozy themed CCC event and it needed to be gluten free.

It’s probably two years since I baked this cake and I made notes at the time about how I had adapted the recipe.  I printed off the recipe and added my slip of paper with the changes tucked into a clear plastic cover for future use.  Then it disappeared.  I have looked for it many times since then and then yesterday, as if by magic, it surfaced, when I was looking for something else, hidden in a folder with a bundle of other forgotten recipes.

rum and date gluten free cake2

I remember that the cake turned out well, nice and moist with a hint of rum and of course anything with dates in it is just my cup of tea.  Now that I have found it I will be able to make it again.  Highly recommended to go with your afternoon cuppa or other beverage of your choice!

Ingredients

170g softened butter or baking spread (I used Flora Buttery)

50g light muscovado sugar

120g caster sugar

2 large eggs

120g gluten free plain flour

50g ground almonds

1 scant tsp GF baking powder

75g chopped dates

2 tblsp rum

Method

First, put the dates into a small bowl with the rum and leave to soak.

Preheat the oven to 180°C / 160° fan / gas mk 4.  Butter and line a 2lb loaf tin or use a liner.

Using a stand mixer, cream the butter and sugars until light and fluffy.  Beat in the eggs one at a time.  Fold in the flour, almonds and baking powder then mix in the soaked dates until well combined.

Spoon the mixture into the tin, level the top and bake for 45 minutes or until done.  Remove from the oven then cool in the tin before removing to a wire rack to cool completely.

Cuts into 8-10 slices.

May 1, 2018

DRINKING CHOCOLATE CAKE

milk chocolate cake4

I made this cake for our most recent CCC event which was themed “Inspired Baking”, although to be honest, it’s a recipe I’d had in mind to do for some time.

My baking inspiration, like so many people I suppose, came from my mum.  She was a good cook of tasty, plain and hearty food and she did a lot of baking.  Every Saturday and sometimes again during the week she would bake a huge pile of little buns and pastries, her favourites being sausage rolls, maids of honour, mince pies and butterfly buns.  Curiously she didn’t make a cake that often.  She would make a Christmas cake at Christmas, ginger cake from the Be-Ro book regularly and the occasional Victoria sponge (which she just called "sponge cake").  If a cake was required for a birthday or Sunday treat it was usually a chocolate cake and made using Cadbury’s drinking chocolate not cocoa powder as that’s what she would have in the house.

milk chocolate cake2

I was reminded of all this when I stumbled across this recipe by Karen in her “Lavender and Lovage” blog.  Most chocolate cakes nowadays are made using melted chocolate or cocoa powder, which is very fine but often a bit too chocolatey for me and in any case, my mum would never have contemplated anything so extravagant!

Most of her baking came from a recipe in her well thumbed and ancient copy of the Be-Ro book but I can’t find anything in the more recent editions that uses drinking chocolate.  Hence I used Karen’s recipe and a great success it was too.

milk chocolate cake3

I had my doubts when it came out of the oven, there being a sunken ring around each cake which caused my heart to sink too.  However, a good slathering with cherry jam and the frostng concealed all the dents and wrinkles and once decorated with Oreo biscuits, chocolate raisins, mini eggs and little Aeros, it looked a treat.  It tasted really good too.  It had a light and moist texture, something you don’t always get by using cocoa powder, and was well received at the meeting.  Definitely a cake I shall be baking again – if only because it would remind me of my mum every time.

milk chocolate cake6

I have adapted Karen’s excellent recipe for the ingredients I had available and it worked well but I suggest you first try her recipe which you can see here.

Ingredients

150g self raising flour, sifted

75g drinking chocolate (I used Nestlé “Le Chocolat”)

2 tsp baking powder

180g caster sugar

200g soft margarine or baking spread (I used St Hubert margarine)

3 large eggs

3 tblsp hot water

For the icing and filling

2-4 tblsp cherry jam

225g milk chocolate

125 ml double cream (I used Tesco double cream substitute)

150g unsalted butter, softened

225g icing sugar

Method

Butter and line the bases of two 20cm round sponge tins.  Preheat the oven to 175°C / 155° fan / gas mk 4.

Sift the flour and baking powder into a large bowl and add all the other cake ingredients except for the hot water.  Whisk with an electric whisk until light and fluffy.  Add the hot water and whisk again for about 3 minutes until even fluffier.

Divide between the prepared tins and bake for 20-30 minutes until done.  Cool in the tin for a few minutes then transfer to a wire rack to continue cooling.

To make the frosting, break the chocolate into pieces and put with the cream in a heatproof bowl over a pan of simmering water.  Stir continuously until the chocolate is melted and well blended with the cream. Remove from the heat and add the butter.  Stir until the butter is blended in.  Sift in half the icing sugar and mix well, then add the remaining icing sugar and mix until creamy and smooth.  Set aside to cool until thickened.

When the cakes are completely cold sit one cake on a plate or stand and spread with a layer of cherry jam.  Spread half the frosting on top of that.

Put the other cake on top, spread with the remaining frosting,  decorate with whatever takes your fancy and serve.

Cuts into 8-10 slices.

April 17, 2018

BLUEBERRY AND COCONUT CAKE and is cake really sexy?

blueberry and coconut cake

I made this cake ages ago, nearly two years ago in fact, and then the book I got the recipe from went missing.  When I was in France I thought it must be in the UK and vice versa.  I couldn’t find the recipe anywhere on the worldwide web so I was feeling miffed that I had made a really nice cake but had no idea how!  When I eventually found the book languishing under a pile of other stuff waiting for filing, sorting, chucking or saving, I was very pleased.  It was a good cake and I wanted to have the recipe so I could make it again if I ever wanted to.  The book is called “What’s for dinner?” by the actress Fay Ripley.

blueberry and coconut cake2

The cake didn’t look much when it came out of the oven, which made me chuckle because in the book she describes it as “comforting and sexy at the same time”.

Well, I don’t know what you think about the idea of cake being sexy, but this one did not look too enticing!  More twinset and pearls than slinky undies but if that’s what wrinkles your prune…….

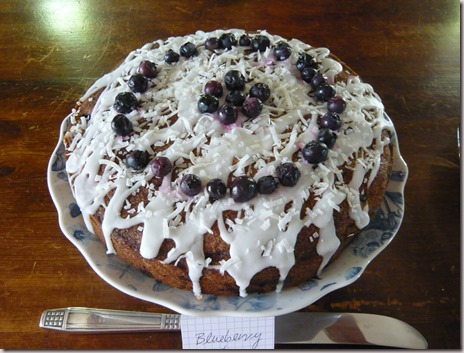
Anyway, enough of that!   One of the reasons that I write this blog is that I find it handy to have a record of the recipes I used and what they turned out like.  Now that I have this one posted I can always find it regardless of which side of the channel I happen to be!  It was a lovely cake made for a CCC event although it looked a lot better after I had tarted it up with some drizzly icing and a sprinkling of coconut and blueberries.  It was moist and fresh tasting with the fruitiness of the blueberries, and the coconut added that unique texture that you only get from……coconut.  Which is not everyone’s favourite in a cake but it is one of mine.

blueberry and coconut cake3

There were some stunning cakes on the table at that meeting  and I would like to think that mine looked as tempting as any of them.  Not that the events are competitive of course – far from it – but even so, one does like one’s cake to look more bee’s knees than dog’s dinner!

Ingredients

180g softened butter (I used Flora Buttery)

180g caster sugar

2 large eggs

1 tsp vanilla extract

100g ground almonds

150g self raising flour

60g desiccated coconut

300g fresh blueberries

Method

Preheat the oven to 180°C / 160° fan / gas mk 4.  Butter a 23cm springform tin and line the base with baking paper.

Using an electric whisk, cream the butter and sugar until light and fluffy.  Whisk in the eggs, vanilla and almonds.  Fold in the flour and coconut then, very gently, the blueberries.

Transfer to the tin and level the top.  Bake for 50 minutes until done. 

Serve warm as a dessert dusted with a little icing sugar.  Or allow to cool in the tin before turning out and decorate with a little lemon water icing drizzled over, some shredded coconut and blueberries arranged on top.

Cuts into 10-12 slices.

April 9, 2018

SUNDAY SCHOOL CAKE

sunday school cake2

Much water has gone under the bridge and many a cake has been baked since I last posted.

The water is because the winter that has just passed must be the wettest that I remember.  There may have been even wetter ones before but I don’t remember those, only this one which has, frankly, been miserable.  My winterus horribilis (no idea if my Latin is correct, which is probably isn’t because I just made it up.)

I shall remember this winter for the muck, mud, mess and litter.  The muck comes from the renovation of our 1960’s UK bungalow, any building work seemingly impossible to achieve unless there is a ton of muck produced every single day.  The mud comes from the back garden where our new puppy Hugo churned it up and brought loads of it into the house.  The mess is the mess in the house as we moved furniture and boxes of our belongings from one room to another, upstairs and downstairs and back again (it’s a dormer bungalow) to make way for some building project or other with a deadline to meet.  The litter is everywhere in the UK as far as I can see.  And in fact as far as everyone can see.  It’s awful.

In fact the filthy state of the roads, pavements and grass verges in the UK depresses me enormously.  Who are these people who think it’s perfectly acceptable to chuck stuff onto the streets and roads?  Do they think someone else is going to pick it up or do they simply not care how awful it looks?  The situation is in such sharp contrast to how it is in our part of rural France where I am happy to say there is virtually no litter at all.  In fact if you see any litter it’s remarkable for its presence, hands are waved in horror in an ooh-la-la kind of way.  I know that there are fewer people in rural France and fewer fast food outlets, but people do eat and do buy packaged stuff.  They simply dispose of their rubbish properly, like we all should in the UK but don’t.

Anyway, rant over and back to the cake!
sunday school cake

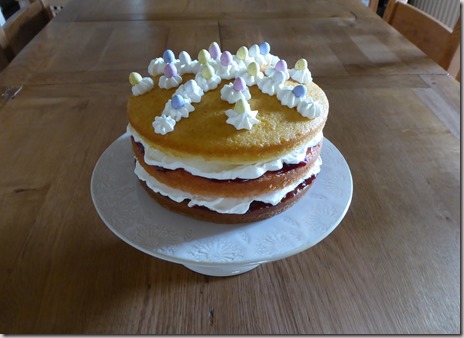
This was Nick’s cake for a recent meeting of Loire Valley Clandestine Cake Club, which I have the honour and privilege to organise.  The theme was “inspired baking”, hoping to find out what or who inspires the members to bake what they bake.  In Nick’s case the inspiration came from his mum who got him and his three sisters to take turns to bake either a cake or pudding for afters every Sunday.  With Nick’s dad being a vicar, lunch or tea was timed around the Sunday morning church service and afternoon Sunday school, hence the name for the cake. 
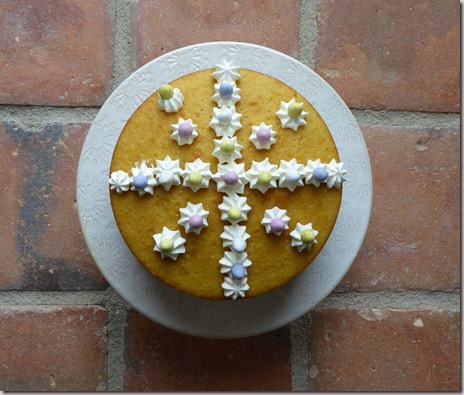
sunday school cake3

Being a boy, he was somewhat mischievous in his baking, usually creating something out of the ordinary, and his pink cakes became famous for their – pinkness.  For the meeting he baked a cake with a nod to the old mischief and produced a three layer cake flavoured with chocolate, rose and almond.  He used the all-in-one sponge recipe in my ancient (early 1970’s) Homepride Flourgraders Recipe Book (price 13/6d including postage) and added flavouring and colouring accordingly.

It was a lovely cake, one of those that almost disappeared completely at the meeting and I had to snaffle the last slice to take home so that I could taste it myself.  Which really was a tribute to the recipe, having stood the test of time and never failed.  It is written in ounces as that’s how things were weighed in the 70’s.  Because he used French flour, which doesn’t seem to produce as good a rise as our Homepride flour, Nick added a little (French) baking powder which wasn’t in the original recipe.

He sandwiched the cake layers with some Bon Maman three fruit jam and some double cream.  French cream is notoriously difficult to whisk thickly enough to do anything with it so he used some “double cream substitute”, a boxed long life product that I buy in Tesco and bring to France with me.  Shamelessly bad ex-pat behaviour I know, but a person can only take so many whipped cream disasters before all the hair is torn out and before resorting to alternative solutions.

sunday school cake4

Ingredients

8 oz self raising flour

1 tsp baking powder

4 eggs

8 oz whipped fat/margarine

8 oz caster sugar

½ tblsp cocoa powder

½ tblsp warm water

½ tsp rose water

a few drops pink or red food colouring

½ tsp almond essence

200ml double cream, whipped for spreading

4 tblsp red jam

chocolate mini eggs or other decorations (optional)

Method

Grease and line the bottom of three 7” (18cm) sandwich tins.  Preheat the oven to 160° C / 140° fan / gas mk 3.

Sift the flour and baking powder into a large bowl, add the eggs, margarine and sugar and whisk with an electric whisk until well blended and creamy. 

Divide the mixture into three equal parts in three bowls – as a rough guide there should be about 10 oz in each bowl. 

Mix the cocoa powder to a smooth paste with the warm water and add to one of the bowls.  Add the rose water to a second along with enough colouring to produce a nice pink colour.  Add the almond essence to the third.

Whisk the contents of each bowl until the flavourings are well blended and transfer to the tins.  Bake for 25-30 minutes until done.  Cool in the tins for a few minutes before turning out onto a wire rack to cool completely.

Shortly before you are ready to serve, spread some jam on top of the chocolate sponge followed by some whipped cream.  Put the pink sponge on top and repeat the filling.  Add the almond sponge and decorate the top with some piped cream – and a few mini eggs or other decorations if you like.

Cuts into 8-10 slices.