April 16, 2026
STRAWBERRY UPSIDE DOWN CAKE
January 12, 2026
MICROWAVED POACHED EGGS
I first wrote about how to poach an egg here. It's the method I use when I have more than one egg to cook and it works well every time as long as the eggs are quite fresh. If they are not so fresh the whites tend to spread a bit but they still taste good!
A perfectly cooked microwaved poached egg.
Then I spotted on the internet a way to do them in the microwave, which is very handy and quick if I just want to poach one egg for myself. There were various methods involving mugs, cups, ramekins and other dishes, water on top, water underneath, and I had mixed results including exploded egg all over the inside of the machine!In the end I arrived at this method and came to the conclusion that the shape of the dish has a lot to do with the success.
My best results came from using a rather conical shaped dish.
December 7, 2025
CHOCOLATE BIRTHDAY CAKE and a tale of more haste, less speed
More haste, less speed, is a saying my mum used often. What it means is that doing something in a rush will take you longer in the end because things go wrong and you have to re-do them. I have found it to be very true!
On a beautiful, warm and sunny autumn day I had baking to do. I thought that if I got a move on there would still be time to do some gardening or sit out in the sunshine but then things went wrong……
The first thing to go wrong was a simple chocolate cake; wrong size tin and wrong flour. (French flours do not work the same as British flours.) The sponges were flat and sad looking. Had it been just for us I would have used them but it had been requested as a birthday gift so I remade it using Mary Berry's recipe for a chocolate sandwich cake and some of my stash of Homepride flour. (The first set of sponges now resides in my freezer and will be used in future for something like a chocolate trifle.)
The second was in making some Parkin which I had also promised to someone else. With a double batch in the oven and finally sitting out in the sunshine with my mug of tea I had one of those nagging doubts and went back inside to consult the recipe. I had forgotten to put in the bicarbonate of soda. By now the Parkin had been in the oven for ten minutes and was just beginning to set.
I hesitated for a second but realised I could end up with two trays of flapjack if I didn't do something about it. So quick as a flash, between us we scraped the mixture out of the tins and into a bowl. I sprinkled two teaspoons of bicarb over the top and Nick used my biggest wooden spoon and a lot of muscle to beat like hell and mix it in. We dolloped it back into the tins and put it back in the oven for the rest of the baking time. It turned out fine! You can see the Parkin recipe here.
As we finally sat outside in the last of the afternoon sunshine with a glass of something to calm my nerves I could hear my mum whispering "more haste, less speed!" in my ear and see her cheeky smile. It’s almost twenty three years since she died and I miss her and her little sayings every day!
The cake went down well with the birthday girl. Having made one before I knew it would be a lovely soft sponge and I decorated it with my standard chocolate buttercream recipe and a few girly sprinkles.
Curiously, when I looked for the recipe online I stumbled across a peculiar page on the Silver Spoon (sugar manufacturers) website comparing Mary Berry's recipe with Nigella's. They reckon Nigella's was best! You can see it here. What a very odd thing to have on a product website. I wonder what Mary would make of that!
Ingredients
For the cake
2 tblsp cocoa powder
3 tblsp boiling water
225g each of
self raising flour
caster sugar
baking spread
1 level tsp baking powder
4 large eggs
For the icing
50g butter
150g icing sugar
1 tblsp cocoa powder
1 tblsp warm water
Method
To make the cake, grease and line the base of two deep 20cm sandwich tins. Preheat the oven to 180c / 160 fan / gas mk4.
Blend the cocoa powder with the water in a large bowl and allow to cool slightly. Add all the other cake ingredients and beat well with an electric whisk until nice and smooth.
Divide the mixture evenly between the two tins and bake for 25 minutes until done. Leave in the tins for a few minutes then transfer to a wire rack to cool completely.
To make the icing, beat the butter until soft then sift in the icing sugar a spoonful at a time and beat until smooth. Mix the cocoa powder to a smooth paste with the water and beat into the mixture.
Use half of the icing to sandwich the sponges together and swirl the other half over the top.
Decorate with your favourite sprinkles and candles.
Cuts into 10-12 slices.
July 7, 2025
PLUM (OR NECTARINE) TART (can be gluten free)
The plum version before baking.
There is no pastry involved so some would ask - how can it be a tart? I spent a happy few minutes looking up the definitions of cake, tart, torte and gateau and came to the conclusion that although it was definitely not a cake, a flan or a pie I still had no idea! In any case it went down well for dessert at a BBQ one very hot June evening.
The plum version when cooked.
The first time I made this it was definitely a bit overdone - the plums looked a bit crozzled and it was a devil to get out of the tin. Only when I made it the second time did I realise that I had baked the first one at 160° fan instead of 160° C. A casualty of the debilitating heat - it had reached 39°C during the day and my concentration withers exponentially over 30°C!
The nectarine version - much less crozzled.
For the second time I used nectarines, didn't cram quite as much fruit in, and kept the slices away from the sides of the tin, which definitely made it easier to turn out, baked it at the right temperature and kept my eye on it. With its apricot glaze it had that patisserie glamour. It tasted great too.
Stoning the fruit can be a bit fiddly. An old fashioned grapefruit knife came in handy for getting the stone out of some of the firmer fruits. Changing the ordinary flour for gluten free flour (e.g. Doves Farm) will make it a gluten free dessert and a handy recipe to have instead of pavlova.
Ingredients
For the cake base
zest of 1 lemon
2 tsp lemon juice
30ml whole milk
125g softened butter or baking spread (I used Le Fleurier)
125g caster sugar
1 egg
125g plain flour or gluten free flour
125g ground almonds (or half and half ground almonds and ground rice)
For the topping/fruit
10-12 ripe plums or 3 large nectarines
2 tblsp apricot jam
Method
Butter the base and sides of a 23cm loose bottomed tart tin.
Put the milk and lemon juice into a small bowl or jug, mix together and set aside
In a large bowl, cream together the butter, lemon zest and sugar. Add the egg and beat well until well combined.
Fold in the ground almonds (or almonds and rice), then the flour followed by the thickened milk.
The mixture will be quite thick so transfer it to the prepared tin and level with the back of a spoon or small palette knife. Smooth the surface as much as possible then put the tin in the freezer while you prepare the fruit.
Cut each plum or nectarine in half and remove the stone. Cut into quarters and slice thinly. Plums should make 8 slices each, nectarines 12 slices.
Preheat the oven to 160°C / 140° fan / gas mk3.
Remove the tart case from the freezer and arrange the slices of fruit neatly in circles on top of the cake base.
Stand the tart tin on a baking sheet and bake in the oven for about 1 hour. The fruit should be tender and the cake base lightly golden and cooked.
Remove from the oven to cool slightly. Remove the tart from the tin and place on a serving plate.
To make the glaze, warm the apricot jam in a saucepan with 1 tblsp water. Brush over the fruit.
Serves 8-10.
This is my gluten free version, made with apricots. The cake base is as per the recipe above but using half and half ground almonds and ground rice, plus gluten free flour.
April 4, 2025
ICED LEMON SQUARES FOR AFTERNOON TEA
A chocolate Guinness cake was the star of the show and of course Guinness was served for those brave enough to drink it so early in the day.
The cake stand had dainty sandwiches including egg and cress, always very popular, on the bottom tier. The eggs were true free range, a gift from one of the ladies in our watercolour painting class and the yolks are an astonishingly bright orange. She has a number of hens that lay lots of eggs and she brings everyone a box of half a dozen every week! We also used some home grown cress grown on our windowsill from a packet of seeds smuggled in from our trip back to the UK at Christmas. (I have never found either cress or packets of seeds other than watercress in France.)
There were also ham and tomato sandwiches, smoked salmon, cream cheese and cucumber sandwiches, all with the crusts removed! I also made a plate of mini sausage rolls using cocktail frankfurters which were very tasty and well received.
The middle tier had home made scones (made by Nick) and some cream horns. I wrote about them here. The top layer had little iced and decorated squares of lemon cake. I fancied doing French fancies but chickened out when I spotted this Irish recipe by Donal Skehan.
However, they very nearly didn't happen. The recipe is an all-in-one method and said to use butter "at room temperature". Well, I ended up with little flecks of butter in the mixture. I knew that too much beating could make the cake tough not soft and had used up all my lemons so couldn't start again. I looked for solutions on the internet. Most said "just cook, it will be fine", a couple said beat harder and several said to sieve the mixture! I tried that - what a palaver and I soon gave up and went with the "just cook" theory!
I baked it as a shallow tray bake, cut it into little squares and decorated with everything I had to make them look pretty. I made a thin icing using lemon juice and coloured half with yellow food colouring. They looked perfect and tasted very lemony. The texture was slightly firm, a bit like a madeira cake and there were occasional little holes, presumably due to the tiny lumps of unblended butter.
I would use this recipe again but make sure the butter was very well softened, not just "at room temperature" next time. I suppose that it very much depends on the temperature of the room! The creaming method would have worked better to ensure the butter was properly blended on this occasion!
I could imagine my mum saying "you're never too old to make mistakes" and the swish of Mrs Stafford's broomstick as she swooped by!
Ingredients
225g caster sugar
250g self raising flour
1 tsp baking powder
4 large eggs
225g butter at room temperature (well softened would be better)
3 tblsp milk
Zest of 3 lemons
For the icing:
200g icing sugar
Juice of 1 lemon
Sprinkles of your choice
Method
Preheat the oven to 160°C / 140° fan / gas mk 3. Line a large rectangular baking tin, 30 x 23cm, with baking paper.
Put all the cake ingredients into a large bowl and beat with a hand held electric whisk until well blended.
Transfer the mixture to the tin and level the top. Bake for 35 minutes until done. Remove from the oven and after a few minutes carefully lift the cake in its paper out of the tin and onto a wire rack to cool.
To make the icing sift the icing sugar into a large bowl and beat in enough lemon juice to make it runny but not too thin.
Divide your cake into half if you are using two colours or thirds if you are using three. Cut into squares of the size you want, very small and dainty or larger. Separate slightly on the paper or by removing onto the rack.
Coat one section of cake with white icing, allowing it to drip down the sides of the squares.
Transfer half of the remaining icing into a separate bowl if you are using three colours or colour the remainder with just one colour if you are using two colours.
Decorate with sprinkles.
Cuts into at least 20 squares depending on how dainty you want them!
May 3, 2024
NOUGAT DE TOURS
There are plenty of recipes on the internet but in the end I adapted one by my friend Susan which you can see here. I used strips of candied orange peel rather than marmalade and then went slightly off piste adding some chopped green and red glacé cherries as well. Then I went even more off piste and slightly wrong.
To begin with I had chosen entirely the wrong baking dish, a round Pyrex one, simply because it was to hand and easier than trying to wrestle my loose based tart tin from the back of the cupboard. Then, as I was spreading the almond topping over the tart there seemed to be barely enough to cover it and it wasn’t until the tart was in the oven and I started stacking the dishwasher that I spotted the third egg white in its little pot on the kitchen worktop!
(When cracking the eggs for a meringue I usually drop the white into a small pot or cup and add them individually to the bowl. I've done this ever since the time that the fourth egg white for a pavlova contained a blob of unwanted yolk as I dropped it into the mixing bowl with the others!)
It was also the devil's own job to get slices of the tart out of the dish in one piece. Definitely not the best looking tart I have ever made but tasted delicious so I made a second one a couple of weeks later using the right tin and all three egg whites!
That one turned out much better and will teach me not to be so lazy and to pay more attention to what I’m doing in future! Mind you, both tarts were equally delicious!
It also occurred to me that mini versions, along the lines of the old Be-Ro tartlets, might work very well. I shall have to try that when the opportunities presents itself.
This is the tart we had at Le George and the topping was, I think, more like a Bakewell almond sponge than macaroon, but it set us on a little culinary adventure and Nougat de Tours will be on the menu regularly from now on.
~~~~~~~~~~~~~~~~~~
Susan's post is worth reading because she explains the history of the tart including the use of local jams. My jam was an apricot made from local trees by a friend that lives two miles away! The jar of apricot is now all used up and the next one in line is her peach jam. Tah-dah!
Ingredients
1 pack of sweet pastry
A layer of apricot jam, around 150g
A layer of chopped candied peel and a few chopped glacé cherries, around 150g
75g ground almonds
75g caster sugar
3 egg whites
2 tblsp icing sugar
Method
Remove the pastry from the fridge 20-30 minutes before you want to use it, otherwise it might crack when you unroll it.
Preheat the oven to 200°C / 180° fan / gas mk 6. Butter the base and sides of a 20cm loose bottomed tart tin.
Unroll the pastry and use it to line the tart tin, leaving the edges untrimmed and draped over the edge of the tin.
Spread a generous layer of jam over the pastry then scatter a generous layer of chopped peel over the top.
To make the topping, put the egg whites into a large bowl and whisk until stiff. In another bowl mix together the ground almonds and caster sugar then fold them carefully into the egg whites.
Spread the topping evenly over the fruit, making sure not to leave any gaps at the edges. Sprinkle with icing sugar, leave for a few minutes then sprinkle again.
Stand the tart on a baking sheet (this removes the risk of accidentally pushing the loose bottom up on removing the tart from the oven) and bake for 30 minutes. Cover with foil if it looks too brown after 20 minutes. Remove from the oven, remove the foil and cool in the tin.
When cool, carefully snap off the overhanging pastry and lift the tart onto a large can of food or small upturned bowl and ease the outer ring so that it drops down. You can then serve the tart from its metal base or transfer it to a flat serving plate by using a large cake lifter.
Cuts into 8-10 slices.
August 26, 2023
A LEAKY QUICHE RESCUE MISSION success snatched from the jaws of disaster!
With guests arriving for dinner I was flummoxed when, on removing my blind baked quiche pastry from the oven there was a large crack in it and a couple of small ones. It was bound to leak.
Rats!! What to do, what to do? There was no time to make a batch of pastry, or to pop to the shops to buy another pack. I put my thinking cap on and came up with a solution.
I had half of a "wonderloaf" in the house. The pappy white sliced bread that’s neither very nutritious nor tasty but is good for cucumber sandwiches and toast with marmalade. I pinched a bit out of a slice, rolled it into a small sausage, brushed one side liberally with some of the egg filling and squashed it into the cracks with the back of a fork. I hoped it would stick sufficiently to plug the gap.
It worked! There was still a little leakage but nothing major. I shall have to remember this for future and presumably any kind of bread would work. The quiche was delicious and nobody knew how close the leaky leek and goats cheese quiche was to becoming a frittata instead!
~~~~~~~~~~~~~
One week after the event/almost baking disaster it has just occurred to me that the thing to do would be to save the pastry trimmings until after the quiche shell comes out of the oven.
I could have easily used a bit of the pastry trimmings to plug the hole if I hadn't already discarded them. Hmmm........I'll try to remember that in future!
October 13, 2022
LIME AND COCONUT CAKE
In accordance with my recent lightbulb moment regarding the conundrum of giving away cakes made to an untried recipe I made a couple of muffins with a spoonful of the mixture. They tasted good, a nice flavour of lime with a hint of coconut, just as I would expect, moist and with a nice even crumb, which confirmed my conclusion that the recipe on the internet must be wrong and the sugar had been omitted. The lime flavoured icing was delicious.
It wasn't until I looked at the recipe again for writing up the blog post that I realised my mistake........I should have used condensed milk, not evaporated milk, condensed milk being an already sweetened product. No wonder the recipe contained no actual sugar! I can't believe I did that but brain fog has been a feature of my life so far this year!
In the words of René Artois from "Allo, allo": "you stoopid wooman!!"
The cake sold well, every slice devoured, so I leave it up to you whether you make it with evaporated milk or condensed milk. I will add this cake to my tweaking list and try the condensed product myself next time!
(You can buy tinned condensed milk everywhere in France and I think also evaporated milk, sold as an addition for coffee, although I haven't tried it. I brought mine from the UK in the pre-Brexit days when that was allowed.)
A word here about zesters.
Ingredients
For the cake
175g softened butter or baking spread
3 large eggs, beaten
55g desiccated coconut
zest of 2 limes
175g self raising flour
1 tsp baking powder
250g evaporated milk*
100g caster sugar*
For the icing and decoration
100g icing sugar, sifted
juice of 2 limes
as sprinkling of desiccated coconut
strands of lime zest (optional)**
Method
Preheat the oven to 170°C / 150° fan / gas mk 3. Butter a 900g / 2lb loaf tin and line the base with a strip of baking paper, or use a paper liner.
Put all the cake ingredients into a large bowl and using a hand held electric whisk beat together until pale and creamy.
Transfer the mixture to the prepared tin, level the top and bake for 50-60 minutes. If the top is looking brown before the middle is cooked, cover with a piece of baking paper or foil.
Cool in the tin for 10 minutes then remove to a wire rack to cool completely.
To make the icing, mix the icing sugar with enough of the lime juice to make a thick pouring consistency and drizzle imaginatively over the cake.
Sprinkle coconut over the cake for decoration. If using an extra lime, scatter strips of lime zest over the cake.
Cuts into 10-12 slices.
*instead of evaporated milk and sugar use 250g condensed milk
**if using the extra lime to create the topping it occurred to me that you could drizzle the juice from it over the cake before icing it.
March 23, 2022
LIGHT GINGER CAKE
It's a Mary Berry recipe called "mild ginger loaf" from her "Fast Cakes" cook book, and I baked it in my small oblong roasting tin rather than a loaf tin. This produces a slightly flatter cake rather than a tall loaf.
The recipe calls for 50g stem ginger and there were just two balls of it left in the jar in the fridge. On weighing it out, 50g turned out to be just 1½ balls so I decided to use the last half of the last ball, along with some of the syrup from the jar, for icing and decoration.
Nick declared the cake a hit. It was certainly delicately spiced and with a lovely, even crumb. Definitely a good one for when it's blowing a hoolie and you need an easy to bake, easy to eat, cake to go with your tea or coffee. I intended to use the last pieces as a pudding with some custard but when I looked in the tin, they had already gone........funny that!
Ingredients
For the cake
100g baking spread (I used Stork)
100g light muscovado sugar
2 tblsp black treacle
225g self raising flour
1 tsp baking powder
1 tsp ground ginger
50g stem ginger, drained and chopped
2 large eggs
For the icing
½ a ball of stem ginger, diced
3 heaped tblsp icing sugar, sieved
ginger syrup from the jar
Method
After chopping the 50g (1½ balls) of stem ginger, preheat the oven to 160° C / 140° fan / gas mk 3. Grease and line a 900g loaf tin (or small roasting tin) or use a paper liner.
Put the baking spread, sugar and treacle into a medium pan and heat gently until melted.
Put all the other dry ingredients into a medium bowl and stir together. Add the melted mixter, the chopped ginger and eggs and beat well until thoroughly blended.
Pour into the prepared tin and bake until done, about 45 minutes.
Cool in the tin for 5 minutes then turn out onto a wire rack to finish cooling.
To make the icing, put the icing sugar into a small bowl and mix in enough ginger syrup from the jar to make the consistency of double cream. Slather or drizzle this over the cooled cake as you prefer and dot with diced bits of the remaining piece of ginger.
Cuts into 8 - 10 squares or slices.
February 3, 2022
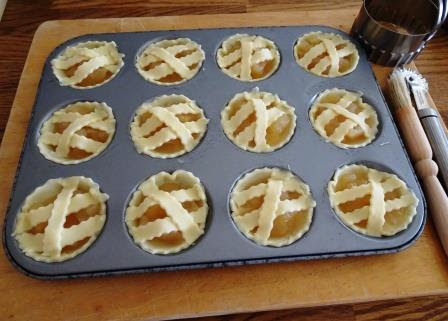
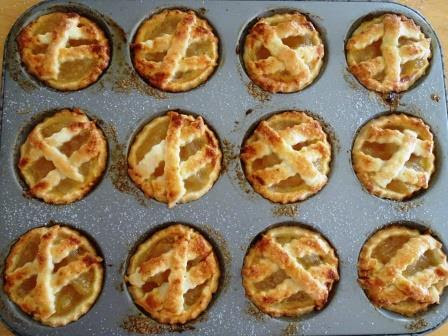
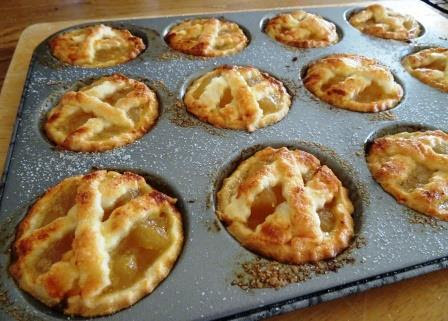
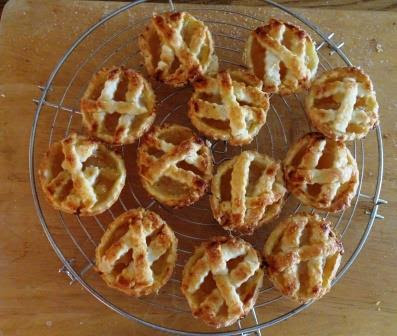
MINI APPLE PIES AND EXCUSES
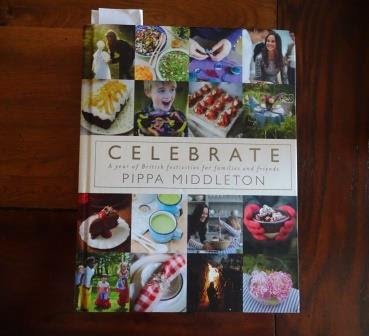
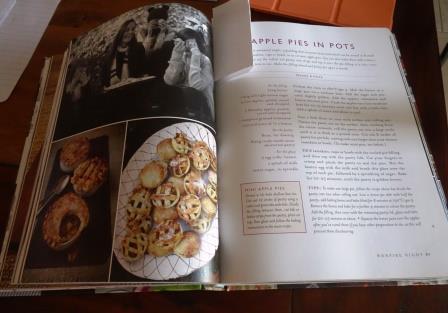
I found the recipe in this book by Pippa Middleton, our future king's sister in law.
(I found the book in a charity shop for £1.)
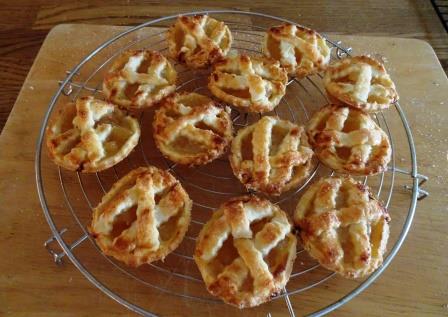
They looked ok and smelled wonderful.
However, they were not fit for purpose!