Showing posts with label gluten free. Show all posts

October 24, 2026

GLUTEN FREE CARROT CAKE and a cream cheese frosting disaster!!


It was that time of year again - the weekend of the annual food, art and craft festival in the next village which goes by the name "L'Art et Lard".  It's a wonderful event.

On the Sunday there is a pop-up tea room called the English Tea Garden for which I usually contribute some cakes.  This year I made two vegan and two gluten free cakes, one being something I had never tackled before; a GF carrot cake.


I used a recipe from the website "Jane's Patisserie" which you can see here.  The recipe seemed straightforward, very similar to a normal carrot cake but with GF flour.  An interesting tip that I had never used before was to grate the carrots with a medium fine grater, not a coarse one, thereby avoiding strips of visible carrot in the cake and giving a better texture.  That really worked.


As a precaution I used a couple of spoonfuls of the mixture to make two muffins, baked alongside the cake.  This enabled me to taste test the cake before giving it away, something I now always do when handing over a cake to a new recipe that I haven't used before.

The muffins tasted delicious, lightly spiced and moist with a soft texture..  I then decided to push the boat out and ice the cake, even adding the little sugar carrots I had brought with me from a previous trip to the UK.

Then things went pear shaped........I had a total disaster with the cream cheese frosting.

I beat the butter and icing sugar together according to the recipe and then added the cream cheese.  As I started to beat it in and within moments the whole lot turned to liquid.  I went into panic mode.  The cake was meant to be at the festival half an hour later and I had no more cream cheese.  

Nick volunteered to go and fetch more but that would have taken anything up to an hour, probably much longer if the nearest supermarket didn't have any in.  Instead I made a batch of ordinary buttercream and iced the cake with that.  It looked a real bobby dazzler and sold well on the day.

The question is, what went wrong?  A bit of research suggested that the fat content of the cheese was too low.  I hadn't been able to get Philadelphia cheese, which I normally use, and had picked one at random not realising that it wouldn't work.  

As for the glurpy cream cheese mixture - I turned it into ice cream - the ingredients had cost too much to waste them!  I beat a few tablespoons of full fat double cream to the floppy stage, folded it into the mixture and put it in the freezer.  It was delicious - in fact absolutely divine!  I shall probably make it again but will always think of it as my "Accidental Ice Cream"!

I was so put out by the failure of the cream cheese that I did some more research and one fact that cropped up everywhere is that whatever you do, you should not try mixing more icing sugar into the liquid mixture, which had in fact, been my first instinct.  Luckily I had been in too much of a hurry on the day to try it!  A good guide to the problem can be found here.  The website "Jane's Patisserie" has a good guide to making the frosting here.

Ingredients

For the cake

300g (approx 3 medium) carrots, grated medium fine

275 g soft light brown sugar

5 eggs

225ml sunflower oil

zest of 1 orange

325g gluten free self raising flour

1 tsp ground cinnamon

1 tsp ground ginger

100g raisins

For the cream cheese frosting

175g unsalted butter at room temperature

175g icing sugar

350g full fat cream cheese

½ tsp ground cinnamon

1 tsp vanilla extract

Alternative buttercream icing

150g unsalted butter at room temperature

300g icing sugar, sifted

1-2 tblsp milk

½ tsp vanilla extract

Method

Grease a 20cm round springform cake tin and line the base with baking paper.  

Preheat the oven to 180° C / 160° fan.

Put the oil, carrots, sugar, eggs and orange zest into a large bowl and mix well.

Sift in the flour and spices, add the raisins and mix again until smooth and well combined.

Pour the mixture into the tin and bake for 30-35 minutes until done.  Cool in the tins.

To make the cream cheese frosting

Put the butter into a medium bowl and beat until smooth.

Add the icing sugar, cinnamon and vanilla and beat again.

Beat in the cream cheese until just combined.

Spread half of the mixture onto one of the cooled cakes and place the second cake on top.  Spread or pipe the other half of the mixture on top of that and decorate as you prefer.

To make the alternative buttercream icing

Put the butter into a medium bowl and beat until soft.  Add the icing sugar a spoonful at a time and beat until smooth.  Beat in the vanilla and a splash or two of milk to get the consistency you prefer.  Use half to sandwich the cakes together and the other half to decorate the top.

Cuts into 10-12 slices.

September 26, 2026

FIG, HAM AND HERBY CHEESE GLUTEN FREE APÉRO TART

It's many times that on reading Dominic's blog "Dom in the Kitchen" I have felt inspired compelled to bake something he has posted straight away - or as soon as possible.  That's the case with his Boursin, fig and jambon galette which you can read about here.  

We had friends coming round for an evening BBQ and one of them needs a gluten free diet.  I had previously swooped on a pack of gluten free puff pastry in the supermarket with the idea of using it for some kind of nibbles for apéros.  It occurred to me that an adaptation of Dom's recipe would do the job really well.


I had some purple figs given to me by a friend, the right kind of pastry, some black olives and some ham in stock.  All I needed was the Boursin.  I popped into the village shop and whilst they didn't have Boursin they had their own brand herby soft cheese which worked fine.


It was a delicious tart, very simple to make and a great start to the evening.  The gluten free pastry didn't look quite the same as normal (shop bought) puff pastry when cooked but tasted fine and I would definitely use it again.

If gluten free was not a requirement I would use a pack of ordinary rectangular puff pastry and bake it into small square mini tarts which are easier to hand round and eat for people sitting with a glass in one hand!  Cutting squares from a round pack of pastry produces a lot of waste or some odd looking shapes of tart!  It also occurred to me that the filling would work well made into little filo parcels using filo pastry (known as "brick" in France).  I'll add this to the post if I do try it!

Ingredients

1 pack of ready made, ready rolled gluten free puff pastry

4-5 ripe figs, quartered

2 slices of thin ham, cut into strips

6-8 stoned black olives, halved

1 small pack of garlic and herb cream cheese

a little olive oil for drizzling
 
a little runny honey for drizzling

1 egg, beaten

Method

Take your pastry out of the fridge and allow it to come to room temperature, about 10-15 minutes.  Preheat your oven to 190°C / 170° fan.  Place a sheet of baking parchment on a large baking sheet.

Unroll the pastry onto the baking sheet.  Make a cut all the way around about 2cm from the edge to create a border but not going through the thickness of the pastry.

Spread a generous layer of the cream cheese over the pastry within the border.  Lay the strips of ham on top and arrange the fig quarters and black olives on top of them.

Drizzle a little olive oil and honey over the top and sprinkle with the fresh thyme leaves.  

Brush the edges of the pastry with beaten egg and bake for around 25-30 minutes until the pastry is golden brown and the cheese bubbling at the edges.

Serve warm or at room temperature.

Cuts into 8 - 10 slices.

May 3, 2026

FRIDGE BOTTOM FRITTATA

As time goes by we have become more adept at using up what we have in stock rather than shop for more food.  There are several reasons for this.  

The first is probably because we have more time to cook.

The second is that in France we live a good distance from any shops.  There is a village shop which sells a limited range of basics about 3km away but a supermarket selling everything is at least a twenty minute drive away.  We therefore shop less frequently and make sure we use everything up.

The third is that out here in rural France fresh produce does not seem to keep as long as stuff that we used to get from say Tesco or Sainsbury's.  I don't know why that is but we find ways to use up leftovers and veg before they become too tired.

The fourth is thrift.  Now that we are retired we have to be a bit more careful.  We enjoy eating out and balance the cost of that with sensible shopping.

The fifth is to avoid waste, for all the reasons above.


There are several ways to use up random leftovers of cooked or raw food.  You can make them into soup, into a quiche, in a salad, a gratin, or one of our favourites, a frittata.

This one had in it leeks, broccoli (stalks and florets) cherry tomatoes, courgettes and cooked brussels sprouts plus leftover bbq bits and pieces including smoked sausage and baby potatoes. You could add any herbs or spices, fresh or dried, or chilli flakes.

As a friend of mine used to say, if you have eggs, you have dinner!


Ingredients

1 leek, trimmed and sliced thinly

a few cherry tomatoes, halved

a handful of broccoli florets and the stalk, trimmed and sliced

a piece of cooked sausage

1 courgette, washed and sliced

a few cooked leftover sprouts, halved

4 eggs beaten

1 tblsp crème fraîche or cream

Herbs, fresh or dried

Method

Preheat the oven to 200C / 180 fan.

Cook the broccoli in boiling water for a few minutes until tender.

Heat a little oil in a frying pan with an ovenproof handle.  Cook the leeks and courgette until tender. 

Add the tomatoes, potatoes, sprouts, broccoli and sausage and stir into the pan.

Beat the eggs with the crème fraîche.  Season with salt and pepper and add a few chopped herbs, fresh or dried if you like.

Pour the egg mixture over the veg mixture and heat gently until the bottom is cooked but the top still liquid.  

Transfer the pan to the oven and cook for 20-25 minutes or until the eggs are set.  If you don't have a frying pan with a metal/ovenproof handle, you can cook the whole thing in the oven, just tip the veg etc into a baking dish or tray, pour the egg mixture over and cook in the oven for a little longer.

Serve hot with salad or other veg.  Also good cold.

Serves 2-3, depending on what you serve with it.

March 20, 2026

AIR FRYER HERBY POTATOES and home made one-cal spray oil


When it was a really nice day recently we decided to abandon all plans for chores, gardening and DIY and have a late lunch bbq.

It being still only March we didn't quite feel like wheeling the gas bbq out of the barn and setting it all up which would have taken quite a while.  However, last year we bought a small electric bbq at a brocante for 8€ which has been a huge success so we used that instead.

We did some of our chicken, lemon and thyme kebabs (see here), a carrot and red cabbage coleslaw (see here) and some air fryer herby mini potatoes.  When the gas barbecue comes out for the year we will do our potatoes on that instead as the process is just the same (cooking the potatoes in a foil tray on the bbq) but on this occasion the air fryer came into its own and lunch was on the table (outdoors in the early spring sunshine) within half an hour.

Another thing I have started using recently is home made one-cal oil spray.  This is a tip from Nancy Birtwhistle and it works really well, makes spray oil without any additives cheaply and easily.  I bought a glass spray bottle from Amazon that has liquid measurements on the side and which makes the job of making the oil so easy.

We have found our tiny Instant Pot air fryer very useful for lots of things but wouldn't claim that we can cook everything in it.  We still use our main oven a lot.  I don't subscribe to the theory that if you have an air fryer you can do away with the oven any more than you could manage with just a microwave, or slow cooker.  I have found that different kitchen gadgets are ideal for different things but I certainly don't regret getting the air fryer.  I'm not sure I would attempt to bake a cake in it.  If there are two items that need cooking in the oven we would use that instead of the air fryer.  Horses for courses.

Do you have one and what do you use it for?

Some of the things we find it ideal for are:

Chicken fillets

Salmon fillets

Fish fillets

Sausages, bacon and black pudding

Croutons

Frozen oven chips or sauté potatoes

Baked potatoes

Baked apples 

Frozen croissants

Fish fingers

Roasted vegetables

Refreshing yesterday's baguette

Ingredients for the herby potatoes

2 handfuls of baby potatoes or any small, firm potato, washed and cut evenly to size.

spray oil

salt and pepper

dried herbs of your choice

Method

Parboil the potatoes for 5 minutes.  Drain and tip into the air fryer basket.

Spray with a few squirts of oil (or drizzle with sunflower or olive oil)  

Season with salt and pepper and sprinkle over a teaspoon or so of herbs to taste.

Shake the pan a few times then cook at 180C for 8-10 minutes until knife-tip tender.  Shake the pan a few times during the cooking time.

Serves 2.

To make the spray oil

50ml sunflower oil (or other oil of your choice)

15ml cooled boiled water from the kettle

5ml vodka

Measure the ingredients into your oil sprayer and give it a good shake before each use as the oil and water will separate.  Keep in a cool cupboard, not the fridge.

March 17, 2026

CELERIAC AND POTATO GRATIN


This is a very easy and tasty accompaniment to serve with any meat, chicken or casserole.  It’s fairly rich but a real treat.  I served mine with my version of coq au vin blanc (see here).

There are numerous recipes for it online and I adapted a Jamie Oliver recipe that you can see here because it looked simple.  I put the dish on the table for people to serve themselves as per Jamie's suggestion.  

It was absolutely delicious and there were plenty of leftovers which I reheated by covering with foil and baking at 180° fan for 15 minutes.

Ingredients 

4-6 medium potatoes 

half a large celeriac 

1 large onion 

2 cloves of garlic 

600ml double cream

75g cheddar cheese, grated

Method 

Preheat the oven to 200°C / 180°fan.

Peel and slice the potatoes into roughly 5mm slices. Put them into a large bowl of cold water to prevent discolouration.

Peel and slice the celeriac, garlic and onion.  Drain the potatoes and put everything into the bowl.  Add about half of the grated cheese to the bowl and mix everything together. 

Transfer the mixture into a gratin or ovenproof dish in layers and pour the cream over.  Sprinkle the remaining cheese over the top and bake for 50 minutes to one hour until the veg are soft (test with the tip of a knife) and the sauce bubbling.

Sprinkle with chopped parsley if you like before serving.

Serves 6-8 generous portions.

March 11, 2026

LEMON POSSET


We had dinner at a friend’s house one autumn evening last year and for dessert she served lemon posset, something I had never made or eaten before.  It was utterly divine and she served it in pretty stemmed champagne coupes.  

She and her husband are renovating one of those drop dead gorgeous French houses known as a "maison du maître" with large airy rooms, tall, draughty windows and high ceilings.  They still have plenty of work to do!  But the previous owner left behind a vast quantity of old furniture, linens, china and glassware, including the coupes.  Some of it was not to her taste but much of it was real treasure.

This is in sharp contrast to the unattractive furniture and other stuff that the owner of our first French house wanted to sell us.  We were mightily relieved to find it had all gone when we finally got the keys!  The difference is that our friend's house had been a well loved home whereas ours had been a holiday home for generations of a Parisian family who just descended on the place for six weeks every summer!  You can read a bit about that here.


Anyway, at the first opportunity, the next time we had guests for lunch, I decided to make lemon posset myself.  I served it in a hotchpotch of china cups and glasses and it went down a treat.  I adapted a Mary Berry recipe which was a doddle to make and I shall add it to my repertoire of favourite desserts.  It was luscious yet light and very lemony!  It's also ideal for a dinner party as it can be made the day before.

Ingredients

600ml double cream

15og caster sugar

3 lemons, zest and juice

a handful of fresh raspberries for decoration

strips of lemon zest for decoration (optional)

Method

Put the cream, sugar and lemon zest into a wide saucepan.  Bring to the boil over low heat and simmer gently for 3 minutes, stirring all the time.

Remove from the heat and allow to cool until lukewarm.

Stir the lemon juice into the cooled cream mixture and pour into 8 small ramekins, cups or glasses.

Chill in the fridge for at least two hours until set or overnight.

Just before serving, decorate with the fresh raspberries and strips of lemon zest.

Serves 8 portions.

January 20, 2026

CLEMEMTINE AND ALMOND CAKE


This is one of those cakes that I had the urge to make the minute I spotted the recipe which was in Dom's blog here.  I had made something similar before to a Michel Roux recipe which was a lovely dessert cake (see here) but this one sounded easier.  So, with a number of clementines in the fruit bowl I had all the ingredients needed and decided to give it a go.

Dom mentioned that it's originally a Nigella Lawson recipe so I googled it and it's from her book "How to Eat".  The only tricky bit is that the clementines should be boiled for one and a half hours.  Ah, I thought, I don’t have time for that…..I wonder if there’s another way.  

Sure enough, on Nigella's website (see here) it says that you can microwave them instead, so that’s what I did.  Nigella recommends cooking them in a covered dish with a vent in the lid so I used my lovely old Pearsons of Chesterfield stewpot.

This is a fabulous cake.  Beautifully moist with flecks of the clementine zest running through it and of course it’s gluten free.  It's very easy to make, keeps well, freezes well and makes a delicious dessert.

On another occasion I made the cake in a small Bundt tin.

It was done in just over 30 minutes.

Ingredients

375g clementines

250g ground almonds

225g caster sugar

6 large eggs, lightly beaten

1tsp baking powder

Method 

Preheat the oven to 19°C / 170° fan / gas mk 5.  Butter and line the base of a 20cm springform tin.

Put the clementines into a dish with a lid that has a steam vent.  Add a little water and microwave on high , 800-900W, for 8-10 minutes, turning half way through until soft. Drain and allow to cool while preparing the other ingredients.

Cut each clementine in half and remove the stalk ends and any pips.  The easiest way to do this is to flatten out the halves of fruit and dig out the pips.

Put them all into a food processor and blitz briefly to a rough pulp.  Add all the other ingredients and process until smooth.

Transfer the mixture to the tin, level the top and tap on the worktop to dispel any trapped air.

Bake for 40 minutes until the cake passes the skewer test, covering loosely with foil after 20 minutes to prevent the top from scorching.

Remove from the oven and sit the tin on a rack until the cake is cool.

Dust with icing sugar before serving.

Cuts into 10-12 slices.

January 2, 2026

GLUTEN FREE MADEIRA CAKE (for GF trifle)


I offered to make two trifles for a Christmas party, one gluten free.

I rarely make my own cake for a trifle.  When in the UK I would use a shop bought Swiss roll filled with jam.  The red swirls always look nice on the sides of the bowl.  In France I would use a shop bought "quatre quarts" which is very similar to a Madeira cake, sliced and spread thinly with jam.  

My trifles are unashamedly old fashioned, containing raspberries or mixed berries, red jelly and Birds custard, topped with whipped cream and decorated with sprinkles, all of which are luckily gluten free.  You can see the recipe here.  Sometimes I pour a splash of sherry over the sponge before adding the fruit, but usually not if children will be eating it…..and children do seem to love a trifle!

"One I made earlier."

The usual sprinkles.

For my gluten free trifle this time I used a recipe for Madeira cake from the website "Coeliac by Design".  It could not have been easier to make and was also perfectly delicious just as cake.  I sampled a slice just to be sure before putting it in the trifle and gave the unused portion to the party host to put in her freezer for a future dessert.  Her husband is the "gluten free" person and with it being the party season I thought it might come in handy!

Interestingly….a Madeira cake does not contain any Madeira wine!  Historically it was served as a plain cake with a glass of the wine (which is similar to a sweet sherry) to sip with it.

Ingredients 

200g Doves Farm GF self raising flour

175g softened butter or baking spread

175g caster sugar

50g ground almonds

3 large eggs, beaten

zest of 1 lemon

Method

Put a paper liner into 900g loaf tin, or grease and line with baking paper.  Preheat the oven to 180°C / 160° fan / gas mk 4.

Put all of the cake ingredients into a large bowl and beat well with an electric whisk until light and creamy.

Spoon the mixture into the tin and tap on the worktop a few times to settle the mixture and release any air bubbles.  Level the top.

Bake for 45-50 minutes until done.  Cool in the tin for a few minutes before turning out to cool completely.

Cuts into 8-10 slices.

The author adds the note that this also makes an excellent cherry cake by adding 180g washed and halved cherries.  I would probably make sure they are dried and mixed with a little of the flour before adding to the mixture in an attempt to prevent them from sinking and might also add half a teaspoon of almond extract to turn it into a cherry and almond cake.

October 24, 2025

GLUTEN FREE LEMON DRIZZLE CAKE

Who doesn't love a lemon drizzle cake?


They are always immensely popular at cake stalls.

I made this gluten free version recently for a cake stall at a local village event and it sold really well.

The recipe comes from a handy little book called "200 gluten free recipes" published by Hamlyn.  It lists using brown rice flour but I used Doves Farm gluten free self raising flour with a little extra GF baking powder.

It was a simple, all-in-one kind of recipe, dead easy to make, and looked stunning.  I wouldn't normally include lemon zest in the drizzle, just lemon juice, but it looked great and was very lemony.  I don't often get to taste the cakes given for a cake stall but I was keen to try this one.  The recipe made a huge cake and with the lemon zest in the drizzle did not need any further adornment.  Definitely a keeper of a recipe and one to use again.

Ingredients
For the cake

250g butter, softened, or baking spread

250g caster sugar

250g gluten free self raising flour

3/4 tsp gluten free baking powder

4 eggs, beaten

1 lemon, zest and juice

For the topping

100g granulated sugar

2 lemons, zest and juice

Method

Preheat the oven to 180°C / 160° fan / gas mk 4.  Butter a large, 2lb/900g loaf tin or use a paper liner.

Place all the cake ingredients into a large bowl and beat together with a hand held electric whisk until well combined and fluffy.

Spoon the mixture into the tin and level the top.  Tap on the worktop a few times to release any trapped air.

Bake for 40-50 minutes until golden brown and firm.  Remove from the oven and prick all over with a skewer, cake tester or cocktail stick.

To make the drizzle mix the lemon zest, juice and sugar together in a small bowl.  Spoon the drizzle evenly over the cake and leave it to cool in the tin.

Cuts into 10-12 generous slices.

October 23, 2025

GLUTEN FREE BANANA AND WALNUT CAKE

In making cakes for a recent cake stall I took on the task of baking for people who like a slice of cake but need it to be gluten free.  This banana and walnut cake turned out really well using Doves Farm gluten free flour.


I didn't get to taste it but it smelled lovely when baked and it seemed nice and moist when I sliced it to serve to customers.  Sometimes gluten free cakes can seem a bit dry and crumbly.  Doves Farm gluten free self raising flour already contains xantham gum, something which helps to avoid the sandy, crumbly texture.

I do worry a bit when making gluten free cakes.  Being a vegan seems to me to be a voluntary lifestyle choice but requiring a gluten free diet is a serious health issue and it only takes a small amount of contamination to make people quite poorly.  Consequently I always bake gluten free cakes using a brand new pack of butter and sugar, to make sure there has been no accidental dipping of a spoon used for ordinary flour into an opened pack.  I also made sure there were separate knives and tongs for serving the gluten free and the vegan cakes, something that can be easily overlooked and cause problems.

It was an easy cake to make and it sold well.  I adapted a recipe on the website "Coeliac by Design".

Ingredients
For the cake

140g butter, softened, or baking spread

140g caster sugar

1 tsp ground cinnamon

2 large eggs, beaten

140g gluten free self raising flour

2 ripe bananas, peeled and mashed

50g chopped walnuts

For the topping

1 tblsp demerara sugar

banana chips or walnut halves to decorate

Method

Preheat the oven to 180°C / 160° fan / gas mk4.  Butter and line a 2lb/900g loaf tin or use a paper liner.

Put all the cake ingredients into a large bowl and beat together with a hand held electric mixer until well combined.

Spoon the mixture into the prepared tin and level the top.  Sprinkle over the demerara sugar and decorate with the walnut halves or banana chips.

Bake for 40-50 minutes until done.  Cool in the tin for 10 minutes before carefully lifting out (GF cakes can be slightly fragile) onto a cooling rack.

Cuts into 8-10 slices.

September 16, 2025

SALMON WITH BRAISED CABBAGE AND BACON


The weather has cooled down a lot and although there are some warmer days forecast it definitely feels autumnal now and we feel more like "proper cooking" as opposed to barbecues, quiches and salads.

This is a version of something I cooked a few years ago to a much more involved recipe.  

The sauce is one we make regularly which also works well with chicken or pork.  It’s a method we call "camp cooking" as that’s how we used to cook ourselves a decent dinner while on holiday - chicken in a creamy sauce done in a frying pan, having brought a separate pan of potatoes up to the boil and left to cook by themselves.  It’s amazing what you can do with a one burner camping stove with a little imagination.

For this version, the cabbage was cooked until just done then stirred through the hot sauce.  The salmon fillets were cooked plain and simple in the air fryer, or you could oven bake or fry them.  I added some courgette just because we have so many to use up but you could leave that out.  We had ours with plain boiled potatoes as the dish is already very rich - and delicious!

Ingredients 

half a small hard white cabbage, roughly shredded

1 small courgette, diced (optional)

a splash of vegetable oil

1 onion or shallot, chopped

a small pack (125g) lardons (we prefer smoked)

2-3 tblsp full fat crème fraîche

2 small salmon fillets

a few snipped chives

Method

Cook the shredded cabbage in boiling water until just tender.  Drain and set aside.

Cook the salmon fillets separately using an air fryer or by baking in the oven or in a frying pan.  They will  take 12-15 minutes.  Keep your eye on them as it’s easy to overcook and they’re best if just done and flaky.

In a deep sauté pan or large frying pan heat a splash of oil and add the onion, courgette and lardons.  Cook on medium heat until the onion and courgette are just tender.

Add the crème fraîche a spoonful at a time, stirring on low heat, until you have plenty of sauce.  Season with black pepper but very little salt.  Tip the drained cabbage into the pan and stir through the sauce.

Place the salmon on the bed of cabbage, sprinkled with snipped chives.  Serve with plain potatoes or pasta.

Serves 2.

July 23, 2025

APPLE CHUTNEY


Every year our apples fall from the tree too soon, heaps of them.  Most are unusable due to insect damage and end up in the compost but most years I manage to salvage some.  This year I decided to make some chutney.

I adapted a recipe on the Good Food website to what I had in stock, using Melfor vinegar instead of cider vinegar, demerara sugar instead of light muscovado and a mixture of raisins and sultanas.  You could also add other spices than just ginger: maybe cinnamon or even curry powder.

Peeling and chopping so many apples is not my favourite pastime so I've given it two stars for the amount of tedious work but it's a delicious chutney.  It goes well with our new favourite French cheese - Laguiole, which is not dissimilar to a strong cheddar and can usually be found amongst the Cantal cheeses as it’s from the same region of France.  

I'm sure it would go equally well with pork pie, sausage rolls and cold meats.

It’s ready for eating straight away but can be left to "mature" for a few weeks.

There was such a huge quantity of ingredients that I had to cook mine in two separate pans, dividing them equally between the two.  Interestingly, one lot cooked quicker than the other, the wider, flatter pan finishing first by several minutes!

I remembered a tip from, I think, a James Martin recipe on how to tell if your chutney is ready.  It should be nice and thick and when you drag your spoon through it there should be a clear trail which only fills with liquid very slowly.  If it refills immediately cook for longer, in five minutes intervals.

At the time of writing you can see the original recipe here.  The comments suggest it’s a very popular and successful recipe and there are interesting tips and ideas.

Ingredients 

1.5 kg cooking apples (prepared weight) I had about 1.7kg.

750g demerara sugar

500g mixed raisins and sultanas

2 medium white onions

2tsp mustard seeds

2tsp ground ginger

1tsp salt

700ml Melfor or cider vinegar 

Method

Put all of the ingredients into a large saucepan (or divide equally between two), bring to the boil gently then simmer uncovered for 30-40 minutes or until thick and ready (see picture above).  Stir frequently and adjust the heat so that that the chutney doesn’t catch on the bottom of the pan.

While the chutney is cooking sterilise eight suitable jars by washing in hot soapy water.  Rinse well and put jars and lids on a baking sheet in the oven set at 140°C for 20 minutes.

Allow the chutney to cool then fill your jars and seal tightly.  Once opened they should be kept in the fridge.

Makes 6-8 jars of chutney.

July 7, 2025

PLUM (OR NECTARINE) TART (can be gluten free)


The nectarine version.

The recipe for this popped up in my FB feed and comes from one of Nancy Birtwhistle's books, the one about gardening.  

The plum version before baking.

There is no pastry involved so some would ask - how can it be a tart?   I spent a happy few minutes looking up the definitions of cake, tart, torte and gateau and came to the conclusion that although it was definitely not a cake, a flan or a pie I still had no idea!  In any case it went down well for dessert at a BBQ one very hot June evening.


The plum version when cooked.

The first time I made this it was definitely a bit overdone - the plums looked a bit crozzled and it was a devil to get out of the tin.  Only when I made it the second time did I realise that I had baked the first one at 160° fan instead of 160° C.  A casualty of the debilitating heat - it had reached 39°C during the day and my concentration withers exponentially over 30°C!

The nectarine version - much less crozzled.

For the second time I used nectarines, didn't cram quite as much fruit in, and kept the slices away from the sides of the tin, which definitely made it easier to turn out, baked it at the right temperature and kept my eye on it.  With its apricot glaze it had that patisserie glamour.  It tasted great too.

Stoning the fruit can be a bit fiddly.  An old fashioned grapefruit knife came in handy for getting the stone out of some of the firmer fruits.  Changing the ordinary flour for gluten free flour (e.g. Doves Farm) will make it a gluten free dessert and a handy recipe to have instead of pavlova.

Ingredients

For the cake base

zest of 1 lemon

2 tsp lemon juice

30ml whole milk

125g softened butter or baking spread (I used Le Fleurier)

125g caster sugar

1 egg

125g plain flour or gluten free flour

125g ground almonds (or half and half ground almonds and ground rice)

For the topping/fruit

10-12 ripe plums or 3 large nectarines

2 tblsp apricot jam

Method

Butter the base and sides of a 23cm loose bottomed tart tin.

Put the milk and lemon juice into a small bowl or jug, mix together and set aside

In a large bowl, cream together the butter, lemon zest and sugar.  Add the egg and beat well until well combined.

Fold in the ground almonds (or almonds and rice), then the flour followed by the thickened milk.

The mixture will be quite thick so transfer it to the prepared tin and level with the back of a spoon or small palette knife.  Smooth the surface as much as possible then put the tin in the freezer while you prepare the fruit.

Cut each plum or nectarine in half and remove the stone.  Cut into quarters and slice thinly.  Plums  should make 8 slices each, nectarines 12 slices.

Preheat the oven to 160°C / 140° fan / gas mk3.  

Remove the tart case from the freezer and arrange the slices of fruit neatly in circles on top of the cake base.

Stand the tart tin on a baking sheet and bake in the oven for about 1 hour.  The fruit should be tender and the cake base lightly golden and cooked.

Remove from the oven to cool slightly.  Remove the tart from the tin and place on a serving plate.

To make the glaze, warm the apricot jam in a saucepan with 1 tblsp water.  Brush over the fruit.

Serves 8-10.


This is my gluten free version, made with apricots.  The cake base is as per the recipe above but using half and half ground almonds and ground rice, plus gluten free flour.

June 29, 2025

RHUBARB FOOL

This gorgeous old fashioned dessert has a wow factor well beyond its simplicity.

The recipe has its origins in a book by Simon Hopkinson called "roast chicken and other stories" and I found it on a blog called "The Rhubarb Fool". 

The simplicity lies in the cooking of the rhubarb which is just baked in the oven with sugar until tender and processed in a food processor to a slightly lumpy purée. This is swirled into softly whipped double cream to give a marbled effect rather than blended to a homogenous pink.

We were having six guests for dinner on a June evening and it was Nick's idea after he spotted red rhubarb in a local supermarket.  I normally balk at the price of shop bought rhubarb but it does look so pretty for a special occasion.  This rhubarb was mostly a deep red with a little green on the stems which produced a very soft pink colour when cooked.  There was plenty of it so I put a layer in the bottom of each glass before topping with the actual fool mixture.

I happened to have some vanilla sugar on the go, long forgotten at the back of the cupboard from the last time I used an actual vanilla pod, which was a few years ago.  Otherwise I might have stirred a teaspoon of vanilla extract into the rhubarb before baking, or might have used plain caster sugar.

The recipe suggests swirling the reserved juice into the cream along with the purée but instead I served it separately as I was also making a chocolate torte and thought it would also be nice drizzled over that.

I decorated each one with a tiny sprig of mint.

Ingredients 

1.3 kg rhubarb 

500ml double cream

350g vanilla sugar or caster sugar

Grated zest of 1 orange (optional)

small sprigs of mint for decoration (optional)

Method

Preheat the oven to 190°C / 170° fan / gas mk 5.

Wipe, trim and roughly chop the rhubarb.

Tip it into a baking dish or roasting tin, spreading out into an even layer.  Sprinkle over the sugar and orange zest and stir in.  Do not add any water and cover with foil so that it bakes and does not roast or become brown.

Bake for 40-45 minutes until soft and tender.  Drain through a colander over a jug to retain the juice.

Allow to cool before transferring to a food processor and blend to a slightly lumpy purée.

In a large bowl, whip the cream until softly thick, i.e. not stiff but holds its shape.

Spoon a layer of puréed rhubarb into the bottom of eight glass dishes.  Fold the remaining purée into the whipped cream to give a marbled swirl effect and divide this between the dishes.

Decorate with a small sprig of mint (optional) and chill on a tray in the fridge for at least two hours or until needed.  Serve the reserved juice alongside.

Serves 8

December 6, 2024

CHOCOLATE AND ALMOND CAKE gluten free

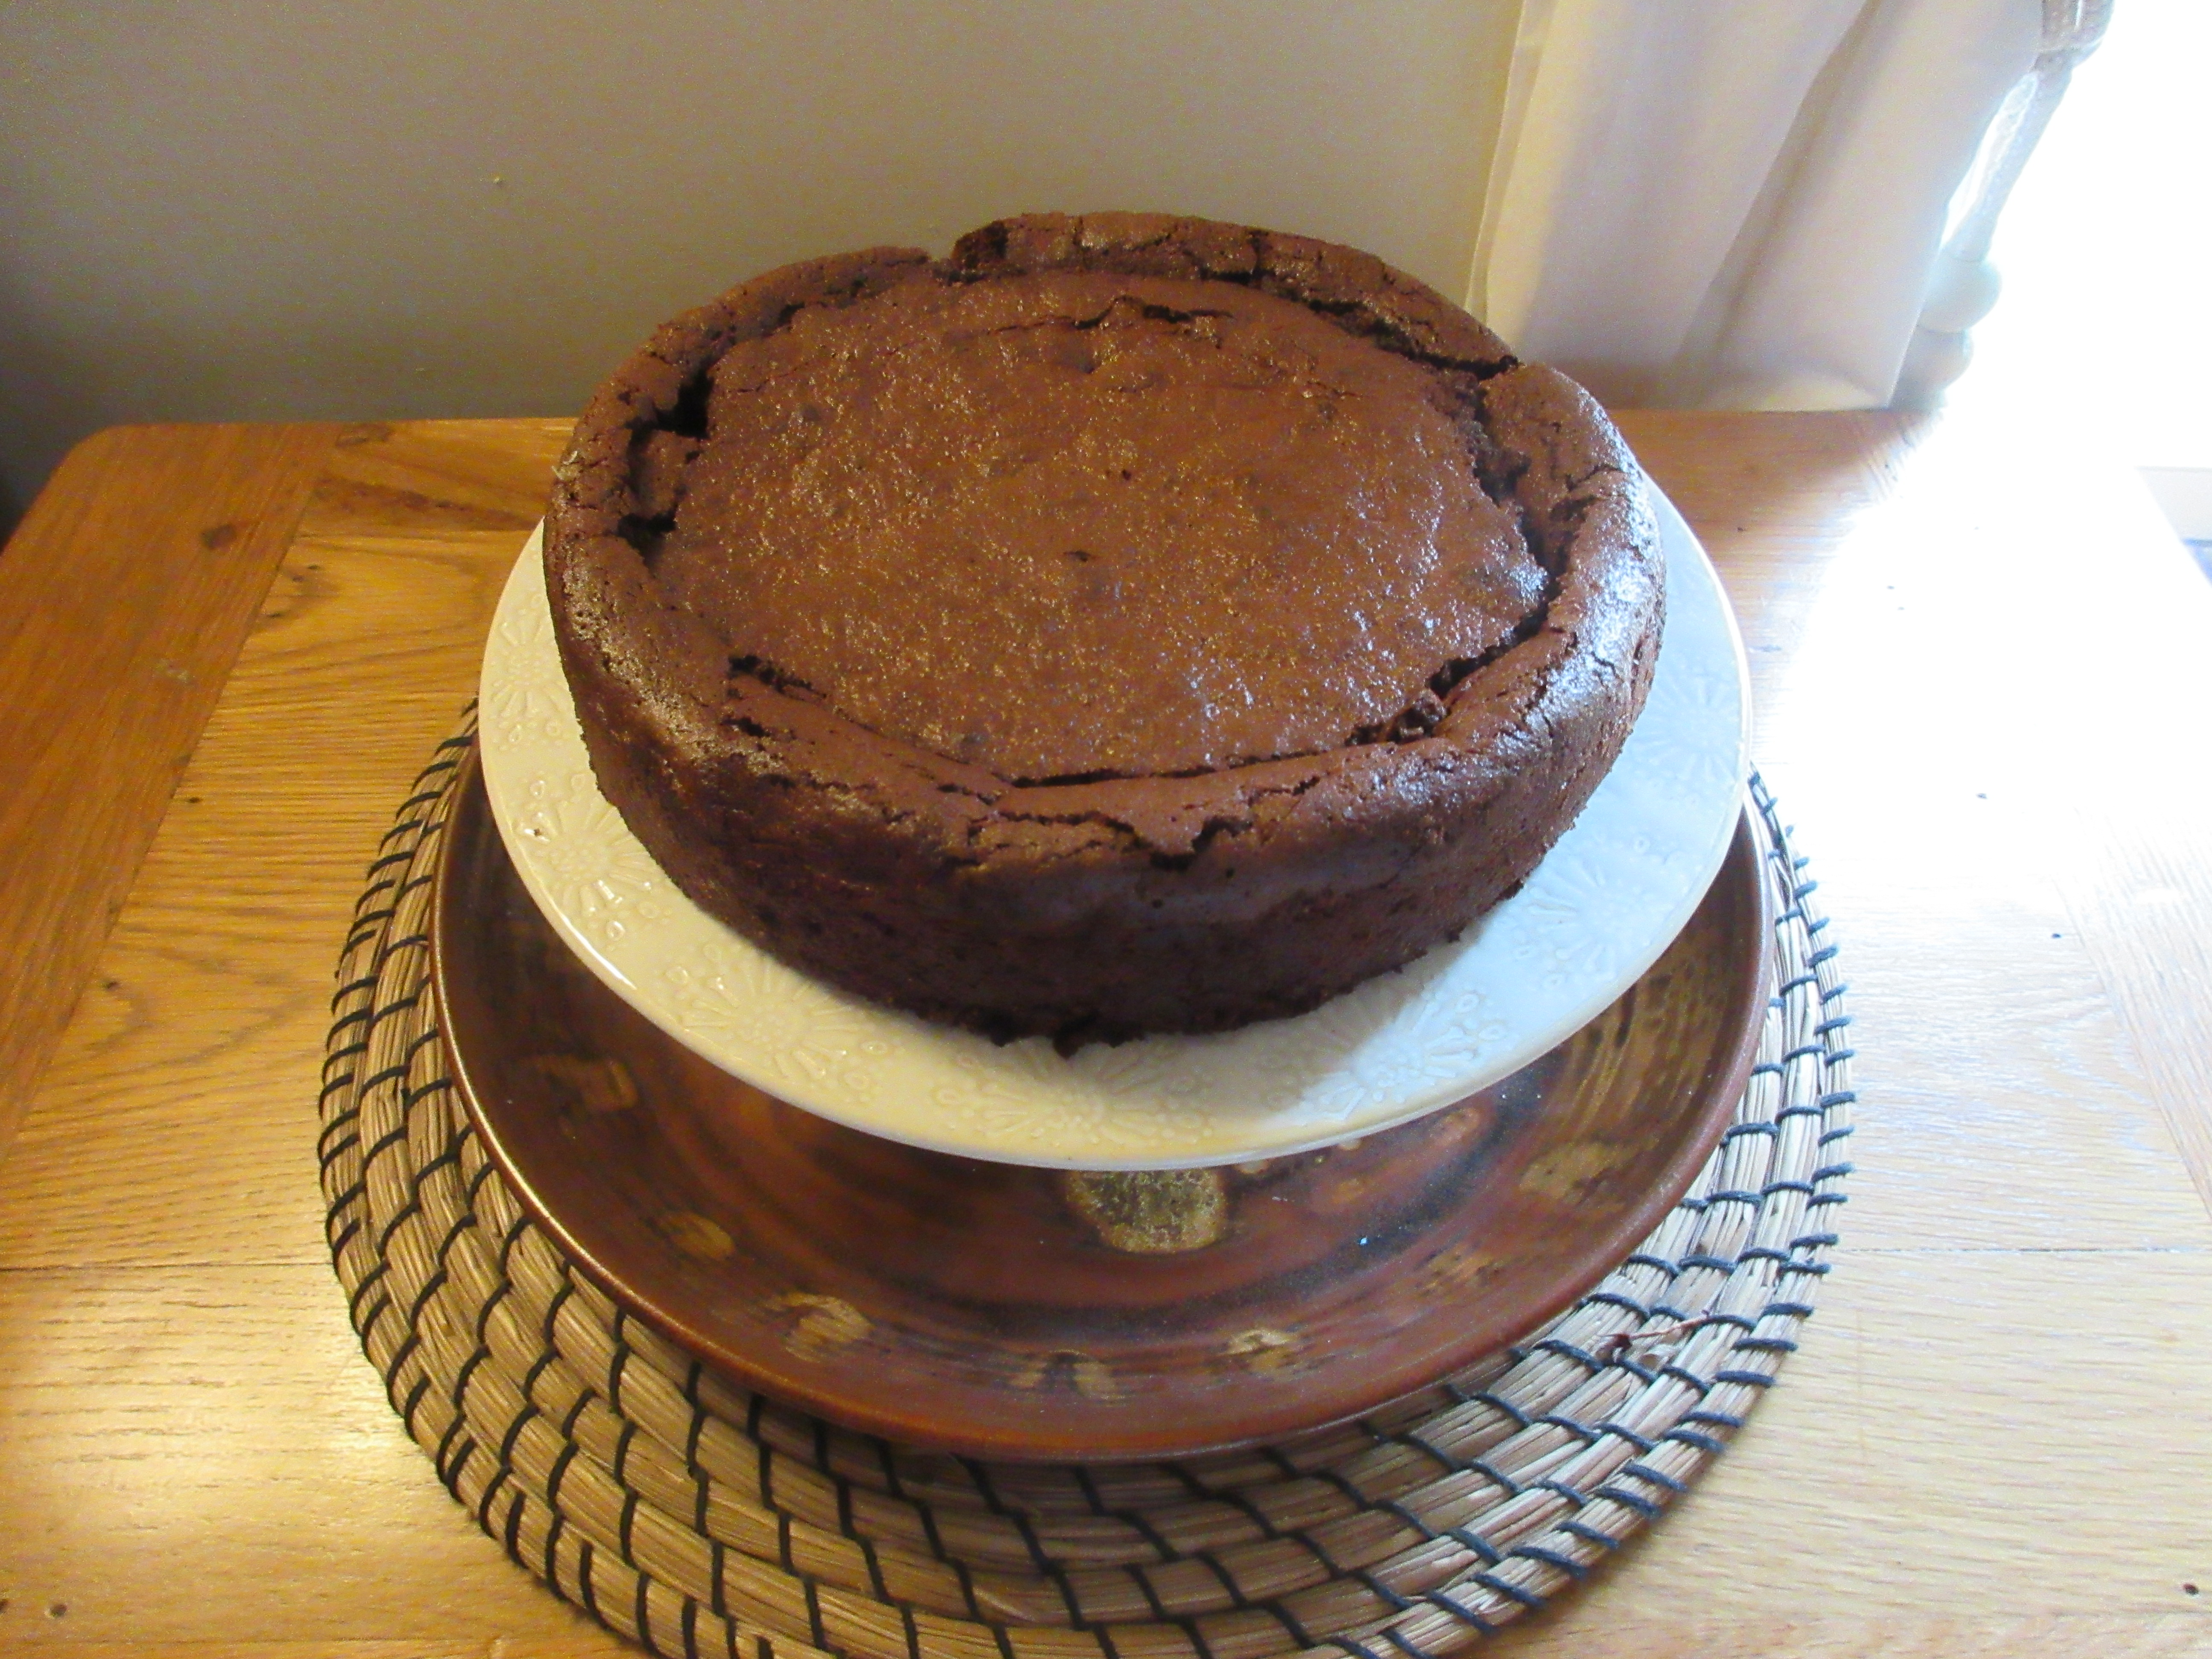
I recently needed a gluten free dessert recipe and none of the ones I had used before seemed to be just right.  So I did a bit of internet research and stumbled across this recipe for a flourless chocolate cake.  It had all the usual ingredients you would expect but also mascarpone cheese and as it happened I had a tub of it in the fridge.  (A random purchase from when I thought "let's have tiramisu this weekend" but never got around to it.)

It was very easy to make but not so easy to get out of the tin!  The instructions suggest it can be served warm or cold and to leave in the tin to cool for 30-40 minutes.  I misinterpreted this and tried to remove it from the tin at this point when the cake was still slightly warm.  It nearly disintegrated but luckily I managed to stick it back together on the cake stand with just an ever so slightly wonky appearance!

 Lesson learned!  If I wanted to serve it warm as a dessert I would bake it in something that it can be served in at the table and slice it straight from the dish.  To get it onto a cake stand I would let it go completely cold before I tried to move it, which is clearly what I was supposed to do!!

It was however, delicious, very brownie-like and extremely rich, which is what you would expect with all that chocolate, butter and cream cheese in it!  I served it in small slices with a poached pear alongside (see recipe here).  It went down very well with our guests and I would definitely make it again. 

Other similar cakes I have written about before include the chocolate amaretti cake, the flourless chocolate torte,  chocolate and chestnut fondant and the gluten free black forest cake .  Take your pick, they are all worth the effort (but not all of them are gluten free, check the recipe).

Update…….

I also noticed that Nigella Lawson made a very similar cake which contains amaretto during the recent repeat of her series "At my Table".  Yum!! The recipe is available online on the BBC Food website.  I shall try it myself and report back!  

Ingredients

200g dark cooking chocolate (It doesn't need to have a high percentage of cocoa.  I used SuperU own brand cooking chocolate.  Cadbury's Bournville would work well.)

200g butter

3 eggs

175g golden caster sugar

100g mascarpone cheese (or soft cheese)

¼ tsp vanilla extract

100g ground almonds

30g cocoa powder

Method

Preheat the oven to 180°C / 160° fan / gas mk 4.  Line the base of a 20cm springform tin with baking paper.

Chop the chocolate and butter into cubes and melt using a bowl over a pan of simmering water.  Leave to cool slightly.

Put the eggs and sugar into a large bowl and, using an electric hand whisk or stand mixer, whisk for several minutes until thick and creamy.  Whisk in the mascarpone and vanilla until evenly combined.

Fold in the melted chocolate mixture until everything is an even colour.  Fold in the ground almonds then sift in the cocoa powder and a pinch of salt and fold in.

Pour the mixture into the prepared tin.  Place it on a baking tray and bake for 30-40 minutes.  The top will crack and the cake will puff up, but bake until there is not too much of a wobble in the middle.  (Mine took an extra five minutes.)  It will sink back down but the cracks will remain.

Remove from the oven an allow to cool.  Serve warm as a pudding or cold as a cake (see my notes in text).

You can, if you wish, dust it with more sifted cocoa powder before serving which would hide the cracks a bit.  I found it chocolatey enough without this and nobody seemed to mind the cracks!

Cuts into 10 slices at least as it is very rich.