Showing posts with label Be-ro recipes. Show all posts

October 26, 2024

COFFEE AND WALNUT CAKE (version two)

A few months ago I made a coffee and walnut cake for an event in the village, to a recipe I had not used before.  Usually I go for the Hairy Bikers recipe from their book "Mums know best" which I wrote about here.  I have also made a lovely coffee cake without walnuts to a recipe from the W.I. book "Cakes" which I wrote about here.

This time I fancied using one from the latest (41st) edition of the BeRo book, which in the end I adapted quite a bit.  Anyway, the cake I made on that day was surplus to requirements and never made it out of the event kitchen, a fellow volunteer buying the whole cake instead.  Which is fine except that I didn't get to find out whether it was any good or not!


As was bound to happen, another event came along recently and I made the cake again.  It's more or less a combination of my two regular recipes; includes walnuts in the cake, has a buttercream filling and a glacé icing top.  It was not the only coffee and walnut cake there and both sold out early in the day, confirming my theory that the old fashioned, traditional cakes, especially if they are well covered in icing, are always the most popular at cake sales.  There was just one small sliver of mine left, looking lonely by itself, so I was able to taste it.

It was light and moist with a strong coffee flavour and just the right amount of walnuts.  This will be my favourite recipe to use..........for now anyway!  I've actually given it two stars in the fiddle factor as chopping walnuts is not my favourite pastime and making two different icings (one for the filling and one for the top) is a bit more time consuming, but it was worth it! 

Ingredients

For the cake

175g self raising flour

1½ level tsp baking powder

100g white caster sugar

75g golden caster sugar (or use all white)

175g baking spread or spreadable butter

3 eggs, beaten

65g walnuts, finely chopped

1 tblsp Camp coffee essence

For the buttercream filling

40g softened butter

80g icing sugar

1 tsp Camp coffee essence

For the glacé icing

110g icing sugar

1½ tsp Camp coffee essence

To decorate

5-6 walnut halves roughly chopped plus 4 whole halves

Method

Preheat the oven to 180° C / 160° fan / gas mk4.  Grease a pair of 7½" or 8" (20cm) sandwich tins and line the bottoms with baking paper circles.

In a large bowl mix together using an electric whisk (or use a stand mixer) the flour, baking powder, sugars, butter, eggs and coffee essence until creamy and well blended.  Mix in the nuts.

Divide the mixture evenly between the two tins and level the tops.  Bake for 25-30 minutes until done (see side bar for tips).

Remove from the oven, leave in the tins for 5 minutes then turn out carefully, removing the baking paper, and leave to cool completely on a wire rack.

To make the buttercream, beat the butter in a medium bowl until soft.  Sift in the icing sugar, add the coffee essence and beat until smooth and well combined.

To make the glacé icing, sift the icing sugar into a small bowl and beat in just enough of the coffee essence to get a spreadable icing.  If you want to get the drip effect as in the second picture, add a little more essence or water a drop at a time until it is slightly more runny.

When the cakes are completely cold, sandwich the two together with the buttercream then spread the glacé icing evenly over the top.  

Decorate with whole and chopped walnuts to your taste.

Cuts into 10-12 slices.

May 14, 2023

BUTTER TARTLETS


I'd been hankering after making these for a while.  There’s no logical reason for this other than that I spotted the recipe in my favourite copy of the Be-Ro book and realised I hadn’t made them since I was at school.  My mum used to make them occasionally and they were a real treat.
In planning our Coronation tea party (in France) I thought something old fashioned would be a nice addition to the festive fare.

In the book they are iced with a blob of water icing and decorated with a sliver of glacé cherry but I completely forgot about this step until I had run out of time!  Also, the next time I make them I would use more than a scant teaspoon of filling for each one.  They are obviously not as likely to boil over as a jam tart.


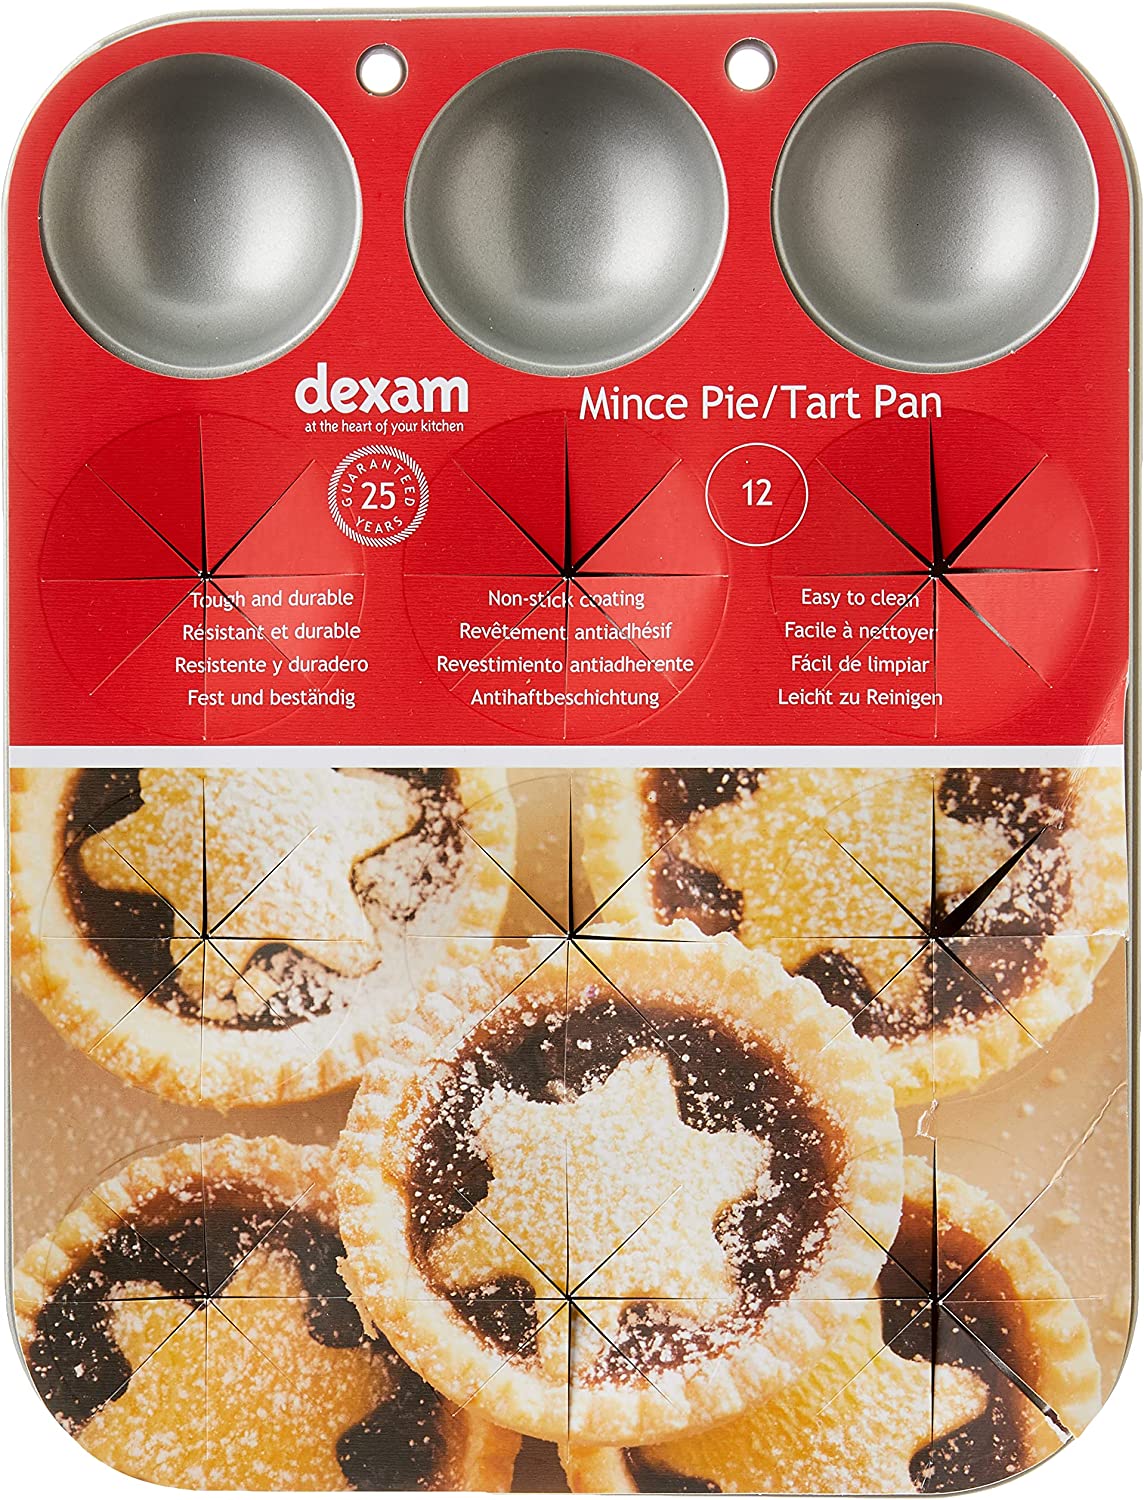
I used two new patty tins, recently purchased from a posh cookware shop in Bakewell.  This was rather a rash purchase but I liked that they felt solid and that the holes had rounded not flat bottoms.  I still have my mum’s old mince pie tins where the holes are fluted and patterned with round bottoms but they are very tatty now and require a lot of greasing.  I abandoned using them years ago in favour of some cheap non stick ones.  


I have to say that the new tins were a dream to use, the tarts slipping out effortlessly.  A worthwhile investment that should last for years.  Or, as my mum would say, "should see me out"!


The tarts were a doddle to make (especially as I used ready made, ready rolled pastry) and delicious.  The flavour took me back instantly to my school days in the 1950s when there might be one or two left in the cake tin from Mum's weekend baking.  A sneaky little bun when I got home from school to put me on until tea time.

Interestingly, the recipe is no longer in the latest edition of the Be-Ro book.  Maybe they are deemed to be a little too old fashioned for modern tastes but all those guests that had never seen them before loved them.  They are quite unique.  

Ingredients

A pack of ready made pastry or make your own using 175g (6oz) flour

25g butter

100g currants

100g demerara sugar

1 egg

A few drops of vanilla extract

Method

Preheat the oven to 200°C/180° fan/gas mk 6.  Grease the holes of two patty tins.

Cut the pastry into circles using a 3” cutter and line the tins.  You should get about 18 tarts from the pastry by re-rolling.

Melt the butter in a small saucepan.  Remove from the heat and mix in the other ingredients.  Put a generous teaspoonful into each pastry case.

Bake for 15-20 minutes until the pastry is lightly golden and crisp.

When cold, decorate each tart with a blob of water icing and a sliver of glacé cherry if you like.

Makes about 18 tarts.

June 6, 2022

AFTERNOON TEA


With all the Queen's Jubilee celebrations for being on the throne for 70 years there has been much talk of street parties and afternoon teas.  In fact in our part of France friends held their own afternoon tea party to celebrate but unfortunately I was unable to attend.  I'm back home in the UK because my father is in hospital and his future care is again under debate.  

So instead I decided it was time I posted about the afternoon tea I held for a friend's birthday just a couple of months ago.  That was in France too.

I used my three tier glass cake stand which I acquired at a brocante a couple of years ago for just 2€.  It matches some dessert plates and a regular one tier cake stand that were also collected for next to nothing from brocantes over the years.  My best white tablecloth doesn't come out very often but with that and real cups and saucers the table looked the business, even if I say so myself! 

The bottom layer was a selection of sandwiches with the crusts cut off (of course!).  There were home made egg mayonnaise and rocket on brown bread, smoked salmon, cream cheese and cucumber on brown and smoked ham with tomato and cucumber on white.

You can see the recipe for egg mayonnaise here.  I have never seen cress for sale in France so opted for rocket instead.  It was a good substitute.

Being in France, the sliced bread available is not quite like in the UK.  Generally the texture is nice but it always seems to me to be slightly sweet.  We toyed with the idea of making our own bread but as it was only a few days after we had arrived and we were still dealing with all the usual problems of being away from the house for so long decided it was a step too far.


The middle layer was Victoria scones.  For such an important occasion I didn't trust myself to make ordinary scones, my success with those being variable.  The Victoria scones are easy to make from the Be-Ro book recipe and for me they work every time.  They looked cute on the stand although someone who saw the pictures on Facebook said they looked like fat rascals!  


I can't say I've ever eaten a fat rascal so wouldn't know but they sound like fun so will add them to my ever lengthening bucket list of thing to bake!  You can see the recipe for Victoria scones here or look it up in the Be-Ro book - it's in all the recent editions.


The top layer, the crowning glory, was of small cakes.  The raspberry sponges were cut from a traybake recipe for a jam and coconut sponge, otherwise known as "school cake" and which I have been hankering after making for some time!  I used a recipe on the Asda website which you can see here.  It is very quick and easy and the little squares looked very pretty when topped with fresh raspberries.  You can also see the recipe here.

The little chocolate cakes were to a recipe from one of the collection of slim volumes that Delia Smith put out many years ago called "Baking".  They are chocolate, prune and Armagnac mini muffins and I topped them with an excellent chocolate icing from Lynn Hill's website Traditional Home Baking.  You can see the icing recipe here and I added a few decorations including halved glacé cherries, halved chocolate covered raisins and choclate vermicelli.  They were delicious!


No afternoon tea would be complete without an actual slice of cake so for that I made a lemon layer cake filled with lemon curd to another Delia recipe from the same book.  You can see that here.  I didn't make my own lemon curd but used a Bon Maman jar which I brought over from the UK.  Bizarrely you can buy lemon curd in France but not the Bon Maman one!

I had never made this cake before but had eaten it several times as it's a family favourite of Nick's sisters.  It was easy to make and, of course, yummy!


Our birthday guests enjoyed the afternoon tea and so did we.  Being Americans they had only ever had afternoon tea a couple of times before when in London.  It was fun to make and fun to eat.  It does involve a lot of preparation and baking with all the different elements but it's well worth the effort.

You can see my lemon curd layer cake here.
The prune and chocolate mini muffins are here.
The little raspberry cakes are here.
The egg mayonnaise recipe is here.

March 3, 2022

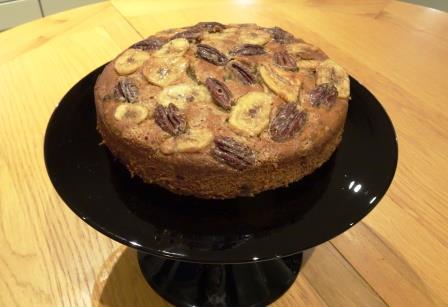
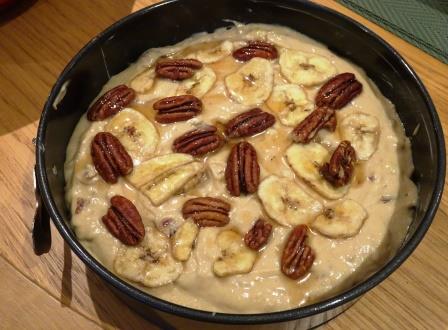
BANANA, PECAN AND MAPLE SYRUP CAKE


This is a Be-Ro book recipe that I spotted in a Facebook group fairly recently and wondered why I had never noticed it before.  The reason is that it’s a new recipe in the most recent edition, which I very rarely use, preferring the book before. 

It sounded so good that I just had to try it.  

In the Be-Ro book it is baked in a loaf tin but the person who posted the picture had used a round tin, which I also prefer.  I have found that all recipes for a 2lb (900g) loaf tin bake perfectly well in an 8” (20cm) round tin instead.  You have to keep your eye on the cooking times and check sooner than stated.  Sure enough, my cake was done in exactly one hour which is less than the time in the recipe.  I also thought it was looking brown enough after 35 minutes so covered it loosely with foil.

It was interesting to see the quantity of bananas given by weight.  So many recipes just say "three medium" or "two large" bananas but how large is large?  This one states the weight of unpeeled bananas which is very reassuring.  

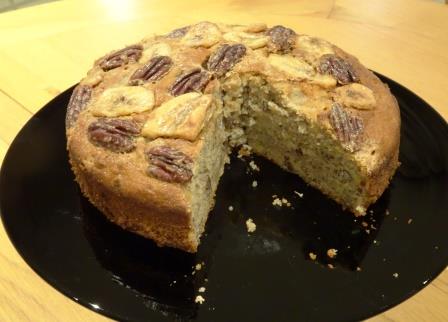
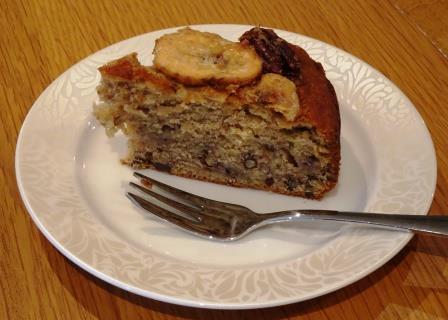
It’s a contender for my current favourite banana cake.  It had a lovely texture, a nice glossy top and just the right bananarish flavour.  The dried banana slices became chewy and I was glad I didn’t substitute walnuts for the pecans just because I always have so many windfall walnuts in stock!  A 100g bag is just right for the cake.  There’s no doubt the people at Be-Ro know how to write a good recipe and I preferred it to the other version that I made exactly a year ago, see here.  Sorry, James!

Ingredients 

For the cake

225g self raising flour

1/4 tsp bicarbonate of soda

Pinch of salt

75g butter (I used Sainsbury's Buttersoft)

110g light soft brown sugar 

2 eggs, beaten 

450g bananas, weighed in their skins (exactly four small bananas)

75g pecans, chopped 

2tblsp maple syrup

For the topping

25g dried banana slices

25g whole pecans

1tblsp maple syrup 

Method

Preheat the oven to 180°C/ 160° fan /gas mk 4.  Grease and line the bottom of a 20cm round springform tin (or use a lined 2lb loaf tin).

First make the topping by simply placing all the ingredients in a small bowl and mixing together.  Set aside.  Peel and mash the bananas.

In a large bowl, cream together the butter and sugar using a hand held whisk until fluffy.  Beat in the eggs in thirds with a little flour.  

Stir in the remaining flour and the other ingredients and spoon into the tin.  Level the top and spoon the topping ingredients over the top.  Pour over any residual syrup.

Bake for about an hour, covering loosely with foil after 35 minutes.  (The recipe gives a longer time of one and a quarter hours in a loaf tin.)  Cool in the tin.

Cuts into 10-12 slices.
September 1, 2021

THE Be-Ro BOOK and their dates of publication.


The 40th and 38th editions.

I have a small collection of old Be-Ro books including the one I bought for myself in the 1970's and a couple of very early editions of my mum's and grandma's.  I updated my collection by buying the 40th edition a few years ago in a supermarket where they were sold with the flour.  Copies of the current edition (41st) can be purchased directly from Be-Ro via their website.  To do that click here.

I naively thought at one time that it might be fun to collect every one ever published but have noticed that they can now fetch a hefty price on Ebay.  Consequently I don't think my collection will grow much more, unless I stumble across one or two in a charity shop somewhere.  That's now less likely as charities are more wise to the value of things than they used to be owing to their volunteers being more internet savvy!


The 21st and 26th editions.

Be-Ro books were first published in 1923, a century ago, and are an interesting insight into social history.  Looking at the earlier editions they were clearly written for the stay-at-home wife and her daughters, right up to those published in the 1970's.  Since then they have become less housewifely.  Over the decades well loved recipes have gradually been changed and new ones added to meet modern tastes and appetites as well as fashions in food.

The older editions can be difficult to date as they don't show the date of publication in them.  Many of the early ones don't have an index either.  As the Be-Ro book was originally published as a helpful booklet to go with the bags of flour that's not surprising.  

Recently I decided to try to find out when one of my mum's favourite recipes, the one for rich coconut tartlets, first appeared in a Be-Ro book - the recipe book she usually used.  I wrote about the tartlets here and then set about finding how far back they first appeared in a Be-Ro book.

I have a copy of the 17th edition where they don't appear and the 21st edition where they do (I don't have any of the editions in between) but typically neither copy has the date of publication.  So I wrote to Be-Ro to ask them.  To my absolute amazement I had a quick reply from Be-Ro with a full list!  So, it was as simple as that, all I had to do was ask!  

It seems my mum's favourite recipe first appeared somewhere between 1954 and 1958, which does make sense.  Being married in 1950 it seems logical that she would have first made them some time between those dates.


The 17th and 32nd editions.

You might also like Karen's blog, Lavender and Lovage, where Be-Ro recipes are often featured.


~~~~~~~~~~~~~~~~~~~~~

Here is the list of publication dates as given to me by Be-Ro:

1st 1923
2nd 1924
3rd 1925
4th 1926
5th 1926
6th 1928
7th 1929
8th 1930
9th 1931
10th 1932
11th 1933
12th 1947
13th 1948
14th 1949
15th 1951
16th 1953
17th 1954
18th 1955
19th 1956
20th 1957
21st 1958
22nd 1959
23rd  1960
24th  1961
25th 1962
26th 1963
27th TBC
28th TBC
29th TBC
30th TBC
31st 1967
32nd 1967
33rd 1972
34th 1975
35th 1978
36th 1980
37th 1982
38th 1988
39th 1992
40th 1999
41st & Current Edition 2009

April 6, 2021

GINGER AND COCONUT TARTS


This is another variation of one of my favourite Be-Ro book recipes.


They are called in the book "rich coconut tartlets" and are essentially jam tarts with a coconut topping.  My mum used to make them by the dozen most weekends.  The last time I wrote about them I had made a version using quince jelly which you can see here.  In that post I originally gave a link to the recipe on the Be-Ro website but, like so many links, it has disappeared!  It's so annoying to get all excited about baking something you've seen in a blog, only to find that when you look up the link all you get is "Error 404"!  


Comparing these to the quince ones it looks like there is much more topping.  That's probably down to using a large egg instead of a medium one.  The large free range eggs we now get are huge!!

I love the knobbly, rustic and home made look!

For these tarts I used Sainsbury's ginger preserve, a favourite jam that I like to have on toast.  I've also used the same jam to fill my pear and ginger upside down cake which you can see here.  (Robertson's make a ginger marmalade which would work nicely too.)  I finished each tart with a bit of crystallised ginger, popped on top before baking. 


This week's weather.


They are perfect for the current weather.  As I write this hail is falling and covering the ground like snow.  This day last week we were basking in 20°C and lighting the barbecue, thinking that this lockdown business is not so bad.  Such is the nature of April weather in Derbyshire, especially during the Easter school holidays!   April showers, I suppose!

Last week's weather - prior to the schools breaking up for Easter!!

Ingredients

100g shortcrust pastry - home made using 100g flour or shop bought

a few teaspoons of ginger jam or marmalade

50g soft margarine

50g caster sugar

1 egg, beaten

50g dessicated coconut

12 pieces of crystallised ginger (optional)

Method

Preheat the oven to 180°C / 160° fan / gas mk 4.  Grease a 12 hole patty tin.

Roll out the pastry and cut twelve 3" (7.5cm) circles using a fluted pastry cutter.  Gently press one circle into each hole and put about ½ tsp jam in the centre of each one.  (This doesn't sound much but any more will cause the jam to leak out and boil over when cooked.)

In a small bowl, beat together the margarine and sugar until light and fluffy.  Beat in the egg and the coconut.

Plop about 1 tsp of the coconut mixture on top of the jam in each tart, teeming and ladling until it's all used up and shared out evenly, and push the mixture to the edges of each one to seal in the jam.

Drop a piece of crystallised ginger into the centre of each one.

Bake for about 20 minutes until the coconut mixture is risen and golden.  Cool before serving as the jam will be very hot.

Makes 12 tarts.

March 4, 2021

THE BE-RO GINGERBREAD CAKE - the taste of my childhood


Nick is not really much of a cake person.  Although for someone who claims not to like cake very much he has made some pretty special cakes himself.  He often tackles the recipes I would shy away from because they're too fiddly  - he just gets the ingredients weighed out and gets on with it, head down and completely focused. 


 However, of all the cakes in the world, his absolute favourite is a ginger cake, and he waxes lyrical about the Be-Ro book ginger cake.


I got out my copy of the Be-Ro book and as I weighed out the ingredients memories of past ginger cakes came to mind.  My mum and my grandma used to make this same cake, using the Be-Ro book recipe, it was a family favourite.  It was made in a small oblong meat roasting tin.  We didn't possess a huge collection of different tins in those days.  There was a pair of sponge tins, a bun tin for fairy cakes, maids of honour and mince pies, a baking tray and a deep cake tin for the Christmas cake.  It was very much a case of make do with what we had and in fact a lot of old fashioned recipes didn't specify the size of tin at all.

This recipe uses the simplest of ingredients that would have been standard fare in everyone's pantry in the 1950's and 60's.  No fancy flours or the kinds of ginger that feature so often in modern recipes.  I doubt my mum would have ever even seen or heard of fresh ginger.  Ginger came dried in a jar.  (In fact I'm not sure that in the very early days if it didn't come in a tin.)


I hadn't made one of these for donkey's years.  Yet it's the best ginger cake you could wish for.  Just look at that sticky, glossy top and the dense, even crumb.  It has a spicy treacliness that's absolutely divine.  The taste of my childhood and just as way back then, the kitchen smelled wonderful all afternoon.

Ingredients

225g plain flour
a pinch of salt
2 tsp ground ginger
1 tsp mixed spice
1 tsp bicarbonate of soda
50g soft dark brown sugar
100g margarine
175g black treacle
50g golden syrup
150ml milk
2 med eggs, beaten
50g sultanas (optional, I omitted them)

Method

First, measure your margarine, treacle and golden syrup directly into a small saucepan.  Heat gently until the margarine has melted, stirring all the time.  Remove from the heat, stir in the milk and set aside to cool.

Preheat the oven to 150°C / 130° fan / gas mk 2.  Grease and line the bottom of an 18cm square or 20cm round tin.

Sift the flour, salt, spices and bicarb into a bowl.  Stir in the sugar and mix well to combine.  Add the beaten eggs and mix well.  Stir in the cooled treacle mixture.  Add the sultanas if using and stir again.

Pour the mixture into the prepared tin and bake for 1 - 1¼ hours.  Mine was done in 1 hour so check early on.

Cool in the tin for 10 minutes before turning out onto a wire rack to cool completely.

Cuts into around 16 slices.

February 23, 2020

THE Be-Ro BAKEWELL TART

 
The Bakewell tart I made the other week went down so well that another one was requested.
 
 
This time I decided to make the recipe in my Be-Ro book.
 
This recipe uses ground rice and ground almonds for the topping but no flour (except in the pastry).  It's a long time since I had any ground rice in the house and it proved hard to find.  Sainsbury's, Tesco and the Co-op didn't have any but I finally tracked some down in Morrison's. 
How times change.  Ground rice pudding was a quick and easy pudding to make and a favourite of mine as a child.  Even as an adult, when I could choose for myself what I wanted to cook, it was a real treat.  Now I can't remember the last time I used any.  It's likely that the remains of a packet was thrown out in one of my house moves over the last five years and until now I hadn't missed it.  Now I have some again I can't imagine how I lived without it.  I love ground rice pudding, along with regular rice pudding and - flaked rice pudding!  Does anyone remember that?  I feel compelled to buy a packet of flaked rice as soon as I see one.  Sainsbury's used to have it but as it was next to the ground rice on the shelf...…I'm not too hopeful about ever getting any.
 
 
I'm pretty sure the recipe my mum used would have been the one in the Be-Ro book.  However, it has changed.  Comparing the two recent editions, the latest (41st) has more butter and sugar than the previous (40th) edition and also two eggs instead of one.  I decided to go with it and see how it turned out.
I have a very small collection of Be-Ro books and the recipe has varied quite a bit over the years.  In my battered copy of the 32nd edition (which cost 1/6d so is probably late 60's) there are only 2oz each of margarine, sugar and ground almonds, plus 1 egg and 1oz round rice, which would hardly have made enough filling to fill the tart.
 
 
This Bakewell tart was very different to the one I made last time.
 
The texture was much more dense and sticky and, as you might expect, less cakey and more grainy than before.  That would be the ground rice in place of the flour.  It occurred to me that in days of yore ground rice with a drop of two of almond essence might well have been a cheaper alternative to ground almonds, which only made an occasional appearance in my mum's baking, mainly at Christmas.
 
 
I would be hard pressed to choose which one I preferred.  I quite liked the denser stickiness of the Be-Ro recipe but felt it could have done with longer in the oven.  I used the heated baking tray trick but in the centre of the tart the pastry was definitely soggy.  Barely cooked in fact.  So much so that I'm tempted to remake it to the previous edition's recipe, with less butter, sugar and only one egg, to see if it makes a difference.  I wonder what made them decide to change the recipe again.
 
Ingredients
 
Shortcrust or sweet pastry made with about 175g flour, homemade or shop bought
 
For the topping
 
2-3 tblsp raspberry jam
 
4oz butter or margarine (I used Stork baking spread)
4oz caster sugar
4oz ground almonds
2oz ground rice
2 eggs, beaten
a few drops almond essence
 
2-3 tblsp icing sugar to decorate
 
Method
 
Preheat the oven to 190°C / 170° fan / gas mk5.  Roll out the pastry to fit a greased 20cm flan dish or tin.
 
Cream together the Stork and sugar.  Mix the ground rice and almonds together and beat into the mixture alternately with the eggs.  Beat in the almond essence.
 
Spread a generous layer of jam over the pastry and dollop on the almond mixture.  Spread out evenly and bake for 35-40 minutes.
 
To decorate, mix the icing sugar with enough water to make a creamy consistency and drizzle over the tart when completely cold.
 
Cuts into 8 slices.

February 26, 2016

GLUTEN FREE FRUIT FLAN

gluten free fruit flan

I have been enjoying making fruit flans in my new tin.  My Lakeland tin is 20cm dia. and makes a flan that serves four.  I fancied getting a bigger version and tracked down a 23cm silicone one on the internet, although since then I have discovered that you can also buy them in some French supermarkets and other shops that sell housewares and fancy goods.

gluten free fruit flan2

Last time I used my silicone flan mould I made a gluten free version that worked extremely well.  I had already scaled up the basic Be-Ro book recipe for the bigger flan and then simply substituted Dove’s Farm gluten free flour for the self raising flour in the recipe.

Quick-jel is not gluten free so my original intention was to make up half a packet of Chivers jelly for the glaze.  However, after watching the last episode of “Sport relief bake-off” on the telly, I decided to go for a cornflour glaze instead.   One of the contestants (I forget who) put jelly on her tart which didn’t set,  and Mary Berry – good old Mary – suggested a cornflour or arrowroot glaze instead.  I didn’t have any arrowroot but plenty of cornflour so tried that and it worked well.

For some the easiest and safest gluten free dessert is a meringue of some kind, but I think this will be my go-to gluten free pud in future.

Ingredients

3 medium eggs

110g caster sugar

110g gluten free plain flour

1 tsp gluten free baking powder

grated zest of ½ lemon

fresh or frozen raspberries and blueberries (or any tinned fruit you like), thawed or drained (reserve the syrup or juice)

1 tblsp cornflour

1 tblsp caster sugar

60ml water

60ml fruit juice (or syrup from the tin)

1 tblsp redcurrant jelly

Method

To make the flan case, preheat the oven to 220°C / 200° fan / gas mk 7.  

Grease a 23cm flan tin and line the raised up bit of the base with a circle of baking paper (to ensure easy removal of the flan).  If using a silicone mould I also find it helps to support the centre of the base by putting a biscuit tin lid of the right diameter underneath to prevent it sagging – which would make the base domed rather than flat when the sponge is baked – and to put it on a baking tray.

Break the eggs into a bowl and whisk lightly, using a hand held electric whisk.  Then add the sugar and whisk well for several minutes until pale and thick.  

Lightly fold in the flour, baking powder and lemon zest. Pour the mixture into the prepared tin and bake for 12-15 minutes, or until golden and firm to the touch.  

Turn out carefully onto a wire rack.

While the sponge is cooling, make the glaze.  Put the cornflour and sugar into a small saucepan and mix to a paste with some of the water.  Add the rest of the liquid and the jam and heat gently until boiling.  Boil for one minute and cool for ten minutes. 

Arrange the fruit in the flan case and spoon the cooled glaze carefully over the fruit.  Leave in the fridge or a cool place for the glaze to firm up (it won’t set completely). 

Serves 6-8.

January 30, 2016

FRUIT FLAN

fruit flan

My friend Pauline recently made a fruit flan with a sponge base using a mould with a raised bottom, a real blast from the past.

This set me on a mission, a fruitless (sorry for the pun) quest to find my own old fruit flan tin from the 1970’s.  I can picture it still, a pale aluminium tin manufactured specifically to bake the sponge flans that were the height of sophistication at dinner parties and posh Sunday teas back then.  Using the recipe from my Homepride Flourgraders’ recipe book I would create many a stunning table centrepiece, using tinned mandarin orange segments, grape halves and Quick Jel.

I have no idea what happened to that tin.  I hunted high and low, but it was nowhere to be found.  I can’t believe that I took it to the charity shop, less still that I have lost it.  How do you lose a cake tin?

fruit flan2

Anyway, Lakeland to the rescue, I acquired another one – and was delighted to find that Quick Jel is still readily available in supermarkets. 

fruit flan6

There is an essential difference between a flan tin and a tart tin.  A sponge flan tin has the raised bit in the middle so that a well is formed in the sponge to hold the fruit.  A tart tin makes a pastry shell which does the same.  Sponge flans seem to have gone out of fashion and I dare say that most people would buy a sponge flan case rather than make their own.  I also noticed that they too are still readily available in supermarkets, which suggests that presumably someone must buy them, but I haven’t actually seen one on a menu or served at gatherings for decades.

fruit flan5

For this flan I used the Be-Ro book recipe for a whisked sponge, one that has no butter in it, like a Swiss roll sponge.  I added a little lemon zest to improve the flavour of it and filled it with some of the raspberries and blueberries that I got last summer from a pick-your-own place and stored in the freezer.  And of course the essential Quick Jel.

fruit flan4

I was very pleased with it.  You can’t beat raspberries for flavour, especially in winter, but even so it was very nice indeed.  So nice that I can’t wait for a need to make another one – using mandarin orange segments, grapes and possibly some kiwi slices.  Sophisticated or what !!


Another version using just mandarin oranges and strawberries.

Ingredients

2 medium eggs

75g caster sugar

75g self raising flour

grated zest of ½ a lemon

fresh, tinned or frozen (thawed) fruit, about a tin or a large punnet should be enough

1 sachet Quick Jel powder (or you could make your own glaze using arrowroot or half a packet of made up jelly)

Method

To make the flan case, preheat the oven to 220°C / 200° fan / gas mk 7.  Grease a 20cm flan tin and line the raised up bit of the base with a circle of baking paper (to ensure easy removal of the flan).

Break the eggs into a bowl and whisk lightly, using a hand held electric whisk.  Then add the sugar and whisk well for several minutes until pale and thick.  Lightly fold in the flour and lemon zest.

Pour the mixture into the prepared tin and bake for 7-9 minutes, until golden and firm to the touch.  Turn out onto a wire rack.

When completely cool, fill with your chosen fruit and top with Quick Jel made up to the packet instructions.  Leave in a cool place for at least 30 minutes for the Jel to set.  For added retro flair you could pipe cream rosettes using whipped cream around the margin of the fruit when the Jel or glaze has set.

Serve with a dollop of whipped cream, crème fraîche, or a spoonful of single cream over each slice.

Serves 6.

September 20, 2013

QUICK QUINCE AND COCONUT TARTS

I was pondering this month’s Alphabakes Challenge, which is to bake something beginning with the letter Q.  Most of my recipe books have nothing at all in the index for the letter Q, what few entries there are being quiche, quick or quince.  I was thinking that I had never actually seen a quince.  I have eaten a jar or two of quince jam in France where the fruit is called “coings” - delicious on toasted French bread - but other than that I know nothing about them.

quince tartletsI vaguely remembered that quite some time ago I bought a jar of quince paste, otherwise known as “membrillo”, for a recipe spotted in a magazine and didn’t think I had actually used it.  So with a bit of a rummage I found it at the back of the jam cupboard, only a year past its sell-by date.

quince tartlets7When I took the lid off it looked healthy enough and tasted nice but was more like a jam than a paste so then I got to thinking what I could use quince jam for.  So when I made some pastry a few days later I made a bit extra and rustled up a quick batch of quince and coconut tarts.

quince tartlets8

The recipe is based on the one for “rich coconut tartlets” in the Be-Ro book.  The recipe isn’t in the current edition but is in the previous one and the one my mum used for decades, probably a 1940 or 1950 edition.  She would make a batch of these most weekends, rarely weighing out the ingredients, just adding a spoonful of everything to some margarine and a beaten egg and mixing them together.  They would usually be filled with Robertson’s strawberry jam or occasionally lemon curd.

quince tartlets2 quince tartlets3 quince tartlets4They took hardly any time at all to make and brought back memories of my childhood ~ coming home from school, dropping my satchel on the floor and grabbing a bun from the tin before jumping on the settee to watch Blue Peter on the telly.  Happy days !!

(I even used my mum’s old bun tin to make them in, which was probably a wedding present or a newly wed purchase, making it more than 60 years old.)

alphabakes

This is my second entry for this month’s Alphabakes Challenge, created by Caroline of Caroline Makes and Ros of More than the occasional baker.  Having managed two Q’s – quiche and quince, not to mention quick, the only one left I can think of is “Queen of puddings”………….

quince tartlets5quince tartlets6

Ingredients

40zs shortcrust or sweet pastry (made with 4ozs plain flour and 2ozs fat)

2ozs butter or margarine

2ozs caster sugar

2ozs dessicated coconut

1 egg, beaten

6tsp quince jam or paste

Method

Preheat the oven to 180°C / 160°fan / gas mk 4.  Grease a 12 hole patty or bun tin.

Make the pastry as usual and cut out circles to line the tin.  Put ½tsp jam in the bottom of each tart.

Cream together the butter and sugar.  Add the egg and coconut and beat in.

Put 1tsp of mixture on top of the jam in each tart, pushing the mixture out to the edges so that the jam is hidden (to avoid it boiling out).

Bake for 15-20 minutes until the pastry is golden and the sponge is risen.

Leave to cool before serving.

Makes a dozen tarts.