September 30, 2018

COURGETTE AND GOAT’S CHEESE POTS

courgette and goat's cheese pots

Our courgette plants are still providing us with a few courgettes so when I was thinking about what to make for a starter when friends came round recently I felt compelled to use them.  My first thought was to make one of my roasted courgette tarts but pastry was also on the menu for a dessert so that was a no-no.

courgette and goat's cheese pots2

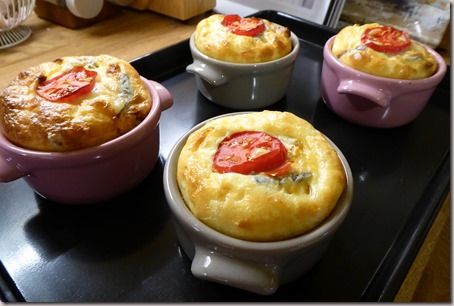
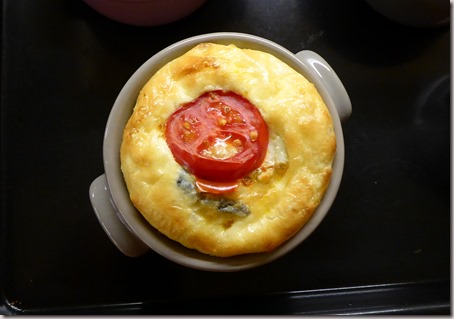
Then I remembered reading somewhere about a crustless quiche and an idea came into my head.  I put the roasted courgette slices along with some lardons and onion in the bottom of some ramekins, added a slice of goat’s cheese, poured in the quiche liquid filling, topped them with half a cherry tomato and there we have them. 

They puffed up in the oven like a quiche filling often does and looked very tempting.  I served them warm with some crusty bread and they went down a treat.  I didn’t quite know what to call them as “crustless quiche” sounded a bit clumsy and they weren’t exactly a soufflé.  So I called them “pots”.  Our guests said they were delicious and they would have been pleased to have eaten them in a restaurant.  I’ll take that as a compliment!

Ingredients

1 medium courgette, green or yellow, wiped and sliced thinly

1 small onion, peeled and chopped

1 pack of lardons

4 small slices or chunks of goat’s cheese

2 eggs

a spoonful of double cream (or crème fraîche)

about 100ml milk

2 cherry tomatoes

Method

Preheat the oven to 180C / 160 fan.  Scatter the courgette slices and chopped onion over a baking tray and scatter the lardons on top.  Roast for about 15 minutes until the lardons are cooked, shuffle them around about half way through.

While the veg are roasting, put the eggs into a jug with the cream or crème fraîche and make up to 250ml with the milk.  Add salt and pepper and beat with a fork until combined.

When the veg are cooked, divide between four ramekins and add a piece of cheese to each one.  Pour over the eggy liquid, being careful not to overfill.  Drop half a cherry tomato on top of each one and return to the oven for about 20-25 minutes until puffed up and set.

Serve warm.

Serves 4.

September 29, 2018

QUINCE TARTE TATIN WITH DULCE DE LECHE ICE CREAM

poached quince tarte tatin

Last week my friend Gaynor gave me some quince.  I have been intrigued by this fruit for a long time and was excited to get my hands on some and do something with them. 

poached quince tarte tatin2

I knew they could be challenging to cook with and the only home made dish I had tried so far was quince jelly – made by another friend, not me.  Occasionally they turn up on a restaurant menu and I have eaten them in both sweet and savoury dishes.

poached quince tarte tatin3poached quince tarte tatin4

This is how they grow.  This tree in the next village was positively dripping with fruit, not quite ripe yet.  I thought I would see how I got on with cooking them before I considered sneaking back to scrump some of the ones dangling outside the owner’s garden….

poached quince tarte tatin5

I have to say that they are the devil’s own job to prepare.  I decided to use two recipes by David Lebovitz and he warns about the dangers of grappling with them.  The peel comes off quite easily and the flesh is firm like an unripe pear.  The core however is very woody and puts up a hell of a fight.  It took me the best part of an hour to core this lot.  Consequently I have given the recipe a faff factor *** as it is not for the faint hearted!

First I poached the pears using the recipe that you can see here, although I changed the quantities to suit the number of pears I had.  To make the tarte tatin I reduced some of the poaching liquid in the tatin tin until it began to caramelise then arranged the pears on top.  You can see the recipe here.

poached quince tarte tatin6

I used a pack of ready made, ready rolled puff pastry for the crust rather than make my own – to save time, having already spent much longer than I expected on preparing the fruit!

poached quince tarte tatin7

The quince changed colour spectacularly when they were cooking in the oven and on turning out the tarte this fabulous pink creation emerged like a butterfly from its chrysalis. 

poached quince tarte tatin8

While it was baking in the oven I got on with making the ice cream.  I had spotted this recipe on Phil’s blog called As Strong as Soup and had a strong desire to make it immediately!  I had to wait until Nick and I had found all the various parts of our ice cream machine and then let the bowl chill in the freezer for twenty four hours before I could start.

The ice cream was utterly delicious.  I used a whole jar of Bon Maman “confiture du lait” and it made a good sized box of ice cream that continued to delight us long after the tarte tatin was finished.  The tarte was also delicious, a great hit and a very impressive dessert when both are served together.

For the poached pears

5 large quince, peeled, cored and quartered

1.5 litres of water

150g sugar

100g honey

1 lemon, halved

1 cinnamon stick

3 cloves

1 vanilla bean, split lengthways

Method

Bring the water, sugar, honey, lemon and spices to a gentle boil and add the quince.  Cover with a circle of baking parchment with a walnut-sized hole in the middle and simmer gently until they are tender.  Mine took an hour.

Remove the fruit from the pan with a slotted spoon and set aside.  Strain and reserve all the liquid, discarding the lemon and spices.  The poached fruit will keep for about a week in their liquid in a sealed container in the fridge.

For the tarte tatin

Preheat the oven to 190C / 170 fan.

Put 300 ml of the strained poaching liquid into a tatin dish or ovenproof frying pan and cook on the hob until it is reduced and thickened.  Mine took quite a long time to reach this point and suddenly bubbled up like caramel.  At that point I quickly removed it from the heat.

Arrange the pears cut side up in the pan, packing tightly and filling any gaps with pieces of pear.

Carefully lay an unrolled circle of puff pastry over the pan, tucking in the edges, remembering that the tin will be hot so be very careful not to burn yourself.  Prick the pastry with a fork and bake for about 45 minutes until the pastry is golden brown.

Remove from the oven and rest on a cooling rack for a few minutes before placing a serving plate upside down on top of the tarte and carefully turning out.  If any fruit is left behind in the pan it’s an easy job to replace it in the tart.  Spoon any syrup left behind in the pan over the tart as you don’t want to miss any of its deliciousness.

Serve warm or at room temperature with the dulce de leche ice cream.  Or of course any ice cream of your choice but you really should try this one.

Serves 8.

For the ice cream

See Phil’s recipe here.

September 11, 2018

A TALE OF TWO COCONUT CAKES and a reminder that you should never judge a cake by its icing.

coconut cake2coconut cake
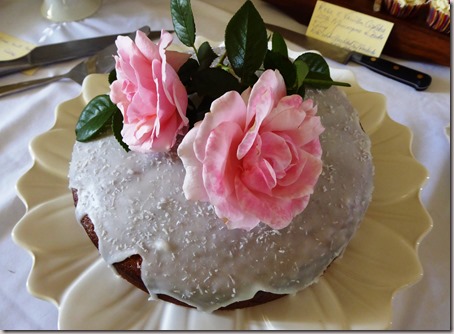
I am a fan of coconut in cakes and for our July Cake Club meeting where the theme was “flowers” I decided to make a coconut and rose cake.  Decorated with fresh roses and sitting on one of my favourite cake stands on the table, it looked very pretty but when I took a bite of the first slice it turned out to be an embarrassing disappointment.  There was rose water in the cake and the icing but you could hardly taste it and the cake itself was very dry.
Goodness only knows what I did wrong but you can see the recipe here.**  I was so miffed that it turned out so badly that I’m half tempted to revisit the recipe and try again, maybe with a little tweak or two but in reality it will probably never happen.  Unless of course I just take a simple, reliable, coconut cake recipe and add some rose water…..hmmmm………

coconut cake3
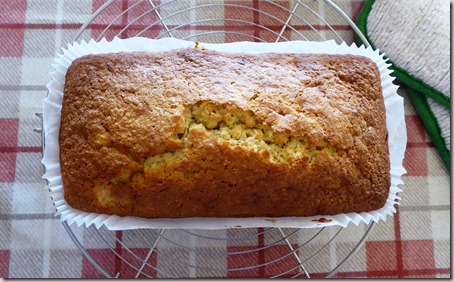
Anyway, in sharp contrast this rather ordinary looking cake turned out to be absolutely gorgeous!  It’s a coconut and banana cake and I found the recipe on the Guardian website here.**

coconut cake5
Included in the recipe are instructions for a Malibu drizzle and/or a Malibu and coconut buttercream filling.  The first time I made the cake unexpected guests turned up and the cake got cut without its drizzle.  It was delicious.
The second time I made the cake was for a charity event and I gave it away, complete with the drizzle, so didn’t get the chance to taste the difference.  I imagine it would have been lovely but I’ll have to make it a third time to confirm!  That will be no hardship of course, although there are very few cakes that I make more than once…….so many cakes, so little time.  I’m not sure I would bother with the buttercream but you never know – I might even have to make the cake a fourth time to decide if it really needs it or not!
Which just goes to show that a gorgeous looking cake can disappoint but an ordinary one can be delightful.  Never judge a cake by its icing!

*Having made the cake again, this time with its Malibu drizzle icing, I can confirm that it does make a difference.  I found the quantity of icing in the original a bit too much so have amended it in the ingredients given here.
I'm not sure that I could be tempted to add the Malibu buttercream as well - maybe if I made it as a round cake……..

**Both of these recipes have now been removed from the internet.

Banana and coconut cake
Ingredients
170g caster sugar
170g softened butter or baking spread
170g self raising flour
1 tsp baking powder
2 medium ripe bananas, peeled and mashed
100g desiccated coconut
3 eggs
1 tsp vanilla extract
For the drizzle
1-2 tblsp Malibu (or you could use fresh lime juice)
100g icing sugar
Method
Butter and line a 2lb loaf tin (I used a paper liner).  Preheat the oven to 160° C / 140° fan / gas mk3.
In a large bowl, cream together the butter, sugar and vanilla until light and fluffy.  Beat in the eggs, one at a time with a spoonful of the flour and a spoonful of banana.
Sift in the remaining flour, add the coconut and banana and mix well to combine.
Pour into the prepared tin and level the top.  Bake for 50-60 minutes or until done.  Leave in the tin for ten minutes then remove to a wire rack to cool.
While the cake is cooling, make the drizzle by mixing together the Malibu and sifted icing sugar.  Make holes in the cake with a skewer and while it is still warm pour the icing over the cake so that some sinks in and some dribbles down the sides.
(Refer to the recipe in the link if you wish to fill the cake with the coconut buttercream.)

Cuts into 10-12 slices.

September 1, 2018

SPICED COFFEE APPLE CAKE

honey and apple cake

Yes, you did read that correctly, not toffee but coffee.  I spotted this recipe in the second CCC book, “A Year of Cake” and wanted to give it a try because of what I thought was an unusual ingredient.  I have been on a mission, on and off, to find a recipe for the perfect apple cake so have read a lot of apple cake recipes.  This is the first time I have encountered one that included coffee amongst the ingredients.  In the book it is called a honey apple cake but it’s the coffee that makes this cake different.

honey and apple cake3

With the garden work now finished we were expecting visitors who were keen to inspect the result and with the sun shining it seemed only right to serve tea and cake outdoors to mark the occasion.  That was the excuse I used to bake the cake but as so often happens I was a bit late in getting started and it was still in the oven when they arrived.

honey and apple cake2

Fortunately they were not the kind of people to judge me because the cake was still on its cooling rack when I served it, instead of being presented on a pretty cake stand and dusted daintily with icing sugar. 

I served it warm and it was delicious, as apple cakes usually are when warm. The problem comes when you try to serve them cold and they are often so full of fruit that they fall apart, being more like a pudding than a cake.  As well as being delicious, this one also served very well when cold. The spices, apple and coffee flavours were all there and very subtle, adding up to a very pleasant, not overpowering in anything, kind of cake.  Perfect for the late summer, mists and mellow fruitfulness just around the corner, season.

Ingredients

300g self raising flour

1 tsp ground cinnamon

¼ tsp mixed spice

½ tsp baking powder

pinch of salt

2 eggs

100g light muscovado sugar

100g dark soft brown sugar

125ml vegetable oil

200g honey (either runny or set)

125ml warm strong fresh coffee

2 medium eating apples, peeled, cored and grated

30g raisins (or sultanas)

25g flaked almonds

Method

Preheat the oven to 200°C / 180° fan / gas mk 6.  Butter and line the base of a 23cm round springform tin.

Sift the flour, salt, baking powder and spices into a medium bowl and set aside.

In a large bowl beat the eggs and sugar using an electric whisk until light and creamy.  Set aside.

In a jug mix together the oil, honey and coffee.  Add to the egg mixture and mix well to combine.

Pour the liquid into the flour mixture and mix well, making sure there are no lumps.  Add the apple, raisins and almonds and stir well to combine. 

Pour into the prepared tin and bake for 40-45 minutes until done.  Check for browning after 20 minutes and cover loosely with foil if necessary.

Cool for 10 minutes in the tin then turn out onto a wire rack to cool completely.  Dust with icing sugar before serving.

Cuts into 10-12 slices.

August 29, 2018

BLACK FOREST CAKE

black forest

I have made more chocolate cakes than usual this year, for reasons that completely escape me.  Which is no bad thing because you can’t beat a nice chocolate cake and in fact for virtually a whole decade (in my thirties) the only two cakes I made regularly were a chocolate cake (for birthdays and other occasions) and the annual Christmas cake. 

I look back on those years now with amazement.  How can my life have been so dull that only an occasional chocolate cake ever graced my table?  I do know the answer of course, I was busy doing other stuff, and dull it certainly wasn’t, working full time and scuba diving when I wasn’t working.  Looking back I can hardly think it was really me that did all that.  Now that I am retired I can hardly remember ever going to work, as if it was a bad dream for forty years.  As for scuba diving, I wonder who that woman was that I used to be, that lived and breathed underwater swimming for nearly fifteen years.  Crikey.  How things change.  I gave up sub aqua when I reached forty and took up motorcycling instead.  Now I bake and still ride my Harley.  Hey ho.

I made this cake for the very last Loire Valley CCC meeting where the theme was European cakes.  I had been hankering after making a Black Forest Gateau for a while, having a fascination for things retro, and this was the perfect opportunity to get it out of my system.

black forest2

The recipe comes from one of my favourite cook books, “Gorgeous Cakes” by Annie Bell.  I have made several cakes from this book, all have been a great success and turned out more or less as they should have.  You can’t expect more than that from any cook book I think.

This one is described as a Black Forest Victoria and is a variation on the famous sponge cake recipe.  It was very good.  I filled it with cherry jam and cream, plus a few black cherries (from a tin) between the layers of sponge.  I decorated it with a few fresh cherries from our own cherry tree in our French garden and added a few chocolate coated raspberries just because I had the packet open.  I will be making it again – probably for dessert when we have prawn cocktail for starters and chicken chasseur for mains.

Ingredients

225g unsalted butter

200g golden caster sugar

1 tblsp golden syrup

200 self raising flour

2 tsp baking powder

25g cocoa, sifted

4 eggs

100ml milk

For the filling

3-4 tblsp cherry jam

1 tblsp Kirsch

350 ml double cream

1 tin black cherries

2 tblsp grated dark chocolate

a few fresh cherries

Method

Preheat the oven to 190°C / 170° fan / gas mk 5.  Butter and line the bases of 3 18cm sandwich tins.

Put all the cake ingredients into a food processor and blitz until smooth and well blended.  Divide the mixture equally between the three tins and bake for 20-30 minutes until done.  Remove the cakes from the tins and cool on a wire rack.

For the filling, blend the jam with the Kirsch and set aside.  Whisk the cream until spreadable (not too stiff).

Spread one of the cooled cakes generously with cherry jam and then with half of the whipped cream.  Push a few black cherries into the cream and put another cake on top.  Repeat and add the last cake.  Spread it thinly with cherry jam and sprinkle the grated chocolate over the top.  Add a few fresh cherries and other suitable decorations as you like.

Keep in the fridge and bring up to room temperature before serving.

Cuts into 8-10 slices.

August 15, 2018

GINGER AND APRICOT CAKE and how a new garden led to a new cake stand.

ginger and  apricot cake6

We are spending August in the UK because we needed a new garden.

ginger and  apricot cakeginger and  apricot cake2

You may remember that last year we re-upsized our UK home (having downsized in 2014) and bought a 1960’s bungalow that needed a lot of work to bring it up to date.  We spent most of the winter having new doors and windows, a new kitchen, a new drive, new plumbing, new staircase, carpets and decorating.  Then we anguished over what to do with the back garden.

It was a mess of worn out patio tiles, hugely overgrown shrubs, little paths, low crumbling walls and a leaking pond.  We came to the conclusion that it would take us months of work if we tried to sort it out ourselves and in fact hardly any of it was worth saving.  What we needed was a very low maintenance garden so that we could spend our summers in France not worrying about it.

ginger and  apricot cake3

The company that did the front drive do that kind of work so we hired them to start at the beginning of August, that being the best chance of a dry month to get it done.  By the end of day one they had turned what was a mess into a wasteland, much to the disgust of our cat Daisy, who was wondering where her adventure playground had gone.

ginger and  apricot cake5ginger and  apricot cake5a

Gradually all the garden features were demolished, scooped up and removed but this process is extremely time consuming, messy, noisy and disruptive.  After three days I could stand it no longer and had to get away from the house.  We opted for a trip to Waitrose.  (We needed some shopping anyway.)

Our nearest Waitrose is an hour away so we only make pilgrimages a few times a year.  Compared to our local Tesco it’s such a peaceful, calm and civilised environment with nice staff and nice customers.  A visit there usually restores my faith in human nature and we come away refreshed and with something a bit different.

ginger and  apricot cake4ginger and  apricot cake4a

It was there that I spotted and fell in love with this cake stand to add to my collection.  The collection is now so huge that we are having to operate a one in, one out, policy.  Nobody in their right mind needs as many cake stands as I have but I found that if I owned up to my obsession and called it a “collection” it didn’t seem so weird.  The problem is that we are, frankly, running out of space to display them.  Even I realise that there is not much point in having them if they’re simply hidden away in a cupboard.  This one, however, matches the colour of my new kitchen just perfectly……

ginger and  apricot cake5b

The garden is taking shape.  When the contractor proposed the design I couldn’t really visualise what it would look like but as each painful day passes and a little more is done, I can see what the end result will be.

ginger and  apricot cake6c

We will have a nice, modern, easy to look after garden that will not go rampant when we are not around to look after it all summer.

ginger and  apricot cake7a

Daisy and Hugo are still mystified and I suspect they liked the old garden better.  At the end of each day’s work they inspect the progress.

ginger and  apricot cake6a

A new cake stand deserves a nice cake to go on it and as I have mentioned before, Nick is not that fond of cake.  Ginger cake is on the very short list of cakes that he likes.

ginger and  apricot cake6b

The recipe comes from a little book published by Delicious magazine, simply called “Baking”.  As per usual, I didn’t have all the required ingredients in stock so improvised a bit, the major difference being to put apricots in it instead of prunes, although I think prunes would have been really nice (if I had had any).  It was moist with a close and even texture and just the right amount of spice, enhanced by the crystallised ginger pieces on top.  The little morsels of chopped dried apricots added a nice chewy element.  Delicious it was.

Ingredients

100g butter

100g dark soft brown sugar

75g golden syrup

100ml milk

1 egg, beaten

150g plain flour

1 tsp bicarb

2 tsp ground ginger

2 tsp ground cinnamon

75g ready to eat dried apricots, chopped

2 heaped tblsp icing sugar

juice of ½ lemon

a few pieces of crystallised ginger, chopped small, to decorate

Method

Put the butter, sugar and syrup into a small saucepan and heat gently to melt together, stirring all the time.  Stir in the milk and set aside to cool.

Preheat the oven to 150° C / 130 °fan / gas mk 2.  Grease and line the base of a 20cm springform tin.

Sift the flour, bicarb and spices into a large bowl and make a well in the middle.

Stir the beaten egg into the sugar and butter mixture then pour into the flour.  Add the chopped apricots and mix well to combine.

Pour into the tin and bake for 50 minutes or until done.  Cool in the tin.

When the cake is cool, remove from the tin and place on a board.  Sift the icing sugar into a small bowl and mix with enough lemon juice to make a runny icing.  Drizzle over the cake in any pattern you like, scatter the crystallised ginger pieces over the top and transfer to your favourite cake stand.

Cuts into 10 – 12 slices and, like most ginger cakes, keeps well for several days in an airtight tin.
July 25, 2018

COURGETTE AND TOMATO GRATIN – ways of using a glut of courgettes #3

courgette gratin

Our courgettes and tomatoes just keep on coming!  This way of using them is an alternative to the usual ratatouille – a kind of baked ratatouille.  The idea came from my friend Ken’s blog – they seem to be having a glut of courgettes this year too.  You can see his post here.

courgette gratin2

Essentially you put a layer of sliced onions in the bottom of a suitable dish, arrange sliced courgettes and tomatoes standing up on their edges on top of the onions, add some sliced garlic and bake.

This gratin dish came from a local French brocante a couple of years ago.  It’s a well used Le Creuset style cast iron gratin dish and cost me the princely sum of 1€.  The brand is actually Cousances, another maker of cast iron cookware made in France that often turns up at brocantes and vide greniers for next to nothing.  I find it odd that the French seem happy to virtually give away such valuable items.  Is it because this kind of cookware is no longer fashionable or that the French have abandoned home cooking like we have in the UK?  Well, a lot of us have, judging by the huge variety and volume of ready meals for sale in every UK supermarket. 

These days it’s much easier to buy a ready meal in France than it was say ten years ago.  Friends who live in France full time report that French housewives – and the cooking around here does still seem to be done mainly by the lady of the house – use as many ready meals and convenience foods as the British do.  For microwave cooking you don’t need a cast iron dish that fifty years ago would have been a prized possession in the kitchen. 

Not that I wish to be judgmental.  When we were working we cooked from scratch most days because that’s what we were used to.  We cheated by using convenience ingredients but mostly our meals were uncomplicated, home cooked affairs.  However, I dare say that if we had had kids or jobs where it’s not possible to feed everyone around the table at the same time - or even a sensible time, as is often the case in modern families – we would probably have used ready made foods and convenience items much, much more.  We had the luxury of both of us arriving at home at around the same time early evening and we enjoyed creating something nice to eat over a glass or two of wine.  Not everyone is that lucky and let’s be honest, not everyone loves food that much and most can find much more exciting things to do with their time.

courgette gratin3

We baked our gratin for about 45 minutes, adding some chopped tomatoes thinned with a splash of white wine after about 20 minutes to stop it from drying out or becoming too crozzled round the edges before the middle was done.  We served it alongside some green beans and a chicken traybake and it was delicious.

Ingredients (quantities variable according to your dish)

4-5 medium green and yellow courgettes

1 aubergine (optional)

3-4 tomatoes

1 large onion

4 cloves garlic, peeled and sliced

Olive oil for drizzling

1 tin or box of chopped tomatoes

1 glass white wine

salt, pepper and dried herbs to taste

a handful of grated cheese, eg emmental or cheddar (optional)

Method

Preheat the oven to 180°C / 160°fan.

Peel and thickly slice the onion and lay the slices in a gratin or other shallow dish.

Wipe the courgettes, aubergine and tomatoes and cut into slices about the thickness of a £1 (1€) coin.  Arrange standing in their edges in rows on top of the onions.

Peel the garlic and tuck slices in between the other veg.  Drizzle with olive oil, season, sprinkle with herbs if you like. 

Bake in the oven for 45 minutes or until the veg are soft and browned. 

After about 20-25 minutes cooking add the chopped tomatoes thinned with the wine to stop the veg from drying out.  Sprinkle with grated cheese if you like.  Serve hot.

Serves 4-6 people as a side dish.