December 29, 2021

BANANA AND APRICOT CAKE

I have been meaning to have a second go at this cake for some time.

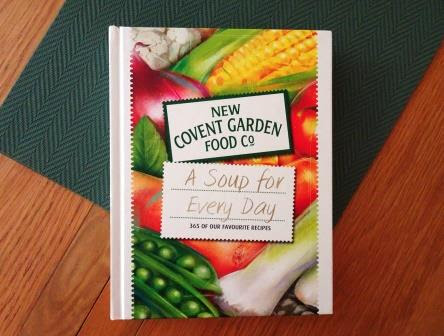
You can see the first time I made it and where it was not a success if you read here.  The recipe comes from the Trex website (see here) and I had made the cake as per instructions using Trex.  There were lots of good things about it but I felt it would probably be much better if made with butter.  


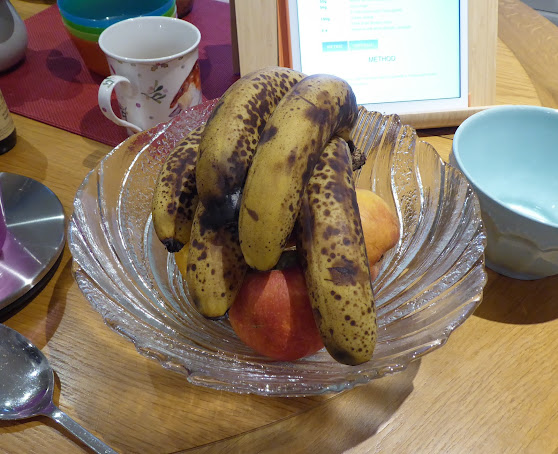
It was when I saw a bunch of bananas reduced to 20p just before Christmas that I thought it was time I had another try at the recipe.  Bargain.  One week later they were just right for baking with!


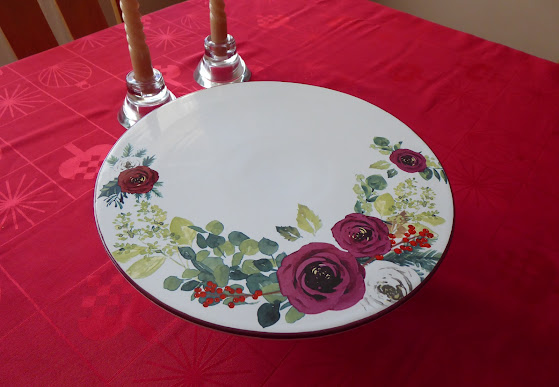
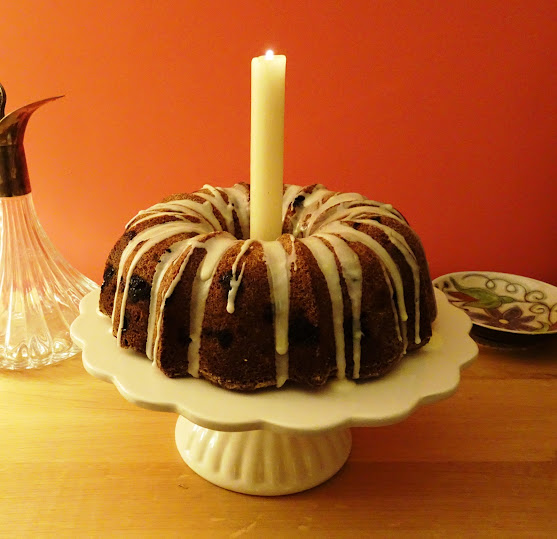
I was also keen to use my new Christmas cake stand.  Also a bargain.

Now I know I have more than enough cake stands already but......this one is so pretty and when it was reduced in price on the Lakeland website I thought one more wouldn't do any harm.  (I have also created a second storage place for my large collection!)  You can see it here but it's back up to full price!

I needed a few other things from Lakeland (don't you always?) so I placed the order paying extra for next day delivery, not holding out too much hope of them actually arriving in time for Christmas.  

My luck was in!  The parcel arrived the following evening but........I was hugely disappointed to find that the cake stand was faulty.

"How can that be?" I hear you say.  Well it was wonky.  Wonkiness is a common fault with cake stands.  It only takes the pedestal to be glued slightly off centre on the base of the plate and you end up with a bit of a slope.  

I'm not too fussy about a slight slope.  After all, very few of my cakes are actually perfectly level and nobody ever seems to notice a slight wonkiness but this one was miles out.  Well over half an inch across the plate.  (I know this because my other half insisted on getting out his spirit level and measuring it!)

I phoned Lakeland first thing the next morning and spoke to a very nice lady.  I have to say that Lakeland's greeting message is probably the most polite and friendly one I have ever heard.  The lady was very understanding and quick to offer a refund.  When I said what I really wanted was another cake stand she said she would despatch another and to keep the faulty one.  On Christmas Eve my replacement arrived so I hot footed it to the Hospice shop where the wonky original was received gladly.  It was priced and on sale by the time I left the shop.  Hopefully someone who doesn’t mind a cake stand a bit of a slope would have got an even greater bargain for displaying their Christmas cake.


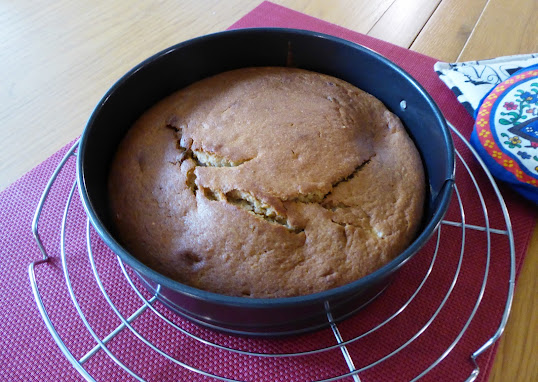
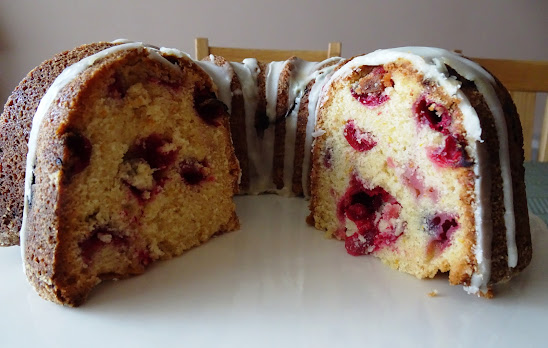
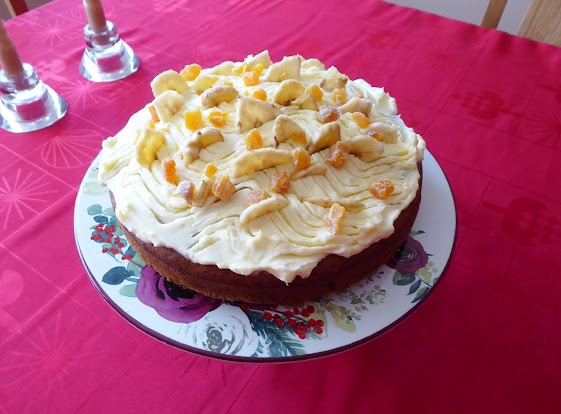
In the end I used Stork block baking margarine not butter.  I also made the whole thing in the food processor.  It had one of those smiley face cracks when it was done.


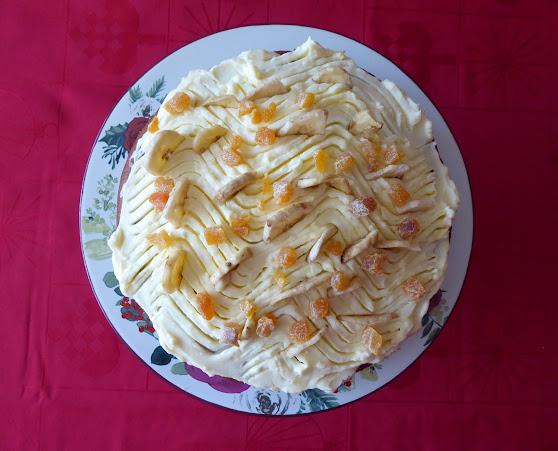
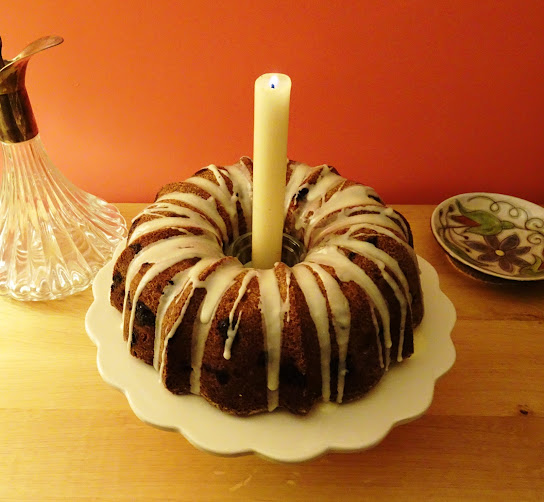
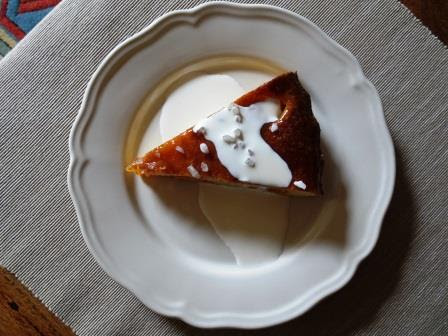
I decorated it with the cream cheese frosting, banana chips snapped in half and chopped apricots as suggested in the recipe.


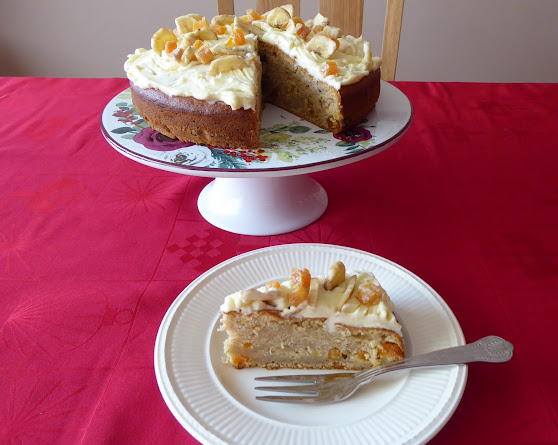
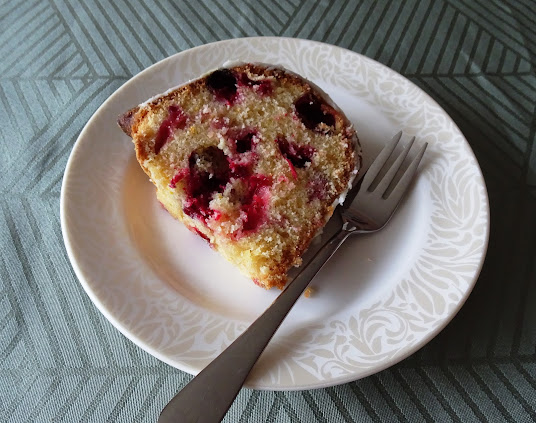
I don't think it rose as much as the last time I made it but it was yummy!


Definitely a cake recipe worth the tweaking!

Ingredients
For the cake

225g self raising flour

a pinch of salt

100g block margarine, chilled and cubed

100g soft light brown sugar

2 large eggs

1 tsp vanilla extract

3 medium very ripe bananas, peeled and mashed

50g chopped dried apricots

1 tblsp milk

For the topping

50g softened butter

50g icing sugar, sifted

zest of ½ a lemon

100g cream cheese

a few dried banana chips and chopped apricots to decorate

Method

Grease and line the base of a 20cm round springform cake tin.  Preheat the oven to 180C / 160 fan / gas mk 4.

Sift the flour and salt into a food processor.  Add the margarine and pulse until fine breadcrumbs appear.  Add the sugar and pulse briefly to combine.

Beat the eggs and vanilla together.  Add to the food processor and process to mix in.  Add the mashed bananas, apricots and milk and process again until mixed together.  Add more milk if the mixture seems a bit stiff.

Transfer to the prepared tin and bake for 50 - 60 minutes until done.  Cool in the tin.

To make the frosting, beat the butter, icing sugar and lemon zest together.  Beat in the cream cheese.

Spread over the top of the cake and decorate with the banana chips and choppe apricots.

Cuts into 8-10 slices.

December 16, 2021

CRANBERRY AND ORANGE BUNDT CAKE and a Happy Birthday to me!


I recently had a Big Birthday!
Unfortunately I couldn't get all seventy candles on the cake so settled for one!

For my birthday cake I fancied making a recipe I had had my eye on for a while, a cranberry and orange cake by Lynn Hill.  I decided to make it in a Bundt tin for the extra glamour.


It was done in much less time than that specified in the recipe, 55 minutes.  In fact by then it was probably slightly over baked and would have been fine after 50 minutes.  It had a very dark and crispy crust with brown speckling, as warned by Lynn in the write up, due to the very high sugar content.  I decorated it with a drizzle of icing made from 3 tablespoons of sifted icing sugar and enough orange juice to make it the right consistency to run over the sides of the cake.  That disguised the not so attractive appearance of the naked cake!

Once through the crispy crust it was superb!

The mixture was quite stiff so the cranberries didn't sink at all and were beautifully evenly distributed.  I used fewer cranberries than stated in the recipe as my punnet only contained about 220g.  It was plenty I think.

It tasted delicious, cranberry and orange being one of my favourite combinations.

It also kept well in a sealed box and the last few slices made an excellent dessert served warm with custard.  You can see the recipe here.  Apart from the tin, the cooking time, the quantity of cranberries and the addition of the icing I followed it to the letter! 

Cuts into 18-20 portions.

December 2, 2021

COURGETTE, MUSHROOM AND BACON QUICHE


It was the same old story, nothing in for lunch and a rummage in the fridge required.


Things have been getting a bit fraught here.  Dealing with the affairs and care for my dad who has just turned 93 has become immensely time consuming and frustrating.  Grappling with all the pitfalls and obstacles has turned into a comedy of errors and the most difficult thing I have ever had to do.  You can read about the latest nonsense here.

The upshot is that managing our own shopping has become a bit hap hazard lately and there is often nothing instantly recognisable as a meal in the fridge.  Thank goodness for oven chips.  And wine.


To make this quiche I simply used a pack of Tesco ready made, ready rolled shortcrust pastry that I found in the freezer (and left on the side for a few hours to thaw out) and followed my general method for making a quiche which you can see here.

Whilst the pastry case was blind baking in the oven, I fried the courgette, onion, bacon and mushrooms in a little oil until softened.  I then tipped the lot into the hot pastry case, added a few slightly tired cherry tomatoes, followed by the egg mixture and a sprinkling of that much despised but loved by us finely grated Parmesan cheese.


Delicious!  Enough for two generous main meal portions.

Ingredients

1 pack of ready made, ready rolled shortcrust pastry

1 large courgette, sliced

1 medium onion, peeled and sliced

3 rashers of smoked back bacon, chopped or cut into strips

3 fat chestnut mushrooms, wiped and thickly sliced

6 cherry tomatoes, halved

1 tbslp approx of grated Parmesan cheese.

3 large eggs

a dollop of Elmlea "double cream"

enough milk to make the beaten eggs and cream up to 400ml

Method

See the link in the text!

Serves four as a main course, six as a light lunch or starter.

November 29, 2021

SMOKY SWEET POTATO SOUP (soup maker recipe)

This soup was very much inspired by a post in Phil's blog, "As Strong as Soup", which you can see here.  It flashed through my mind as I breezed through the root veg section in Sainsbury’s so I did an about turn and bought some lovely sweet potatoes. 

As I put them in my trolley it occurred to me that I ought to buy them more often.  For a start they make great addition to mash and traybakes, the fabulous colour being a delight now that summer is a distant dream and we have the miserable months (weatherwise) to get through.

I adapted Phil's ingredients largely because I can no longer eat anything other than a very small hint of chilli.  I then totally disregarded his quantities because I was using my soup maker!  (Sorry, Phil!)  I tend to use the basic rule of enough prepared veg (washed and peeled as you normally would, then chopped into fairly large chunks) to fill the machine to the lower 1300 ml line then add the stock or flavourings and enough water to the 1600 ml line.  This seems to work perfectly well every time for my machine.

Looking in my cupboard for an alternative to the chillies that would add an equally warming and interesting spiciness, I spotted an unopened jar of smoked garlic paste and one of sweet smoked paprika.  Thinking I only had ground ginger in stock, Nick reminded me that we had a pack of chopped ginger in the freezer and although we had no limes we had a bottle of lime juice in the spare fridge in the garage.  Which is also where he found the bottle of white wine that I won in the golf club raffle on their quiz night last week!  As I reached into another cupboard for the olive oil my hand settled on a bottle of walnut oil and I thought "why not?".  So all the stars were aligned and a mere thirty minutes later we had the most gloriously orange coloured and utterly yummy soup!

On a practical note, the soup maker generally makes four very generous portions of soup, ideal for two lunches for the two of us.  Because it's best to clean the machine as soon as it has finished cooking, I have experimented with ways of dealing with the second half of the hot soup once the first two helpings have been poured out.  I have tried plastic boxes and poly bags with mixed success but as luck would have it I happened upon an offer for this Pyrex jug on Amazon.  It's a standard one litre jug but with a very handy lid.  I can pour half of the soup into two bowls for lunch, pour the rest of the very hot soup into the jug and take a couple of minutes to rinse out the machine before the residue begins to become dry and caked on the inside of it.  By that time the soup served in the bowls has cooled slightly but is still hot for eating.  I leave the jug on one side with the lid ajar for the contents to cool before putting it into the fridge where it will keep for a couple of days or so.  

The smell of the soup seemed to linger in some of the plastic boxes I tried but another good find was a square glass storage box with a locking lid that I found in Tesco.  They're not expensive and stack well when in the fridge or not in use.  Ikea also have something very similar but the jug appealed to me more because I could use it for other things.  And I needed a big jug!

Ingredients

1 large leek

2 medium sweet potatoes

2 medium white potatoes

1 tsp frozen chopped ginger

1 tsp smoked garlic paste

1 tsp sweet smoked paprika

1 small glass (100ml) dry white wine

1 soup spoon lime juice

1 soup spoon walnut oil

1 chicken stock pot

Salt and pepper to season

Method

Prepare enough veg to fill the machine to the lower line.  Add the other ingredients, water to the upper line, a little salt and pepper and cook on the smooth setting.  Adjust the seasoning to taste before serving.

Makes 4 generous lunch portions (or 6 as a starter).

November 27, 2021

GLUTEN FREE DATE AND WALNUT CAKE


Some time ago I had a request for a gluten free cake of my choice.  There is a vast number of recipes for gluten free cakes on the internet, many of them being quite exotic and requiring special ingredients that as a regular baker I would not use again, if ever.  But I got the feeling that the person that requested this cake would probably welcome a GF version of an old favourite that she used to eat before developing her intolerance to gluten.  She's a date and walnut loaf kind of person, I thought.

I already had a bag of Doves Farm gluten free white self raising flour so I looked first at the Doves Farm website.  There spotted a recipe for a wholemeal date and walnut cake using ordinary (not GF) wholemeal flour.  You can see it here.

I decided to adapt the recipe using the GF flour that I had in stock, to make it in a round tin not as a loaf, and decorate it to glam it up a bit.  I added a cream cheese icing and some walnuts for decoration and it looked the bees knees!  (It would also have been good with a butter icing topping.)

Sadly I did not get to taste it!  However, I'm giving the recipe here because the lady concerned was thrilled with the cake, declared it to be moist and delicious and a real treat.  (Also so that I don't forget about the recipe altogether!)  One day I will make it again using just ordinary self raising or wholemeal flour as per the recipe - I shall add it to my "tweaking list" for future consideration!

Ingredients

For the cake

200g chopped dates

150ml water

½ tsp bicarb

3 eggs

100g soft light brown sugar

100g sunflower oil

200g gluten free white self raising flour

50g chopped walnuts less 1 tblsp

For the topping*

150g full fat cream cheese

75g icing sugar

60ml double cream

the reserved tblsp of chopped walnuts (or walnut halves)

Method

Put the chopped dates into a small saucepan with the water and bring to the boil slowly.  Remove from the heat, stir in the bicarb and set aside to cool.

Preheat the oven to 180°C / 160° fan / gas mk 4.  Grease and line the base of a 20cm round springform cake tin.

Put the eggs and sugar into a large bowl and using an electric whisk beat until light and airy.  Add the oil and flour and mix together until well combined.

Add the chopped nuts less one tablespoon, plus the prepared dates and mix well.

Transfer the mixture to the prepared tin and level the top.

Bake for 55-60 minutes until done.  Cool in the tin for 20 minutes before turning out onto a wire rack to finish cooling.

While the cake is baking, make the cream cheese icing by beating the cream until fairly thick, then sift in the icing sugar, add the cream cheese and beat together until smooth.

When the cake is completely cold, spread the icing over the top and decorate with the chopped nuts, or walnut halves, or both.  Sift over a dusting of icing sugar before serving if you like.

Cuts into 8-10 slices.

*If you prefer make a half quantity of butter icing for the topping, using 75g butter and 150g icing sugar.

November 22, 2021

PYREX REJUVENATION

Something very peculiar happened in the oven the other day.


Well truthfully, not my oven but my sister-in-law's.

She uses her forty year old Pyrex mixing bowl every time she bakes and after washing it she normally puts it in the warm oven (turned off after baking) to dry.  

One day last week she turned on the oven to a fairly high heat, 190° - 200°C she said, and after a few minutes remembered that the Pyrex bowl was still in there.  She grabbed the oven gloves and pulled the bowl out to find what she said was a kind of gooey, gluey puddle of a clear substance in the bottom of it.

Fearing the worst she dashed outside with the bowl and left it to cool down, thinking that she had had this bowl as a wedding present and would be sad to see the end of it.  A few minutes later, it looked like the picture above.


The goo had solidified so she gingerly lifted it out and to her surprise discovered that the bowl, which was very scratched and worn, now appeared to be in immaculate, like new, condition.  The substance she lifted out was a kind of solid ring of something that felt much like plastic.

I'm tempted to buy one of those worn out Pyrex bowls that are for nuppence in the local charity shops and try it myself to see if I can rejuvenate it in the same way.  She says she tried it with her pudding basin but it didn't work because she thinks the oven wasn't hot enough.  

I wouldn't recommend trying this at home yourself but any explanations would be welcome !!

November 12, 2021

BANANA AND WALNUT LOAF


It was the usual story, a small bunch of bananas gradually going past their best in the fruit bowl and whispering "banana cake" every time I walked by!


Browsing through my collection of cook books, I remembered a recipe that I fancied but had put on the back burner some time ago, years ago in fact.  I'm not a huge fan of loaf shaped cakes, preferring to make a round cake (or even square) for totally illogical reasons, but this one looked so rustic that a loaf seemed the right way to go.

I have made many a banana cake in the past, most requiring bananas that are mashed to a pulp, some where the bananas are left a bit more lumpy and one almost a purée before adding to the mixture.  All have been good.  This one was slightly different, saying that the bananas should be added whole and then mashed into the mixture to leave them a bit more lumpy.  


The recipe also suggested sprinkling demerara sugar on top before baking to add a bit of crunch.  I decided to use this sugar which I had stumbled upon in our fairly new branch of "Home Bargains" and is described as "golden granulated sugar".  It has the texture of very coarse demerara and I sprinkled a fair bit over the top.  It worked really well, providing a very crunchy topping and adding a bit of extra sweetness to the cake.


I have to confess that I don't know why cakes like this are called banana "bread".  Are they meant to be served toasted or buttered rather than au nature?  In any case, this one was not overly sweet and benefited from the sugary topping.  It was also very rustic in appearance and flavour - not a bad thing at all.  From the colour you would almost think it had been made using wholemeal flour, not white.  It kept really well and if anything was better and even more moist a couple of days after baking.  I might be tempted to add a little cinnamon or ginger to the mixture next time but all in all it's probably my favourite banana cake so far.

Ingredients

2 medium eggs

170g light soft brown sugar

80ml sunflower oil

80ml milk

3 smallish ripe bananas

170g plain flour

1 tsp bicarb

60g walnuts, roughly chopped

1-2 tblsp demerara sugar for sprinkling on top (optional)

Method

Butter and line a 900g (2lb) loaf tin or use a paper liner.  Preheat the oven to 180°C / 160° fan.  

In a large bowl, whisk the sugar and eggs until pale and thick.  Whisk in the oil and milk.

Add the peeled bananas and mash roughly with a potato masher or fork so that there are still some lumpy bits.

Add the bicarb to the flour and sift into the mixture in two halves, folding in each half.  Then fold in the walnuts.

Pour the mixture into the prepared tin and sprinkle the demerara sugar on top.  Bake for 60-70 minutes until done.

Cool in the tin for 10 minutes then transfer to a wire rack to finish cooling.

Cuts into 8-10 slices.

October 30, 2021

AN ULTRA QUICK PUMPKIN CAKE FOR HALLOWE'EN

I was unsure whether to post about this cake or not - because I was in two minds about it.

I spotted the recipe in a lovely blog called "the English kitchen" by Marie Rayner and just had to try it.  It's called "two ingredient pumpkin cake" and my first reaction was "never!".  

Apparently the recipe was turning up all over the internet a few years ago and the two ingredients are just a Dr Oetker carrot cake mix and a tin of pumpkin purée.   (I don't use a cake mix very often but have noticed that they appear frequently in recipes from the other side of the Atlantic.)

I rummaged in my cupboard and dug out the last tin of pumpkin purée from my stash saved for my usual pumpkin spice cake or a pumpkin pie.  (See here and here.)  I picked up a carrot cake mix on my next supermarket shop and on glancing at the instructions was puzzled.  If you are supposed to add eggs, oil and water to the carrot cake mix, how could it work with just a tin of pumpkin purée instead? I even left a comment on Marie's blog to check and she came back to say yes, that's all you do!

Well it did work after a fashion! The mixture was very stiff and it didn't rise much in the tin.  The cake itself was a fabulous colour, lovely and moist with a nice even crumb and a rich, spicy flavour. However…..each mouthful kind of dissolved into something very…..it’s hard to find the right word…..gluey in the mouth.  Very odd.  I'm not sure I would make it again - unless I was very pressed for time as it certainly was a rapid bake and very tasty.  No measuring out and the longest process required was lining the tin!  

As it happened I didn’t get around to icing it with the cider glaze.  I hadn't any cider in the house and had planned to use apple and mango juice instead, but visitors arrived just as I was taking it out of the oven.  Their opinion on the cake was "the ginger saved it!"  You can see the original recipe here.  I would be interested to hear how you got on if you decide to try it!

It did occur to me that it was the ideal cake for Hallowe'en!  Very quick to make, would take all the spooky decorations you could throw at it and that odd texture in the mouth has a decidedly uncanny feel to it!

Ingredients

A 425g tin of pumpkin purée.  I have seen this for sale in Waitrose on the tinned fruit and veg shelf, also in Tesco with the jams and spreads.  Otherwise you can get it online via Waitrose, Ocado or Amazon.

A box of Dr Oetker carrot cake mix.

For the glaze

140g icing sugar, mixed with a pinch of mixed spice and enough cider or apple juice to make it drizzlable.

Method

Preheat the oven to 180°C / 160° fan.  Butter and line a 22cm square cake tin.

Beat the ingredients together using an electric whisk until well combined. This will take at least two minutes!  Spoon into the tin and level the top. 

Bake for 25-30 minutes until done.  Cool in the tin for ten minutes before turning out onto a wire rack.  Cool completely before drizzling the icing over.

Cuts into 12-16 squares.

October 25, 2021

TORTA DI RISO (rice pudding cake)


How are you with cold rice pudding?  I can appreciate that it's not everyone's favourite thing to eat but I just love it!  When we were children my mum had a limited repertoire of "afters" for Sunday dinner and rice pud was one of them. She would bake it in the oven until it was thick and creamy with a nice golden skin on top.  My brother and I would fight over who got most of the skin and then over who got the leftovers when the pudding was cold and solid.  Yum!!


I watched this cake being made by Nigella in her last TV series called "cook, eat, repeat" and knew that before long I would have to make it.  It's her version of an Italian cake that I had never heard of before but wish I had known about years ago.  A slice of it is pretty much like eating cold rice pudding but even better!  

I made it for guests early on during our spell in France this summer.  Nick had taken the car to go golfing with a friend and I was chez nous looking forward to a happy day's cooking and titivating the house in peace and quiet all by myself.  That's when I discovered that the packet of arborio rice I could see in the cupboard in my mind's eye was in our UK kitchen, not our French one!  I considered wrestling my old Harley out of the barn to see if it would start so I could go to the shops, but was convinced there was a packet there somewhere. A more determined search in the depths of the cupboards revealed an unopened packet of Sainsbury’s old fashioned pudding rice so I used that instead!  I have no recollection of ever taking such a thing to France (and I confess it was a few years out of date) but it worked fine.

Rice pudding is basically comfort food for children but this cake was much more sophisticated and grown up.  It's rich and lemon scented and absolutely delicious.  If milk puddings are not your thing you might not be fussed but if you fancy serving something a bit different at a dinner party I urge you to give this a try!  The leftover cake was kept in the fridge and was good for several days.

One of the places you can see the original recipe is here.

Because I was making several dishes for the meal at the same time, I got a bit distracted and made a few mistakes but it still worked out and was delicious.  *One thing I wouldn't do again was to leave the mixture cooling for so long that it was absolutely solid before I attempted to fold in the egg whites!  The recipe has a few more steps (and more washing up) than I usually go for but it's not difficult or fiddly.

Ingredients

150g arborio rice (or pudding rice), rinsed

700ml full fat milk

pinch of salt

1 lemon, zest and juice

75g unsalted butter, softened

3 large eggs

75g caster sugar

2 tsp vanilla extract

nutmeg, freshly grated (or from a jar as was mine)

Method

Put the rice, milk, salt and lemon zest into a heavy based saucepan.  Over high heat bring it to almost but not quite boiling, stirring all the time.

Reduce the heat and cook gently without boiling for about 30 minutes, stirring frequently, until the milk has been absorbed.  Remove from the heat and stir in the butter which will melt into the mixture.

Transfer to a large bowl and set aside to cool completely for about an hour.  (*See notes above.)

When the rice is cold, preheat the oven to 160° C / 140° fan.  Butter and line the base of a 20cm round  springform tin.

Separate the eggs, putting the whites into a large bowl and the yolks into another.  Whisk the whites until stiff using an electric whisk and set aside.  Add the sugar to the yolks in the other bowl and whisk (using the same whisk if you like, I did) until pale and mousse-like.

Add the vanilla and just 2 tsp of lemon juice to the egg yolk mixture, stir together then pour gradually into the cooled rice, folding in as you go.

Add a large spoonful of the stiff whites to the mixture and stir to loosen it, then add the rest in three goes, folding in gently but thoroughly with each addition.

Pour the mixture into the prepared tin, sprinkle some grated nutmeg over the top and bake for 45 minutes until it is golden brown and set with no wobble at all.

Remove from the oven and place the cake, still in its tin, on a wire rack.  Cool until it's still just very slightly warm, run a knife or spatula around the edge of the cake to loosen it then unclip and remove the tin, leaving the cake on its base.

You can serve it on the base or very gently lift it off using a large cake lifter.  I found this quite easy to do because I have a large round cake lifter - the cake is very fragile and a small one or a couple of fish slices would probably result in it breaking up!  Even so, the cake crumpled slightly as I pushed the lifter under it but was easily teased back into shape without any damage.  Phew!

Serve on its own or with a fruit compôte or coulis.  Keep leftovers in the fridge.

Cuts into 10-12 slices.

October 13, 2021

COFFEE CAKE


I quite miss the baking marathons that I used to get involved with. There was the "Children in Need" cake stall at work which raised £150 the first time we did it and over £2,000 the last time it was held.  You can read how we we went about raising so much money here.

Then there was the Loire Valley Cake Club that I formed and ran for several years until it evolved into something more like a lunch club.  

I have enjoyed making cakes for various other events in France over the years, but all of these opportunities to indulge in baking seem to have dried up due to the pandemic and other things.  So, when I discovered that my dad's assisted housing unit was holding a coffee morning in aid of the Macmillan cancer charity, (albeit in the afternoon) I thought I would bake them a couple of cakes. 

Thinking that it would probably be mostly the elderly residents themselves attending I decided to go traditional and went for a ginger cake using the Be-Ro book recipe (see here) and a coffee cake.  Also thinking that I didn’t want to be responsible for mishaps with anyone’s dentures I went for a recipe I had had my eye on for a while that contained no hidden chopped nuts!  The only nuts were to be the pecans decorating the top which were clearly visible!  It comes from the W.I. book "Cakes" by Liz Herbert.

The ladies in the office seemed thrilled when I presented them with the cakes.  As I breezed through the lobby later in the afternoon the place was joyfully ringing with the sound of tinkling teacups and laughter. My two cakes seemed to be the only home made ones on display and Jo from the office beamed as she showed me that they were almost sold out already.  Hmmmmm…..put a home made cake next to a pack of shop bought offerings and there's no contest!

I was disappointed that my dad didn't want to attend.  When I went upstairs to his flat to get him he said "do I have to?" and that was that.  Looking after the needs of a very old person is the hardest thing I have ever had to do in my life I think.  All that fun going on downstairs and he prefers to doze in front of yet another repeat of Dad's Army all by himself.  Tragic.  Oh well, whatever makes him happy.

I didn’t get to try the cake myself but it did look good so I made it again for visitors at home the next week, this time decorating it with some of last year’s crop of windfall walnuts brought with us from France.  It was a delicious cake!  Very simple to make and the coffee glacé icing looked very chic as an alternative to my usual slathering of buttercream!

Just out of interest.........for ages I wondered why so many American recipes for coffee cake contained no coffee at all.  Well, it seems that "coffee cake" is the American term for any sort of cake that you would have with your coffee.  Simple !!

Ingredients

For the cake

175g soft margarine or baking spread

175g soft light brown sugar

175g self raising flour

½ tsp baking powder

3 eggs

2tsp instant coffee granules or powder dissolved in 1 tbslp boiling water

For the buttercream*

40g softened butter (I used Sainsbury's Buttersoft)

80g icing sugar, sifted

1 tsp instant coffee granules or powder dissolved in 1 tsp boiling water

For the glacé icing*

115g icing sugar, sifted

1½ tsp instant coffee granules or powder, dissolved in 1½ tblsp hot water

walnut or pecan halves to decorate (optional)

Method

Butter and line two 20cm sandwich tins.  Preheat the oven to 180°C/ 160° fan / gas mk 4.

Put all the cake ingredients except for the coffee liquid into a large bowl and whisk or beat together until smooth and well combined.  Add the coffee and mix well until incorporated.

Divide the mixture between the two tins, level the top and bake for 25 minutes until done.  Cool in the tins then transfer to a wire rack to cool completely.

To make the buttercream, beat the butter until light and smooth, gradually beat in the icing sugar then the coffee liquid.

To make the glacé icing, place the icing sugar in a small bowl, make a well in the centre and gradually beat in enough of the coffee liquid to give a smooth, spreadable consistency.

When the cakes are cool, place one on a plate or stand and spread the top with the buttercream.  Place the other cake on top, spoon the glacé icing into the middle and, using a spatula, knife or back of a spoon, gently spread outwards almost to the edge.  Decorate with the halved walnuts or pecans.

*I amended the amount of water used to dissolve the coffee granules compared to that in Liz Herbert's original recipe.

Cuts into 8-10 slices.

October 11, 2021

SMOKED MACKEREL SOUP (soup maker recipe)


I stumbled across a copy of the Covent Garden soup recipe book in a charity shop the other day.  We like their soups, a favourite of ours being their smoked haddock chowder.

Almost any hot soup recipe can be adapted for the soup maker and as I hungrily devoured the pages of the book looking for ideas for I spotted the recipe for our favourite soup.  That's when I remembered the pack of smoked mackerel fillets in the fridge.  I had bought them while we were in France, intending to make some paté (which you can read about here) for my birthday bash (which you can read about here) but ran out of time.  (Who knew that putting up bunting could take so long?!)  We brought them back to the UK with us and by now they were heading for the wrong side of their use by date so I thought "why not?".

By jove it was tasty!  I considered using the chunky setting to get the real chowder effect but instead settled on smooth, reserving some of the flaked fish to add in once cooked.*  That turned out to be a mistake because of the annoying little bones, so next time I think I would put all the fish in the machine, cook on smooth and add a few bits of diced cooked potato at the end instead. 

Anyway, if you're a fan of smoked fish you would love this soup!  I have to say that the flavour was quite intense.  It would probably have been flavourful enough with only one of the fillets, not both, which I will also try next time.  Apart from the fish stock pot I didn't add any extra seasoning as the fish itself was peppered and is quite salty.

Ingredients

A twin pack of peppered smoked mackerel fillets

2 medium/largeish potatoes

2 large carrots

1 fish stock pot (I used Tesco own brand)

1 large knob of butter,

Milk to thin the soup when cooked

Method

Remove the skin from the fish, break into large flakes, reserving a few for later. *

Peel and roughly chop the veg, preparing enough to fill the machine to the lower line when added with the flakes of fish.  Add the stock pot, butter and enough water to fill to the upper line.  Process on smooth.

When cooked, thin with milk to get the thickness you prefer, stir in a few small flakes of the reserved fish and serve.

*See notes in text.

Makes four generous portions.

October 1, 2021

APRICOT CLAFOUTIS - things to do with apricots part two and a real bargain.


A clafoutis is a very popular dessert in France.  It's basically fruit baked in a batter and can be served warm or cold, spooned out of the dish or served in slices.  I decided to make one using some more of my gorgeous apricots.

For this clafoutis I used my new dish.  It's a Le Creuset gratin dish that I bought at a "vide maison" for 2€.  A real bargain.  A vide maison is a house sale, where people set out tables of unwanted items in the garden or courtyard, sometimes with prices on but mostly open to negotiation. 

There are fewer charity shops in France than in the UK (where every town now seems to have several different ones).  In France it seems that people hang on to their old stuff and store it in the hope of selling it at a "vide grenier" or a "brocante" - the French equivalent of the car boot sale, or antique fair.  I am constantly amazed at the optimism of the sellers as they painstakingly arrange stuff on the tables that frankly I would have taken to the tip long ago!  Some of it clearly comes out year after year in the hope that eventually someone will pay a euro or two for it.  Empty perfume bottles for example.  And old shoes, still with their original boxes.  French houses obviously have plenty of storage space -  outbuildings, cellars or attics where boxes of old junk can be stored - along with empty boxes for shoes and electrical items, in the expectation that one day box and discarded item will be reunited to be put for sale at a vide grenier or a brocante. 


In France many villages host one or two of these events each year.  Usually the roads through the village are closed to traffic and tables are set up along the streets for people to display their unwanted stuff.  Sometimes it's on the village playing field or in the village hall.  During the pandemic last year there were virtually none.  This year there have been a few but with all the uncertainty many villages have not got around to organising anything.  Consequently  householders have been holding their own "vide maison" instead.  We came across several on our travels and spotted a small hand written notice for one at a house in our nearest village, which is where I swooped upon my bargain Le Creuset dish.

My new dish is in that classic bright orange colour that Le Creuset have been doing for years called "volcanic" - which is pretty much the same as the colour of my apricots.  It's in immaculate condition and the seller actually had three of them.  I can't for the life of me now think why I didn't buy all three, as at 2€ each I could have then given the other two to friends who also would have loved to have one.  Once again I can hear René Artois saying "you stupid wooman!".


I used my favourite clafoutis recipe which you can see on Susan's blog here.  Having tried several other recipes which have all worked fine, I find I mostly come back to this one.


You can use virtually any fruit to make a clafoutis.  Cherries would be traditional but apricots are very good.  I have recipes for banana, prunes soaked in brandy and caramelised apple clafoutis in this blog (see the index).  You can dust it with icing sugar before serving if you like.


We had ours warm with cream.  Leftovers are lovely served cold or warmed through, with cream, ice cream, or even, as has been known in our UK house, custard - usually the instant variety!

Ingredients

5-7 apricots, depending on the size of your dish
50g plain flour
50g ground almonds
100g caster sugar
½ tsp vanilla extract
2 eggs
250ml plain yoghurt, buttermilk or a mixture of youghurt and whole milk

Method

Preheat the oven to 180° C / 160° fan.  Butter the dish.

Wash the fruit.  Cut each apricot in half, remove the stone then cut each half in half.  Arrange the quarters in the dish.

Put all the other ingredients into a bowl and whisk together with an electric whisk or hand blender until you have a smooth batter.

Pour the batter carefully over the fruit and bake for 30-40 minutes until firm and golden brown.

Serve warm or cool, dusted with icing sugar if you like, in slices or spoonfuls, with cream, ice cream, or just on its own.

Serves 4-6 people.

September 28, 2021

APRICOT PIE - things to do with apricots part one and my own tarte tatin moment.

One of the things we love so much about France is the availability of fruit and veg that sometimes have a fairly short lived supply in the UK.  In the French markets and supermarkets during August there are often mountains of apricots for sale.  Usually loose, sometimes prepacked in punnets and often in large trays.  They are hard to resist.  Then when I get them home I have to think what to do with them.

With guests coming for dinner I decided to make an adaptation of one of my recent favourite desserts to a Mary Berry recipe.  Part way through I had a senior moment.

I used the recipe for an apple brioche pudding which I have made before.   It's one of those recipes that is very adaptable and always turns out well.  If you make it right it has a distinct "patisserie" look to it. 


The basic idea is that you line the dish with sliced brioche which forms a nice base for the tart.  Then you spread a frangipane mixture on top and arrange the fruit over it.  After baking you glaze it with an apricot jam glaze.

I realised something was not quite right as I shut the oven door.  Looking at the pie through the glass I muttered "you stupid woman"  in the fashion of René in Allo, Allo (a favourite expression in my kitchen these days) as it dawned on me what I had done wrong.  I clearly had not been concentrating as I carefully arranged the fruit on the brioche base and spread the frangipane mixture on top instead of the other way round!

Still, it looked good when I took it out of the oven so I shrugged, glazed it with the apricot jam as usual and scattered a few bits of crushed sugar on top for a bit of glamour.  As I brushed the warmed jam over the top I couldn't help thinking of the other famous culinary mistake of the Loire Valley, the Tarte Tatin.  The story goes.........well, you can read about it here.


It was still delicious!

The last four slices came in handy the next day when we were invited to an impromptu alfresco lunch at the house of some other friends - another of the things I love about our life in France.  (Impromptu alfresco lunches are an uncommon event in the UK!)  They had phoned to say the weather was perfect for lunch outdoors (which it frankly hadn't been for some time)  and they had made a quiche but hadn't got a dessert.  So I took the last of my pie. 

If you would like to make it, see my blog post here and simply put the frangipane mixture on top of the fruit, not underneath !!

Cuts into 8-10 generous slices.