October 25, 2011

THE PERFECT TARTE TATIN

We love tarte tatin and it is one of our favourite desserts to order when we are in France.  You don’t see it on menus in England quite so often.

For the last couple of years I have tried a number of recipes to make it at home.  Each time I made a tarte tatin, it would taste nice enough and looked reasonable but somehow it never quite came up to scratch.  Now I think I have found the perfect recipe.  It comes from Raymond Blanc’s “Kitchen Secrets” and you can find it here.

When I spotted that Ruth of The Pink Whisk was having an October Challenge for a recipe using Pink Lady apples,  I decided this was a perfect opportunity to bake another one !!

The Pink Whisk Challenge

Of course you can’t beat having the right equipment for any recipe and we had much greater success once we found this tarte tatin dish in John Lewis.  It has gone up in price by £1 since I bought mine but it’s still a great piece of kit for only £13.

tatin 1a

The dish is about the size of a sponge tin but is made of heavy aluminium that is happy on top of the stove as well as in the oven (but not in the dishwasher).  Traditionally the tatin is made in a skillet but somehow I never managed to find one of those.

tatin 1tatin 2

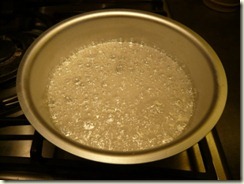
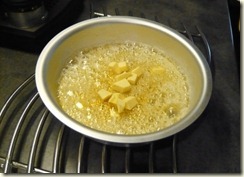
You begin by caramelising the sugar and water on the hob.  When it is pale golden you add cubes of chilled butter, which stops it becoming too caramelised.  I really dislike tarte tatin where the caramel has become too dark and bitter.

tatin 4tatin 3

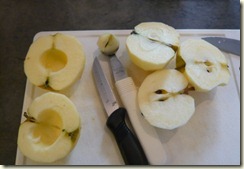
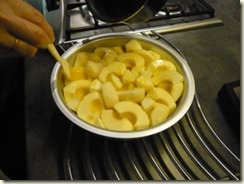
You peel and core the apples ~ I use my melon baller to remove the cores neatly.  Cut them into quarters and place them round side down in the caramel, cramming as many in as possible and filling any gaps with small pieces.

tatin 8

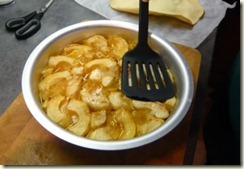
You brush the apples with more melted butter and bake in the oven until the apples are cooked.

tatin 10tatin 9

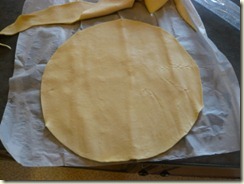
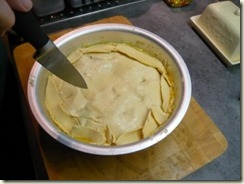
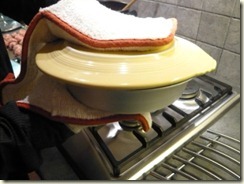
Press the apples down and place a circle of puff pasty over the top, tucking in the edges.  Don’t forget that the tin is hot and be careful not to burn your fingers when tucking the pastry in.

The ready-made, ready-rolled puff pastry you can buy in France works extremely well for this dish.  You have to trim it a little so there is not too much overhang, otherwise the tucked-in portion makes the base too bulky.  I always buy a few packs of it when we are in France and store it in my freezer.

tatin 11tatin 12

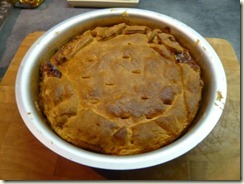
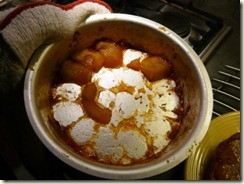
Prick the pastry and bake again until it is nicely browned.  Leave it to stand for a while before turning out ~ always the scary part.  I usually let my other half do that ~ he seems to enjoy it ~ must be a man thing.

tatin 14tatin 15

If the tarte has cooled completely you can reheat it gently on the hob.  This will melt the caramel enough to soften it to enable you to turn it out.  Alternatively, you can make the dish the day before and reheat in the oven.

tatin 16tatin 17

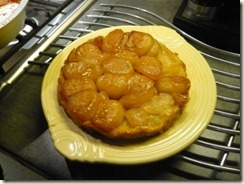
Inevitably there will be a few pieces of apple that stay stuck to the dish.  Just pick them out carefully and replace them in their rightful positions in the tarte ~ nobody will know !!

tatin 19

tatin 20

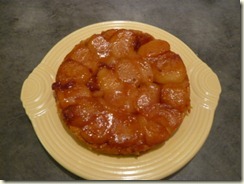
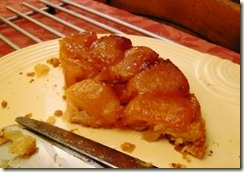
Et voilà !!  The perfect tarte tatin !!

This is what I used.

6 dessert apples

3tblsp water

100g caster sugar

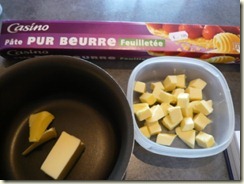
60g unsalted butter, diced and chilled in the fridge or freezer

30g unsalted butter, melted

1 pack of ready-made/ ready-rolled puff pastry

This is what you do.

Preheat the oven to 180°C/160°C.

Peel the apples, cut them in half, remove the cores, then cut them into quarters.  (Raymond suggests keeping the apples in halves and slicing the round bottoms off so they sit flat in the tin, but I found I could cram more in if I quartered them.)

Put the water in the tatin dish and add the sugar.  Leave it for a couple of minutes for the sugar to be absorbed then put on a medium heat on the hob.  Heat gently without stirring until a pale golden colour appears.  Remove from the heat and add the chilled cubes of butter – this stops the cooking and prevents the caramel from becoming too dark and too strongly flavoured.

Arrange the apple pieces, rounded sides down, in the dish, using small pieces to fill any gaps.  Pack them in tightly and press down.  Brush the melted butter over the apples and then bake for 30 minutes.

Remove the tin from the oven.  Place your circle of rolled out puff pastry on the top and tuck the edges in. Be careful because it’s easy to forget that the tin is very hot and burn your fingers when tucking in!  Prick a few holes in the pastry and bake again for 40-45 minutes until golden brown.

Remove the tatin from the oven and allow to cool slightly before turning out carefully onto a serving plate.  Serve warm or cool with cream or ice-cream.

Serves 6
October 24, 2011

TWO FOR THE PRICE OF ONE

For October’s Random Recipe Challenge, I was paired with Alex of Dear Love Blog who chose a cookbook from my collection and then the page to cook from.

meatballs 1

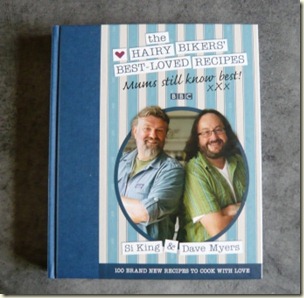
I was pleased when this book from the Hairy Bikers was chosen and after a quick flip through the pages I was hoping for page 208 (jam roly poly pudding) or page 111 (coffee and walnut cake).

But Alex gave me page 203, “Gerarda Minichiello’s meatballs”.  Which is fine because I have never cooked meatballs before.  A good look at the recipe told me that I also needed to cook what was on page 202 – a tomato sauce that the meatballs should be cooked in for the last 35 minutes.  Oh heck.

Another look also told me that Mrs Minichiello was obviously used to cooking for quite a crowd.  The quantities of ingredients would make an enormous amount of meatballs and sauce.  Also the sauce is said to take between two and five hours to cook !!  I thought about halving the recipe, or maybe cheating and cooking the meatballs in a jar of bought sauce.

I even thought about chickening out altogether but the idea of the Random Recipe Challenge from Bellau Kitchen is after all to try recipes that we might not normally do and learn new techniques along the way, if we’re lucky.

So I decided not to be a party pooper, to make the full quantity, freeze half the meatballs for future enjoyment and bottle half the sauce to keep in the fridge.

meatballs 2

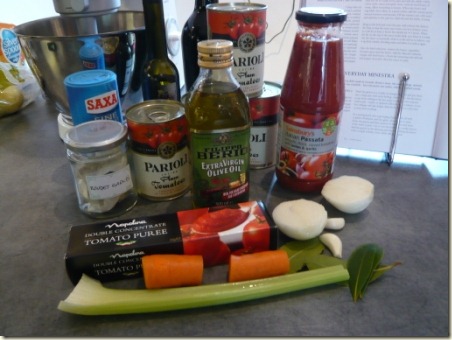
The ingredients for the pasta sauce.

meatballs 3meatballs 4

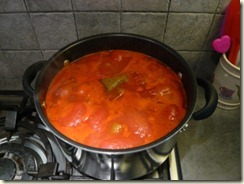
The recipe was a bit vague in places.  For example, it just said to put four tins of plum tomatoes in the pan and one hour later they were still whole, floating on top of the pan.  So I decided to mash them up a bit, which meant I also mashed the vegetables which were meant to be removed before adding the meatballs – although I did carefully avoid mashing the bouquet garni teabag.  But that was fine, as I’m not fond of removing and discarding perfectly good and tasty vegetables from anything.

meatballs 5meatballs 6

Having never made meatballs before, I was surprised at some of the ingredients, such as pine nuts, raisins, mint and grated Pecorino cheese.  I always thought a meatball was probably just minced beef, herbs, onions and breadcrumbs.

meatballs 7meatballs 8

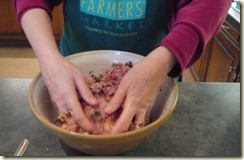
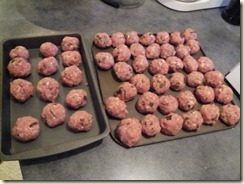
I had to wrestle my humungous mixing bowl out of the cupboard, the one that usually gets used once a year for the Christmas cake, to mix the ingredients together and form the balls.  The recipe said it made 30 but I got 52 out of it.

meatballs 9meatballs 10

Sunday was the only day I would have the time to do the sauce.  This is when my dad comes round for his dinner in the evening.  He enjoys watching us cook and is pretty keen to try something new.

meatballs 11meatballs 12

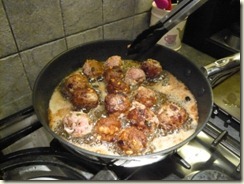
I was a bit alarmed when some of the meatballs started to fall apart when frying them.  If I make them again I will use less oil in the frying pan than stated in the recipe.

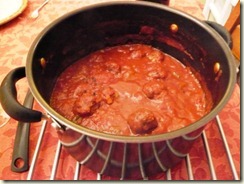
In the end the meatballs were yummy, the sauce was rich and satisfying and the complete dish looked exactly like the picture in the book, which is on page 205.  I confess we served them with vegetables as my dad is not much of a pasta person and in any case I am keen to give him veg on a Sunday as I have a sneaky feeling they’re the only ones he gets all week. 

There are leftovers for us to enjoy with pasta as intended in the recipe and of course, a freezer full of meatballs for if we decide to invite a few folk round one evening – I reckon the quantity made would serve between 8 and 12 people !!

Ingredients

For the sauce

5 tblsp olive oil

1 medium onion, peeled

1 celery stick

1 carrot, peeled

1 clove of garlic, peeled

3 dessertspoons tomato purée

4 400g tins plum tomatoes

1 680g jar passata

2tsp salt

1 bouquet garni

2 bay leaves

50ml Marsala wine

splash of balsamic vinegar

15-20 basil leaves, washed and torn

Method

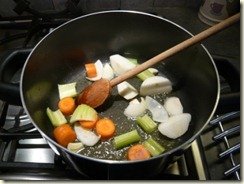
In a very large pan, brown the vegetables, left whole, in the oil.  Add all the other ingredients except the last three on the list, plus water measured by filling the four empty tomato tins.

Bring to the boil and simmer for at least two hours.  (The recipe says ideally 4-6 hours!!)

If it reduces too much, add boiling water from a kettle.

Remove the vegetables, bouquet garni and bay leaves.  Add the Marsala, balsamic and basil leaves.  Check seasoning.

For the meatballs

100g white bread (the recipe suggests sourdough bread but I didn’t have any)

6 sprigs thyme
12 sage leaves

24 mint leaves

24 flat leaf parsley leaves

5 garlic cloves, peeled and chopped

100g pine nuts

150g raisins

3 large eggs

Worcestershire sauce – splash of

100g pecorino cheese, grated

500g minced lamb

500g minced beef

vegetable oil for frying

Method

Put the raisins in a bowl and cover with warm water.  Leave to soak for 5-10 minutes then drain.

Soak the bread in water for 2-3 minutes.  Squeeze out the water and put on one side.

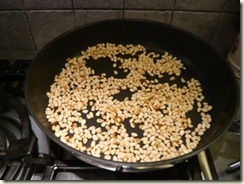
Toast the pine nuts by heating them gently in a frying pan.  Watch carefully as they go from just toasted to burnt in no time at all.

Chop the herbs and mix with the garlic and pine nuts. 

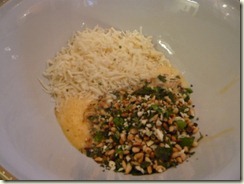
Beat the eggs in a large bowl and add the W. sauce, herb mix and grated cheese.  Break the bread into small pieces and add with the raisins and the meats.  With very clean hands, bring it all together until evenly combined and smooth.

Take pieces of the mixture about a tablespoon in size and form into balls.

Heat a little oil in a frying pan and brown the meatballs a few at a time.  Add to the tomato sauce and cook for another 35 minutes.  Serve by removing the meatballs to a large serving dish and pour the sauce over.

Invite all your friends and family round and enjoy !!

October 20, 2011

PEAR AND WALNUT CHUTNEY

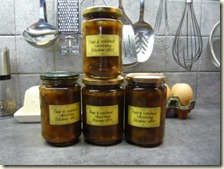
I absolutely love this time of year. September with its hint of autumn but the joy of an Indian summer. October with its beautiful colours and lovely sunshine to cheer us up and bolster us against the chilly evenings. Not long now before we can justify lighting our real fire in the living room and indulge in all that comfort food. chutney3


Autumn_Challenge

I have always loved autumn ever since I was a little girl. My mother and grandmother would make chutneys and pickles and there would be the Christmas cake and mincemeat to make in good time for the big event. This was long before anyone had a fridge and I don’t think freezers were even invented then.

I can also remember them taking chairs outside and sitting peeling pickling onions in the afternoon sunshine. There would be jars and jars of home-made pickles to enjoy with cold meat on a Sunday teatime throughout the winter. When Kate of What Kate Baked announced her autumn challenge I just knew that it was time to start making chutney !! Of course it’s not exactly baking, but it’s cooking and it’s autumn so I hope it counts !!

Many years ago, I heard a fifty-something Germaine Greer taking part in a TV programme about gardening and she said that middle-aged women take up gardening and making jams and pickles because they have passed their childbearing years but still need to nurture and be productive.

I remember feeling rather miffed that someone who had such radical ideas when she was younger should denounce women of a certain age, almost subscribing to the stereotype after all. Although at the time I was already on the brink of middle age myself I was still full of frantic enthusiasm and energy and the idea of growing anything (other than the occasional houseplant) seemed totally alien. I was sure it would never happen to me.

But here I am, pushing sixty and what am I doing…? Growing vegetables and making jam and chutney. The urge to do it crept up on me and was there before I even realised what was happening. So she was right.

chutney5chutney8

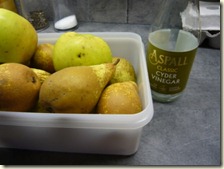
I was delighted when my dad gave me his full crop of pears from his fairly new pear tree and consulted my cookbook for recipes. In it I found an interesting one for pear and walnut chutney.

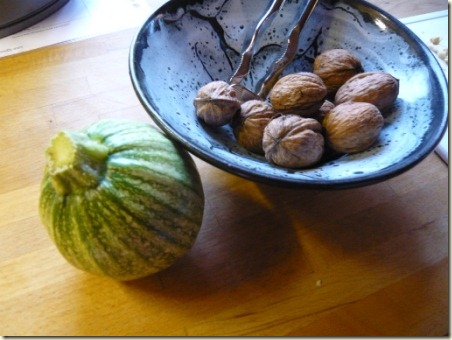
I already had a stock of fresh walnuts, gathered on our walks with Lulu when we were in France in August. They just fall from the trees around the village and you help yourself.

chutney6chutney7

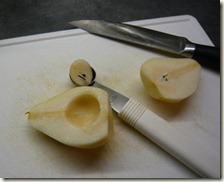
I used a melon-baller to remove the cores from the pears and apples – a tip I read somewhere years ago.

chutney9 chutney2

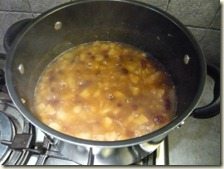
The chutney was simple to make but you have to keep an eye on it, especially in the last stages when it is thickening up and likely to catch on the bottom of the pan. It’s difficult to rescue it if you burn it even slightly.

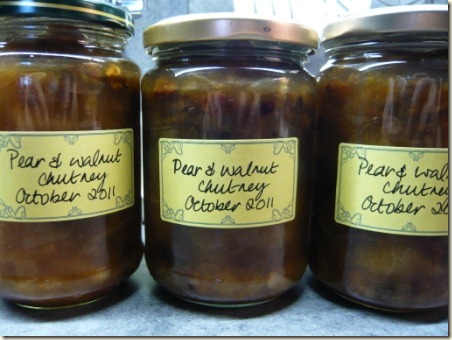
The chutney should be left to mature for a month before eating. Luckily it made four and a bit jars so the bit was handy just to make sure it was worth keeping. It was delicious !!

Ingredients

1.2kg firm pears

225g tart cooking apples

225g onions

450ml cider vinegar

175g sultanas

finely grated rind and juice of one orange

400g granulated sugar

115g roughly chopped walnuts

½ teaspoon ground cinnamon

Method

Put the sultanas in a bowl with the orange juice and leave to soak.

Peel and core the fruit, chop into 1” chunks. Peel and quarter the onions and chop into similar sized chunks. Put the fruit and onions in a preserving pan or large saucepan with the vinegar.

Slowly bring to the boil then reduce the heat and simmer for 40 minutes until the fruit and onions are tender, stirring occasionally.

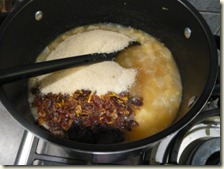
Add the sugar, sultanas, orange juice and rind to the pan. Cook gently until the sugar has dissolved then simmer for 30-40 minutes or until the chutney is thickened and there is no excess liquid. As it thickens, stir frequently to prevent burning or sticking to the bottom of the pan.

Meanwhile, lightly toast the walnuts by heating gently in a saucepan for about 5 minutes, stirring frequently.

When the chutney is cooked, stir in the walnuts and cinnamon.

Spoon into warm, sterilised jars, cover and seal.

Leave for one month before using and keep in a cool dark place. Keeps for about a year.

Makes 4 medium jars of chutney.

October 19, 2011

CHOCOLATE COURGETTE CAKE

When we were chez nous in our little French house in early October, we went out one day and on arriving home we found a food parcel on our doorstep.

food parcel

This is not unusual.  When ever we visit friends in the village we rarely come away empty handed and all visitors arrive with gifts of food.  Sometimes this will be home-made jams or chutneys.  Often it will be armfuls of produce from the garden.

On this occasion it was a little box of tomatoes and peppers, some chard and courgettes from our friends Tim and Pauline who had called when we were out.

There were some round and some long courgettes.  I immediately had an urge to make a chocolate courgette cake, which I had made a few times before.  My recipe came from a friend who used to live in France but my only copy was back home in England.  So I went down to the tourist office in the village to use their public computer to find another one.

chocolate courgette cake 6
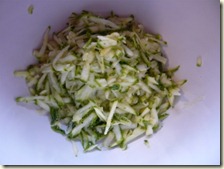
After a bit of Googling around, I found this recipe.  It was for a huge cake that serves 24.  I don’t have a baking tin of the right dimensions in my little French kitchen so I literally halved the ingredients and used a 22cm round spring-form cake tin.  It seemed to work.  I used the courgettes left for us by Tim and Pauline and windfall walnuts from the many trees around the village.

chocolate courgette cake 5 chocolate courgette cake 4

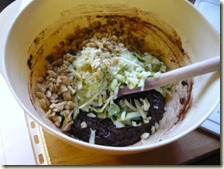
Apart from shelling and chopping the walnuts and grating the courgettes, the cake took very little time to make.  There was no beating of eggs or sifting of flour, although I did give the flour a bit of a whisk to aerate it a little.

chocolate courgette cake 3

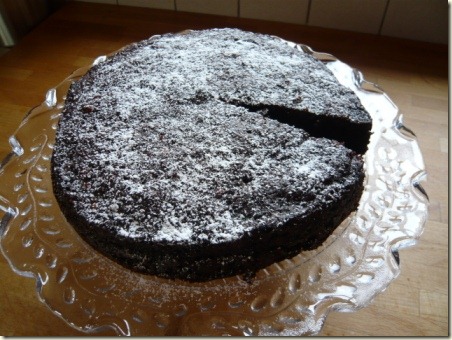
The cake was very dark and moist.  You could not taste the courgette at all and in fact there was absolutely no sign of it – no little green flecks to give the game away.  It was just a very pleasantly chocolatey cake, not too sweet.  It would have been delicious covered in a cream cheese topping if you like it a bit sweeter but I just dusted it with icing sugar and served it au nature.

chocolate courgette cake 2

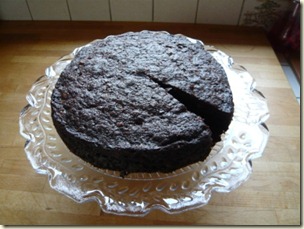
Unfortunately I was so keen to see what it tasted like that I forgot to take a picture until after I had cut myself a small slice.  But anyway, it was lovely.  And a good way to use up a glut of courgettes or fool the kids into eating vegetables.

chocolate courgette cake 1

CHOCOLATE COURGETTE CAKE

Ingredients

this makes a 22cm round cake

125g plain flour

190g caster sugar

35g cocoa powder

1 teaspoons bicarb of soda

½ teaspoons baking powder

¼ teaspoon salt

½ teaspoon ground cinnamon

2 eggs

175 ml vegetable oil

170g grated courgette*

45g chopped walnuts

Method

First, grate your courgettes.  I read somewhere that this is best done by hand – if you blitz them in a food processor it may be quicker but they come out too wet.

Preheat the oven to 180°C.  Grease and line a 22 cm baking tin.

Put all the dry ingredients into a large mixing  bowl and stir together.

Add the eggs and oil and mix well.

Fold in the nuts and courgettes until evenly distributed.

Pour the mixture into the cake tin and level the surface.

Bake for around 40 minutes.  (The recipe for the full size cake says 50-60 minutes, so best to check after 35-40.)  Cool completely before dusting with icing sugar to serve.  Would also be nice iced with a cream cheese frosting or drizzled with water icing to glam it up.

Serves 12.