October 27, 2013

AUTOMATIC GRANARY LOAF

granary bread

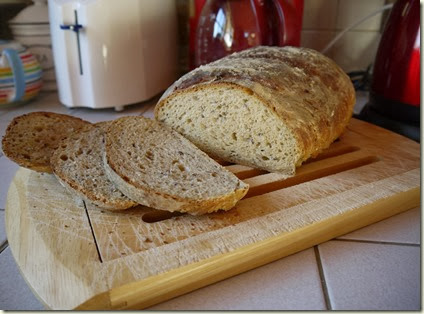
There’s nothing quite like fresh home-made bread is there?  The anticipation as it bakes in the oven and the aroma fills not just the kitchen but the whole house.  The frustration of waiting for it to be cool enough to cut, then the joy of the first slice, spread with a thick layer of butter – then jam on top for the second slice.  Heaven. 

Even though everyone in the world is knocking up a loaf of bread with the ease of tying their shoe laces, I confess that I have never done it.  Except in a bread making machine, which probably doesn’t count.  The idea of baking anything with yeast gives me the collywobbles.

granary bread2a

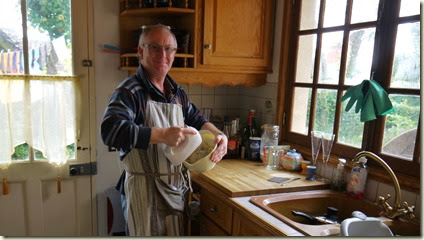
Nick however loves making bread from scratch, the old fashioned way.  He finds the kneading and pummelling quite therapeutic and satisfying.  I find the smell and eating very satisfying !!

So when we were chez nous last week he decided to make a simple loaf of bread and to try out the automatic bread baking programme in our French oven.  Sorry, I forgot to take a picture of the oven, but it has lots of programmes and settings, including the rotisserie, which we use quite often, a cake baking programme which I fail to see how it can work, and the bread programme.

You just put your proved bread into a cold oven, turn it on and it bakes.  No temperature setting or timing required, just some water in a tray in the bottom of the oven.  We were both a bit sceptical, but it worked perfectly.

granary bread3

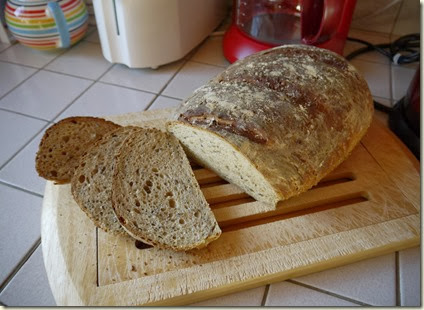
Nick used a basic multigrain strong flour, nothing fancy, and a sachet of fast yeast from Intermarché.  He used his standard recipe which he keeps in his head, having made a basic loaf so often that he no longer needs to look at a recipe. (Which makes me feel ever so slightly inadequate as I still check the recipe before I make the chocolate cake I have been making for over thirty years !!)  He mixed it using the little dough hooks on our cheap French hand mixer, left it to rise for a couple of hours, put it in the oven and 50 minutes later it was done !!  And perfectly delicious. 

I suppose we shouldn’t really have been sceptical, or surprised , that the bread programme worked so well.  Presumably it brings the bread up to temperature slowly to give it more rise, then blasts it to bake it in the final minutes.  Similar in fact to how a bread making machine works.  Hey ho.

In fact it looked so easy that I might pluck up the courage and have a go myself.  One day.  Maybe.  In any case, as home made granary bread is a real treat for tea time, I am contributing Nick’s loaf to this month’s Tea Time Treats Challenge, organised by Karen of Lavender and Lovage, and Kate of What Kate Baked.  The current theme is “bread” and you can see the details here.

Tea_Time_Treatrs_logo

Obviously, to many people such a simple loaf is hardly worthy of a blog post, not to mention a baking challenge entry (especially having seen the other fabulous entries already linked in – what a lot of talented bakers there are around), but to me a home-made loaf is always a little miracle.  How something that tastes so good can come from a handful of simple ingredients is, I think, pretty amazing.  I don’t know why we don’t make it every time we need bread, especially when you just shove it in the oven on an automatic programme !! 

The keeping properties of this loaf are quite good.  It stays fresh in the bread bin for a couple of days and is very toastable after four days.

granary bread4

Nick’s automatic granary loaf recipe (adapted from the basic recipe in The River Cottage Handbook)

500g multigrain flour

7g dried yeast (one sachet)

10g salt

300ml warm water

25g butter

Method

Combine the flour, salt and yeast in a bowl, add the butter and water and mix with the dough hook attachment of your hand mixer for a few minutes, until the dough starts to come together.

Transfer the dough to an oiled surface and knead for five minutes.  Place the dough in an oiled bowl, cover with cling film and leave at room temperature or somewhere warm for at least an hour, possibly two, by which time it should have doubled in size.

Remove the dough from the bowl, flatten to knock it back, and shape it into an oval loaf.  Transfer to a baking sheet, slash the top with a sharp knife, sprinkle with a little extra flour and put it into your cold oven on the automatic bread setting.  Put 500ml of water in a baking tray in the bottom of the oven. 

Leave the house ~ so that you’re not tempted to stand in the kitchen, enjoying the lovely aroma, watching the oven and waiting for the alchemy to take place !!

Alternatively, if you don’t have an automatic setting, leave the dough to rise for a second time for thirty minutes then put into a hot oven, preheated to 240°C, for 5-10 minutes.  Reduce the temperature to 210° and bake for a further 25-30 minutes until nicely browned.

Makes one 500g loaf.
October 25, 2013

CARAWAY SEED CAKE

It was a relief when this month’s Alphabakes Challenge, was to bake something with the letter “C”.  After a few not so easy letters, this one offered a huge amount of choice: chocolate, coffee, cherry, coconut, caramel, carrot………..an almost endless list.  You can see the details on Ros’s blog here.

caraway cake1

The other day I was browsing through a book I bought just before I retired.  (I absolutely did not need another cake recipe book but I was feeling very buoyant one lunchtime with only 4½ days left to work, so I splashed out and treated myself.)  Delia’s Cakes.

On reading the first few pages I discovered that Delia now believes there is rarely any need to cream butter and sugar separately and suggests that as long as you sift the flour really well an all-in method of mixing is fine.  She also suggests using spreadable butter where softened butter is called for.  Both of these tips appealed to me greatly as the first one saves time and the second one saves a lot of hassle trying to make sure you have butter at the right softness before you start. 

The other tip I picked up is that using one of those pleated paper liners in the tin is good with cakes that are to be kept for a few days as it helps to keep the cake moist.  She specifies using one for this recipe and previously I never understood the point of them but on her recommendation I went out and bought a pack.  The local shop only had packs of 40 so I have another 39 cakes to bake before I have to buy another one !!

caraway cake2caraway cake3

On browsing the recipes I chose caraway seed cake because it’s such a nostalgic flavour.  I had an unopened pack of caraway seeds lurking in my baking cupboard and as soon as I opened it I was transported back to my childhood.  I could just see myself sitting on the floor at my grandma’s house, playing with the contents of her button box, listening to my mum, aunty Vera and grandma gossiping over a cup of tea and a slice of cake.  Caraway cake was a favourite in the 1950’s and 60’s, possibly because it was a very cheap way of flavouring a simple cake.  According to Wikipedia, caraway seeds have been used in baking since the 1600’s but you don’t see them being used very often these days.

caraway cake4

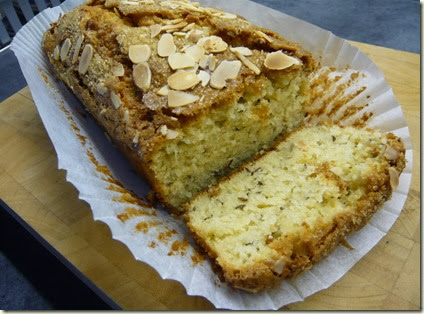
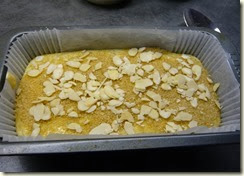
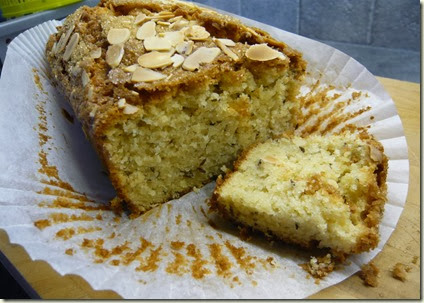
The cake was obviously very quick and easy to rustle up.  It was done perfectly in the time specified, although I did get a bit concerned that it might be slightly over browned so I covered it loosely with foil for the last ten minutes.  I loved the caraway flavour ~ although I can see that it could be overdone very easily and the cake could taste rather unpleasant and medicinal.

alphabakes

So it is with great pleasure that I submit this cake to Alphabakes, a monthly challenge organised by Ros of More than the occasional baker and Caroline of Caroline Makes.  I shall definitely be making this cake again and delving further into Delia’s latest book.

caraway cake5

I don’t know how many letters are left in the Alphabakes series, but, rather like a lengthy game of Scrabble, there can’t be many easy ones to go.  We haven’t had a “Z” yet but believe it or not, there is a recipe for zagablione cake in this book !!

Ingredients

175g self raising flour

175 spreadable butter (I used Anchor Lighter Spreadable as that’s what I had in stock, straight from the fridge, and it was fine)

175g golden caster sugar

3 large eggs, lightly beaten

50g ground almonds

4 tblsp milk

3 tsp caraway seeds

For the topping

2 tblsp demerara sugar

1 tblsp flaked almonds

Method

Preheat the oven to 180°C /160° fan / gas mk 4.  Put a greaseproof paper liner into a 500g / 2lb loaf tin.

Sift the flour into a large bowl.  Delia suggests doing this from a good height to aerate the flour as much as possible.

Add all the other cake ingredients and beat with an electric hand mixer for about a minute until well combined and creamy.

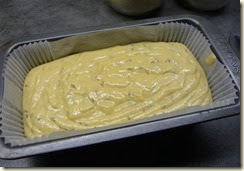
Spread the mixture into the tin and level the top.  Sprinkle the topping ingredients evenly over the mixture.

Bake for 1 hour and 5 minutes until the cake is springy to touch.  Cool in the tin for 10 minutes then transfer to a cooling rack.

Serves 10-12.  Delia suggests the flavour improves after a couple of days, hence the benefit from the paper liner.

October 23, 2013

RED PEPPER AND LIME SOUP

We planted one pepper plant and two different chilli plants in the greenhouse this year.  Disappointingly they all turned out the same and produced exactly the same kind of peppers.  So much for the cheap plantlings at B&Q!  On the other hand, B&Q probably did us a favour as we do use a lot of peppers but not that many chillies.

red pepper soup

We took all our ripe peppers to France with us to use up, rather than just leave them on the plant where they may or may not have been edible by the time we got back.  With them I made some red pepper and lime soup.

red pepper soup2

I have only been making soup for the last few years.  Before then I always believed it to be a bit of a palaver and not worthwhile for two people when all you have to do is open a tin.  I was converted when I stumbled across Nigella Lawson’s recipe for vegetable soup and discovered that soup is one of the easiest things to make, a great way to use a glut of vegetables or a mixture of what’s in the fridge.  All you need is a really large pan, such as a stockpot, which makes the job much easier than trying to keep all the ingredients from spluttering over the side of a normal large saucepan.

You make this soup from the same basic recipe as Nigella’s.  Add chopped vegetables (the peppers) to a cooked, chopped onion, add stock, seasoning and cook. 

This is one of my favourite soups, if only for the fabulous colour.  The lime gives it a lovely fresh flavour and it goes beautifully with some fresh crusty bread.

Ingredients

1 large onion, peeled and chopped

4 large red peppers, deseeded and chopped

1 tblsp olive oil (or a squirt of Flora Cuisine)

1 garlic clove, crushed (optional)

1 small red chilli, sliced (optional – I didn’t use it this time as I didn’t have one)

a good squirt of tomato purée

1 litre of chicken or vegetable stock (I use Marigold stock powder, which is gluten free)

juice and zest of one lime

Method

Heat the oil in a large pan or stock pot, add the onion and cook without browning for a few minutes until soft.  Add the peppers, garlic and chilli and cook with the lid on for about five minutes until the peppers are just soft, shaking the pan occasionally so they don’t catch.

Add the stock and tomato purée, cover and cook at a low simmer for 10-15 minutes. 

Either allow the soup to cool and transfer to a food processor, or use a stick blender to blitz the soup directly in the pan.  If you like your soup completely smooth, pass it through a sieve.  (I don’t mind the odd small lump so I never bother with this.)

Add the lime and reheat gently in the pan.  Go easy on the lime ~ try half of the zest and juice first and taste it.  Season with salt and pepper and serve hot with some of your favourite bread.

Serves 6.  Keeps well in the fridge for a couple of days.  Can also be frozen.

October 15, 2013

DAMSON AND MARZIPAN COBBLER

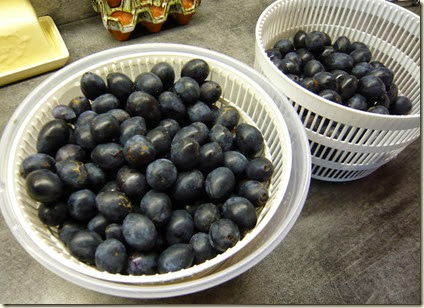
My  father turned up with a huge bag of damsons recently.  I love damsons and he loves damson pie !!  The damson tree they came from is in the garden of a house that used to belong to his parents (my grandparents).  His brother (my uncle) lives in the house next door and luckily the new owners of the tree don’t like damsons and are happy for them to be used by us.  Strangely, I’m the only person in the family who seems to use them.

damsons2Anyway, I was looking for ideas for something to do with them other than a crumble, pie, or jam, and came across a recipe on the Good Food website.  (There’s no point in my giving the link here as it’s on of the ones that disappeared from the site on 30th September.)
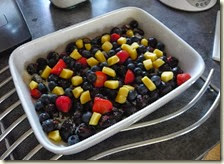
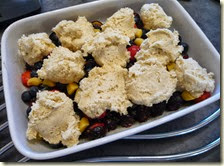
However, I also spotted a recipe for “apple, cherry and marzipan pie”.  This was the one made by Ruby, the young contestant in the current series of The Great British Bake Off.  I remember at the time she put some marzipan in her pie just because she likes it and………..was this the pie that Paul Hollywood said was the best he had ever tasted?  Or was that Kimberley’s?  I can’t quite remember.

damsons1I really like marzipan too so I decided to add some to my damson cobbler.  (I also put in a few strawberries and blueberries that needed using up, but they didn’t add anything to the flavour, the taste of damsons being so strong.)

damsons3 damsons4

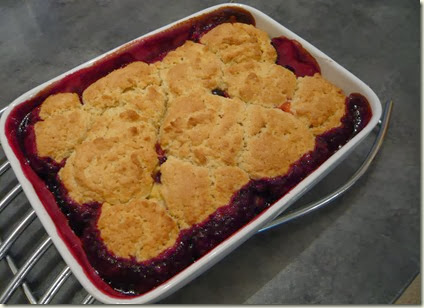
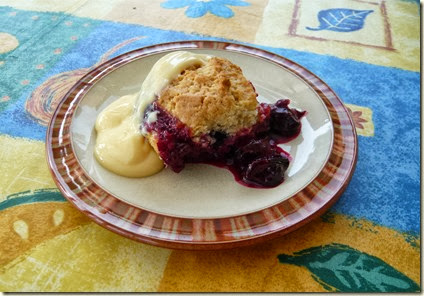
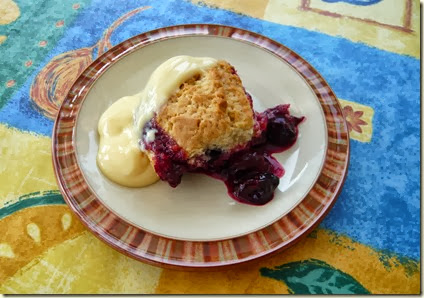
The cobbler was delicious.  That intense purple colour and the sharp, strong taste of damsons were truly magnificent.  The little blobs of marzipan added a little hint of almond in every mouthful.  I shall try adding marzipan to other pies and crumbles from now on.

damsons5Of course the only problem with damsons is the stones.  It’s not an issue when you’re making jam as the stones float to the surface in cooking and can be scooped off fairly easily. 

Every year I think I should make the effort and try to stone them before I use them in a pudding, but I always give up.  I lose the will to live after about a dozen and using either a knife or a cherry stoner seems to waste so much of the damson itself. 

So I always resort to doing what my mum always did – issue a warning as you put it on the table !!  If anyone has a good method for stoning damsons I would be very pleased to hear it.

damsons6 Ingredients

1kg damsons*

100g golden caster sugar

100g marzipan, cubed

For the cobbler topping

80g butter, chilled and diced

200g self-raising flour

100g golden caster sugar

150ml milk or buttermilk

a few hazelnuts, or cobnuts, chopped (I omitted these but almond flakes would also be nice)

Method

Preheat the oven to 190°C / 170°fan / gas mk 5.  Grease a 1 litre baking dish.

Tip the fruit into the dish.  Sprinkle over the 100g sugar and put into the oven while you make the cobbler topping.

Put the butter, flour and sugar into a food processor with a pinch of salt and process to breadcrumbs.  Add the milk and process again briefly to make a soft dough.

Remove the dish from the oven and dot the cubes of marzipan evenly between the damsons.  Spoon blobs of the topping mixture over the fruit.  Sprinkle the nuts on top.

Bake for 30-35 minutes, until the fruit is bubbling and the sponge firm – test it as you would for a cake.

Serve warm with crème fraîche, cream, custard or ice-cream.

Serves 6.

*I have since made the same recipe using a mixture of fruit, apples, pears, plums and nectarines.  It was delicious.  I think this recipe would probably work with any fruit, just putting a layer in the bottom of the dish…….

October 9, 2013

AIRPORT POTATOES

August 2013-3 193

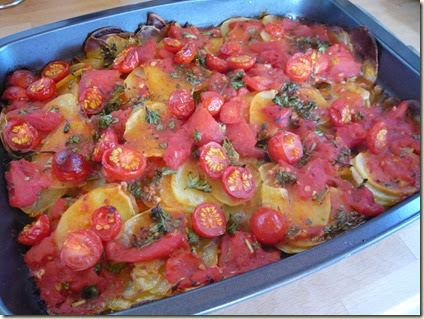
I spotted this recipe in the book “Good Cooking the new essentials” by Jill Dupleix.  She claims to have pinched the idea from the cafeteria at Rome airport, where it is served up in enormous quantities.  She loves it and I was keen to give it a try myself.

Essentially it’s finely sliced potatoes baked with tomatoes, garlic and herbs.  It looks and smells glorious and is great served with cooked meats such as steak, chops or chicken.  There are capers in the original which I omitted as I’m not a fan of them.  It takes an hour to bake so it’s the sort of thing you can shove in the oven and leave to cook while you lavish all your attention on getting the meat right.

Ingredients

1kg all-purpose potatoes

olive oil

1x400g can of chopped tomatoes (for those with a huge tomato harvest to use up, you could obviously use the equivalent of cooked, skinned tomatoes)

2 cloves garlic (I used more)

½tsp dried oregano

200g cherry tomatoes

2 tblsp roughly chopped parsley

Method

Preheat the oven to 190°C / 170 fan / gas mk 5.

Peel and finely slice the potatoes using a food processor, mandolin, or by hand.  Layer in a large oiled roasting tin or dish.  Add 250 ml water and salt and pepper.  Cover with foil and bake for 30 minutes.

Put the chopped tomatoes in a bowl with the crushed garlic, 2 tblsp olive oil, oregano and 1 tblsp of the parsley, salt and pepper.  Mix together.  Remove the foil from the potatoes and spread the tomato mixture on top.

Cut the cherry tomatoes in half and scatter on top of everything.  Put back in the oven and bake for 30 minutes more, by which time the potatoes should be cooked and starting to crisp at the edges.

Sprinkle with the other half of the chopped parsley before serving.

Serves 4 generously, would probably stretch to 6 as a side dish.