October 13, 2022

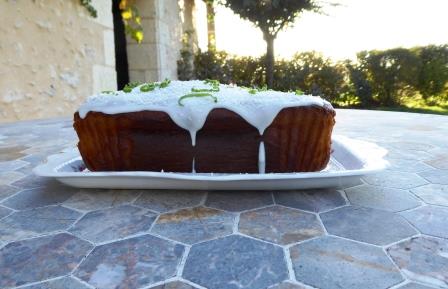
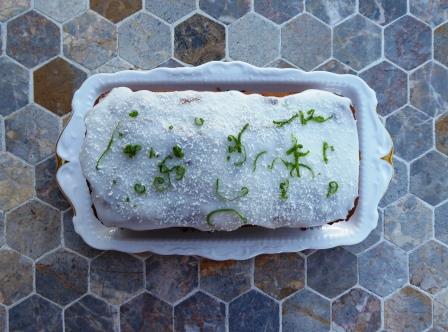
LIME AND COCONUT CAKE


I recently made two cakes for the Tea Garden at an event here in France; a caramel apple cake and this lime and coconut cake.  With my cookbooks all safely under dust sheets because of the ongoing building work I looked to the internet for ideas and spotted this recipe on the Carnation website.


Once the mixture was made I tasted it and thought it was not very sweet.  I looked at the recipe and noticed that it contained no sugar.  "How very odd" I thought.  The recipe must be wrong!

I Googled other recipes for lime and coconut cake and saw that they all contained sugar.  In fact sugar is surely a principal ingredient of all cakes.  The recipe had loads of complimentary reviews, no mention of sugar.  So I decided to add some.  Thinking that evaporated milk is itself slightly sweet I just added 100g.

In accordance with my recent lightbulb moment regarding the conundrum of giving away cakes made to an untried recipe I made a couple of muffins with a spoonful of the mixture.  They tasted good, a nice flavour of lime with a hint of coconut, just as I would expect, moist and with a nice even crumb, which confirmed my conclusion that the recipe on the internet must be wrong and the sugar had been omitted.  The lime flavoured icing was delicious.

It wasn't until I looked at the recipe again for writing up the blog post that I realised my mistake........I should have used condensed milk, not evaporated milk, condensed milk being an already sweetened product.  No wonder the recipe contained no actual sugar!  I can't believe I did that but brain fog has been a feature of my life so far this year!  

In the words of René Artois from "Allo, allo":  "you stoopid wooman!!"

The cake sold well, every slice devoured, so I leave it up to you whether you make it with evaporated milk or condensed milk.  I will add this cake to my tweaking list and try the condensed product myself next time!

(You can buy tinned condensed milk everywhere in France and I think also evaporated milk, sold as an addition for coffee, although I haven't tried it.  I brought mine from the UK in the pre-Brexit days when that was allowed.)

A word here about zesters.


The above is a microplane grater or zester.  It will give you very finely grated zest such as would be ideal for incorporating into cake mixtures and other recipes.  Flecks of the zest are not usually visible.  They are extremely sharp and you have to be very careful not to brush your hand over it as they will easily remove a layer of skin.  They can be quite expensive but a worthwhile investment if you want to get fine, almost powdery, zest.
This is a lemon zester.  It will give you strips or strands of peel that are good for decorating a cake or dessert.  Until I invested in a microplane grater this was all I ever used as I didn't mind the visible strips of zest in a cake.  They are quite cheap and available in most supermarkets.

Ingredients

For the cake

175g softened butter or baking spread

3 large eggs, beaten

55g desiccated coconut

zest of 2 limes

175g self raising flour

1 tsp baking powder

250g evaporated milk*

100g caster sugar*

For the icing and decoration

100g icing sugar, sifted

juice of 2 limes

as sprinkling of desiccated coconut

strands of lime zest (optional)**

Method

Preheat the oven to 170°C / 150° fan / gas mk 3.  Butter a 900g / 2lb loaf tin and line the base with a strip of baking paper, or use a paper liner.

Put all the cake ingredients into a large bowl and using a hand held electric whisk beat together until pale and creamy.

Transfer the mixture to the prepared tin, level the top and bake for 50-60 minutes.  If the top is looking brown before the middle is cooked, cover with a piece of baking paper or foil.

Cool in the tin for 10 minutes then remove to a wire rack to cool completely.

To make the icing, mix the icing sugar with enough of the lime juice to make a thick pouring consistency and drizzle imaginatively over the cake.

Sprinkle coconut over the cake for decoration.  If using an extra lime, scatter strips of lime zest over the cake.

Cuts into 10-12 slices.

*instead of evaporated milk and sugar use 250g condensed milk

**if using the extra lime to create the topping it occurred to me that you could drizzle the juice from it over the cake before icing it.

October 10, 2022

CARAMEL APPLE CAKE

There has been more baking than you would expect going on chez nous lately.  We are up to our eyes in dust and scaffolding here in France, with major work on the house going on.  Roof repairs and five new velux windows; four replacements and one brand new one (in the bathroom - how we put up with no window in the bathroom for eight years is now baffling).  Followed by decorating in the master bedroom and a new carpet.  

The whole house is affected.  The carpet extends into the walk in wardrobe so that has had to be emptied.  The stuff from in there has more or less filled the living room.  The furniture from the bedroom has filled everywhere else.  Oh the joys of home improvements!

Before the work started I volunteered to make a couple of cakes for the Tea Garden at a local event.  The French love British cakes, it seems.  French patisserie is a thing of wonder but British home baking always sells well around here.

All of my cookbooks are safely under dust sheets so I resorted to the internet for ideas.  I was going to make Phil's apple cake recipe (see here) as I've been hankering after making it ever since he posted it.  But then I spotted one by Miranda Gore Browne, a former GBBO contestant from a few years ago, called caramel apple cake, and remembered my golden rule of bake sales.  That the cakes slathered in the most icing sell the best.  Sad but true (in my experience - see here).  I'll risk giving the link for the recipe here as the recipes on the Sainsbury's Magazine website do tend to not disappear or turn into something completely different.


It took longer to clean down the kitchen sufficiently than to make the cake.  I didn't make the apple crisps to decorate the cake as per Miranda's original recipe because a) for me they were possibly a step too far and b) the timing was wrong.  I was making the cake the night before the event and it occurred to me that the crisps might not be quite so crisp by the time the cake was on sale.  I scattered a few fudge squares over the cake instead.

However, they looked so pretty in the picture that the next time I make this cake I will definitely give them a try.

I also had a lightbulb moment regarding the conundrum of making cakes to recipes I had not tried before that were destined to be given away.  I used a spoonful of the mixture to make a separate muffin.  That way I could taste the cake myself and make sure I was not presenting something inedible.  Why did I never think of that before?

Consequently I can confirm that the cake is delightful and the icing is fabulous - very, very sweet but delicious, so I shall definitely be making this recipe again.  Like many apple cakes that contain chunks or slices of apple, the cake was quite fragile.  Even when completely cold the top layer developed a crack when I lifted it on top of the bottom layer, as you can see in the picture.  Luckily the icing disguised it pretty well!  Apple cakes that contain grated apple tend to hold together much better - or maybe it's due to the variety of apple.  The recipe stated Bramley apples but I have never found them for sale in France so I used Reinette apples instead.

At 10.00 when I delivered my cakes the Tea Garden was a sea of cake and the first few customers were trickling in.  When I returned at 5.00pm to collect my plates it was still in full swing but the only cakes left were a few slices of fruit cake.  Amazing.  I was dead chuffed when my friend who was helping on the counter said that the first slices of cake sold were of my caramel apple cake!

~~~~~~~~~~~~~~~~~~


I made this cake again the next year.  This time, instead of making the caramel glaze for the top I made 1½ times the quantity of buttercream filling and topped it with that instead.  It still looked fabulous and I didn't get to taste a slice!  By the time I arrived at 2pm to do an afternoon shift on the cake stall it had long since sold out.

(The photos give it a darker appearance because at 8.00 in the morning the light was so dull when I finished the cake and delivered it in gloomy mist to the event!)

Ingredients

For the cake

500g cooking apples

zest and juice of 1 lemon

225g unsalted butter, softened, or spreadable butter

225g caster sugar

3 large eggs, beaten

200g self raising flour

2 tsp baking powder

50g ground almonds

1 tsp mixed spice

For the buttercream filling

100g unsalted butter, softened, or spreadable butter

200g icing sugar, sifted

2 tblsp caramel, either from a tin of Carnation caramel or a jar of Bon Maman confiture de lait

1 tblsp semi skimmed milk

For the caramel icing

75g unsalted butter

75g icing sugar, sifted

1 tblsp caramel (see above)

For decoration

a handful of fudge pieces (optional)

Method

Preheat the oven to 180°C / 160° fan / gas mk 4.  Butter two 20cm sandwich tins and line the bases with baking paper.

Peel the apples and chop into 2cm dice.  Toss the pieces in the lemon juice to prevent browning and set aside.

In a large bowl, beat together the butter, sugar and lemon zest, either by hand or using a hand held mixer.  Beat in the eggs one at a time.  Fold in the flour, baking powder, ground almonds and spice.  Tip in the diced apples, draining off any excess lemon juice first and mix well to evenly distribute through the mixture.

Divide the mixture equally between the tins and bake for 25-30 minutes.  Leave to cool in the tins for 10 minutes then transfer to a wire rack to cool completely.  Be careful as they are quite fragile.

While the cakes are in the oven make the caramel buttercream by beating all the ingredients together until smooth and well combined.

When the cakes are out of the oven make the caramel icing by putting all the ingredients into a medium saucepan.  Heat gently until melted together and smooth.  Set aside to cool for 10 minutes.

When the cakes are cold, place one onto a serving plate or cake stand and spread the top liberally with the buttercream.

Place the second cake on top and pour the still warm caramel icing over, allowing it to dribble down the sides.  Decorate with the fudge pieces (or any other decoration of your choice).

Cuts into 10-12 slices.

September 29, 2022

COQ AU RIESLING


This is another very retro dish, but with a twist.  It's coq au vin but made with white wine.

I can actually remember the very first time I ate coq au vin (the red wine version).  Nick and I were on our very first motorcycle tour of France together in May 1994.  The weather was decidedly iffy and we were camping.  Nick was keen to show me a place where he had camped a couple of  years before (probably with his previous girlfriend but we won't dwell on that!).


We made our way down through France and landed up in Chinon.  The campsite there is across the river from the town itself.  We pitched the tent and as the light faded the view of the river with its lovely old  bridge, the boulevard along the river bank and the château overlooking everything, in all its splendour, was a sight I shall never forget.

We strolled across the bridge into town for dinner and, being exhausted from a long ride, fell into the first restaurant that was open.  It was the Café des Arts in the beautiful square with the fountain.  There we had coq au vin, the chicken cooked in Chinon wine, followed by crème brulée, before staggering back to the tent and our sleeping bags.  I thought I had died and gone to heaven.  

Chinon became our all time favourite town in France and we went back there for at least part of our holiday every year, often more than once.  Now that we spend half the year in our house in France it is almost just around the corner.  The Café des Arts has been spruced up somewhat in the intervening years but still serves great food.

This white wine version is loosely based on a Nigella Lawson recipe which you will find in her book Nigella Express.

Ingredients

1 pack of lardons, about 150g

1 leek, finely sliced

4 small skinless chicken thighs (or a pack of chicken mini fillets, about 350g)

a handful (half a punnet) of mushrooms, thinly sliced

2 bay leaves

1 tblsp garlic oil for frying

half a bottle of riesling wine

Method

Heat the oil in a sauté or frying pan  that has a lid.  Fry the lardons then add the leeks and cook until softened.

Add the chicken pieces, bay leaves, mushrooms and wine, season with salt and pepper.  Bring to the boil, reduce to a simmer and cook with the lid on for 30-40 minutes or until the chicken is cooked through.  Stir in the cream and heat for another minute or two.  

Remove the bay leaves before serving with pasta, rice or potatoes.  Sprinkle with chopped fresh parsley or dill if you like.  Enjoy the rest of the bottle of riesling with the meal!

Serves 2-4, depending on the amount of chicken.  

September 21, 2022

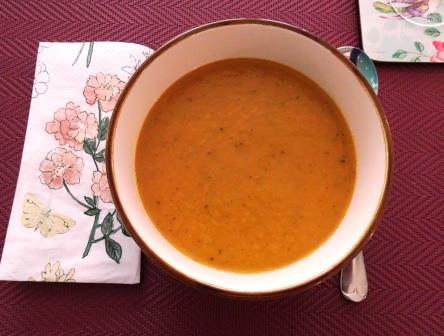
SPAGHETTI SQUASH AND RATATOUILLE SOUP (soup maker recipe)

This has to be one of the best soups I have ever made using leftovers in the soup maker.

After our bbq we had half a roasted spaghetti squash left.  You can read how I cooked it here.

We also had a few of these, barbecued mini potatoes.


They were parboiled, drizzled with olive oil and sprinkled with garlic and herb seasoning before roasting on the bbq as per a James Martin recipe that I found somewhere.

I also used some leftover ratatouille, made roughly to Raymymond Blanc's recipe for "quick ratatouille".


Delicious!

Ingredients

About a pint of leftover ratatouille

Half a roasted spaghetti squash, flesh scraped into the machine (skin discarded)

2 small leftover bbq'd potatoes

3 medium carrots, peeled and thickly sliced

1 veg stock pot

Enough veg to fill to the bottom line

Enough water to fill to the top line

Cook on "smooth" setting.

Makes 4 generous portions.

September 20, 2022

FIG, APPLE AND ALMOND TORTE (and what makes a cake a torte instead of a cake?)


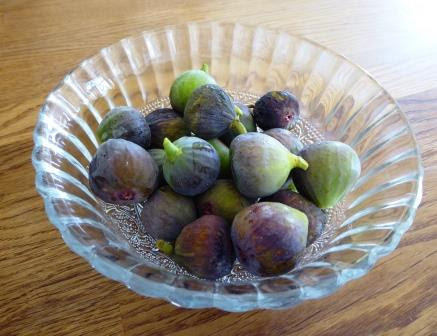
I'm back in France* and a few days ago I went to lunch at a friend's house.  On arrival I admired her fig tree which was loaded with gorgeous small ripe fruit.  On leaving she gave me some of them.

I looked through my collection of cookbooks and on t'internet for some ideas on what to do with them.

I settled on a recipe for "blackberry and apple torte" by Jo Wheatley (one of the early "bake off" winners) which I thought would adapt nicely.  It’s a recipe in her blog which is an adaptation of one from her book called "A passion for baking" where it was originally a recipe for a raspberry torte.  I do have the recipe book but it's back in the UK so I couldn’t do what I would normally do which is to go and look it up! The raspberry version of the recipe can be found, if you Google it, on the Daily Mail website.   I hope you're keeping up!

My own adaptation was to use the small figs instead of the blackberries. However, with both recipes open on my iPad I spotted a discrepancy; in one it suggested an oven temperature of 170° fan and in the other 160° fan.  Hmmmm……

I decided to split the difference and go with 165° and it was done in 40 minutes.  Next time I would check after thirty because it was if anything a tiny tad over baked.

A puzzle sprang to mind as I was looking at these recipes and that is - what makes a cake a torte rather than a cake?  I Googled it and there were so many different explanations that I decided it's probably  entirely down to the whim of the recipe writer.  For myself I thought a torte would be more of a dessert cake than an afternoon tea kind of cake so that’s what I've stuck with here!  Any other suggestions on a postcard, please!

It was a very nice cake.  Torte.  Whatever.  I like recipes that can be adapted to use whatever fruit you have in and this one is good for that. 

Ingredients 

150g each of: 

self raising flour,

softened butter or baking spread,

caster sugar,

ground almonds

1 tsp ground cinnamon

2 eggs, beaten

1 eating apple, peeled and cubed, made up to 150g fruit with small figs, quartered.

2 tblsp apricot jam to glaze

Method

Preheat the oven to 165° fan.  Butter and line the base of a 23cm round springform tin.

In a large bowl, beat together the flour, sugar, butter, eggs and cinnamon until smooth.  Stir the cubes of apple through the mixture.

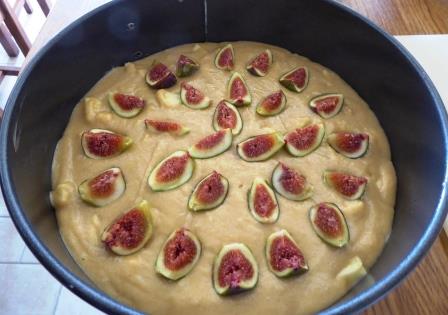
Spoon the mixture into the tin, level the top and tap on the worktop a few times to dispel any trapped air.  Arrange the quartered figs on top and push slightly into the mixture.

Bake for 30-40 minutes until done.  Cool in the tin for five minutes before turning out onto a wire rack to finish cooling.

Put the apricot jam into a small saucepan and heat gently to melt it.  Brush over the finished cake. (Alternatively, just dust with icing sugar.)

Serve with cream, ice cream or crème anglais.  Also delicious just as it is.

Cuts into 8-10 slices.
~~~~~~~~~~~~~~~~~~~~~~~~~~

*When I say "I'm back in France" it’s because Nick is still in the UK.  Before my dad died I spent several weeks in the UK while Nick was in France with the cat and the dog.  Hence we are significantly out of step with each other in terms of the number of days we have left out of our 180 days.  (Our six month visas expired a couple of weeks ago but we can still go up to 180 days within the Schengen rules.)  Consequently he's spending another ten days in the UK so that he can catch up a bit and we can both stay here until the end of October.  It’s all so complicated since Brexit.  

Our plan was that my brother would be spending the ten days here with me so he could have a bit  of a holiday.  Looking after the care of an elderly person month after month is exhausting, draining and all consuming and we are all in need of some rest and relaxation.

Sadly, not many weeks after the funeral my brother ended up in hospital himself.  He had a pulmonary embolism with complications and has now been there for five weeks, the last four of them in intensive care.  He's very poorly indeed.  It never rains but what it pours.  This has not been the best year for us.

September 9, 2022

ROASTED SPAGHETTI SQUASH

Last month a friend in France gave us a spaghetti squash from her new garden where they have grown really well.  I had never seen one before.

The theory is that the cooked squash can be used as an alternative to pasta in numerous dishes.  Like all squashes it doesn't have a great deal of flavour in its own right.  It's a vegetable that carries the flavours that you cook it in, much like pasta in fact.  

I remember how my mum used to make stuffed marrow every autumn, using the marrows that my dad grew in the garden.  The marrow was almost tasteless but the dish was something we looked forward to every year.  You can read about that here.

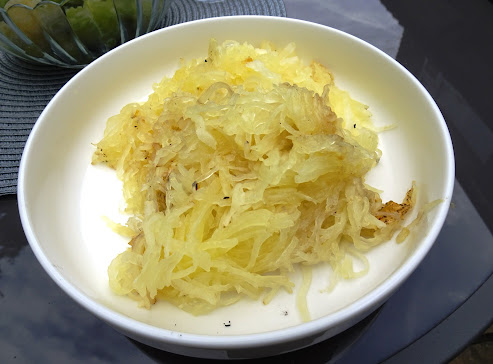
When the squash is cooked the flesh shreds easily into strands, hence the name spaghetti squash.


My friend had sent me a link to a recipe on how to cook it and another one for barbecued spaghetti squash caught my eye.  It involved roasting it in the oven for a while then finishing it off on the barbecue.  The weather was perfect for barbecuing.

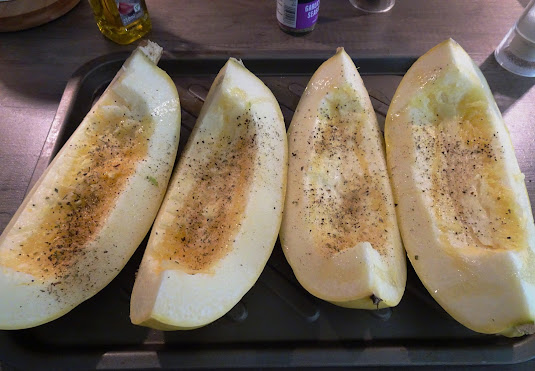
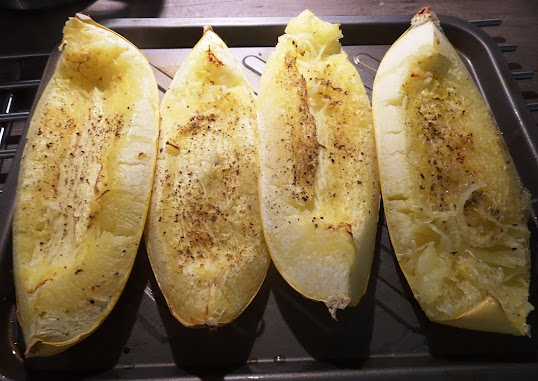
I cut it in half lengthways and scooped out the middle containing the seeds, which was easy to do.  I then cut it into quarters and placed it on a baking sheet.  I then drizzled it generously with garlic flavoured olive oil, seasoned well with salt and pepper and baked in the oven at 180°fan for twenty minutes.  It was almost done and the strands were beginning to form.


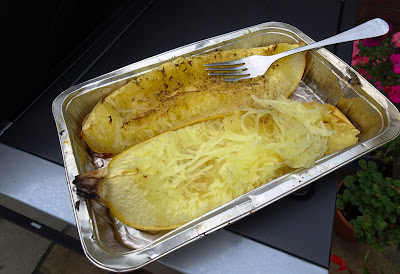
I then handed it over to Nick who was in charge of the bbq.  He placed two of the quarters on a foil tray and finished the cooking on the grill.


Once the squash was tender I lifted out the strands of flesh by drawing a fork through it lengthwise.  You can then do all kinds of imaginative things with it by adding other veg, meats and sauces but just because I had no idea what to expect I served it plain as a vegetable side dish to our bbq.  


It was pleasant to eat, as are most things cooked with olive oil and garlic!  I would definitely do this again.  

There were only two of us at the bbq so half of the cooked squash was left.  I turned that into a really good soup along with the other leftovers from the bbq; some ratatouille and bbq'd potatoes.  That was truly delicious and worthy of a post by itself.  

September 7, 2022

ORANGE AND ALMOND CAKE


I’ve had my eye on this Michel Roux recipe* for a while and when the weather in France last month  turned from heatwave to unsettled muggy showers my thoughts wandered from ice cream to pudding and the opportunity arose.  

For some reason I don't buy oranges all that often but on this occasion I had several in the fruit bowl whispering "cake, cake" as I walked past.  The stars were once again aligned.


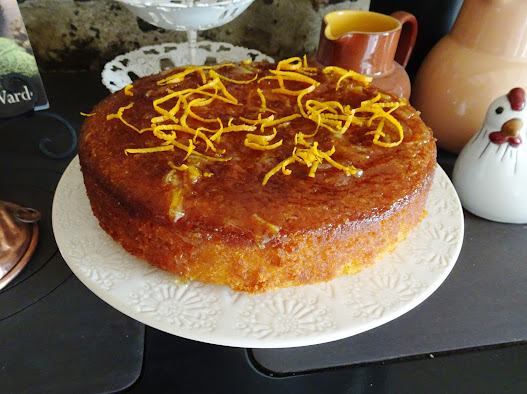
The recipe states that the top should be decorated with toasted almonds but I used strands of orange peel instead.  Toasting almonds is one of those tasks that I shy away from as they can turn from sweet and toasty to burnt and bitter in no time at all unless you keep your eye on them.  It's the sort of thing I can do if I have my ducks in a row and brain in gear but somehow those two things don't align quite so often these days, well certainly not this year anyway.


In the recipe it is suggested that you serve the cake with orange segments marinaded in whisky but I didn't do that either.  Instead I served a bowl of poached nectarines and plums alongside - because I had selected them from an abundance of gorgeous fruit in the greengrocer's a couple of days before.  Also because it would offer a choice of dessert for our guests - cake, or cake and fruit, or just fruit.  In the end everybody had both!  I also served a bowl of softly whipped cream to go with all options.  (You can see the recipe for the fruit on my blog here.)

It was a truly fabulous dessert cake!
The orange flavour was lovely and it was very moist, largely due to the syrup that you make and douse the cake with when it's still warm.  Just because of the syrup I have given the recipe two stars in the faff factor, although really it was not that much extra work and maybe one and a half stars would have been fairer.

I kept leftovers in the fridge and the cake was still moist and delicious several days later.  (It only lasted that long because we had a frenzy of catching up with friends and impromptu eating out over the next few days.)  Definitely a cake that I will make again.

*I hesitate to give a link to the original recipe.  On a few occasions recently when I have looked back at older posts on my blog where links have been given, strange things have happened.  Some links have disappeared altogether and some now link to something else entirely.  So I haven't added a link here and might not do again.  In fact I might even, over the long winter evenings, if I can be bothered and have finished all my half knitted jumpers, go back to more posts and delete all links.  

I will always acknowledge where the recipe comes from.  This one comes from a book called "cooking with the master chef" and if you Google the recipe you will find the original easily in several places on t'internet.

Ingredients
For the cake

50g plain flour
1 tsp baking powder
225g caster sugar
250g ground almonds
250g unsalted butter at room temperature
1 tbslp finely grated orange zest (about two oranges)
4 eggs

For the glaze and decoration

80ml freshly squeezed orange juice (about 1½ oranges)
60g soft light brown sugar
1 tblsp orange marmalade
the coarsely grated zest or peel of 1 orange

Method

Preheat the oven to 180°C / 160° fan/ gas mk 4.  Butter a 20cm springform cake tin and line the base with baking paper.

In a medium bowl, mix together the ground almonds and caster sugar, making sure there are no lumps.  Sift in the flour and baking powder.

In another bowl, using a hand held electric whisk, beat the butter with the orange zest until pale and fluffy.  Beat in the eggs one at a time.

Fold the almond and flour mixture into the second bowl until smooth.  Pour into the prepared tin, level the top and bake for 45 minutes or until cooked.

While the cake is baking, put the orange juice and brown sugar into a small pan and bring to the boil to make the syrup.  Set aside to cool.

When the cake is done, remove from the oven, prick the cake all over, right to the bottom, with a skewer and pour the cooled syrup all over.  Leave to cool in the tin.

When the cake is cool, run a knife round the edge of the cake and release carefully as it is slightly fragile.  Place on a cake plate or stand.

Warm the marmalade in a small pan and brush all over the cake.  Scatter the orange peel over the top to decorate.

Cuts into 8-12 slices.